This post may contain affiliate links. As an Amazon Associate, I earn from qualifying purchases. For more information, please visit my Privacy Policy.
You may have seen this Strawberry Brioche already in my Strawberry Fig Babka and my Strawberry Donuts. I mentioned in those posts that this strawberry bread is soooooo good on its own, but I thought it would be helpful to have a separate post for it.
To make this Strawberry Brioche, I borrowed a great tip from one of my favorite blogs, Sally’s Baking Addiction. Sally made a strawberry cake by pureeing the strawberries, then cooking them down to decrease the amount of liquid in the puree, resulting in more concentration of strawberry flavor. The result in my strawberry bread was a soft, delicious bread with a mild strawberry flavor.
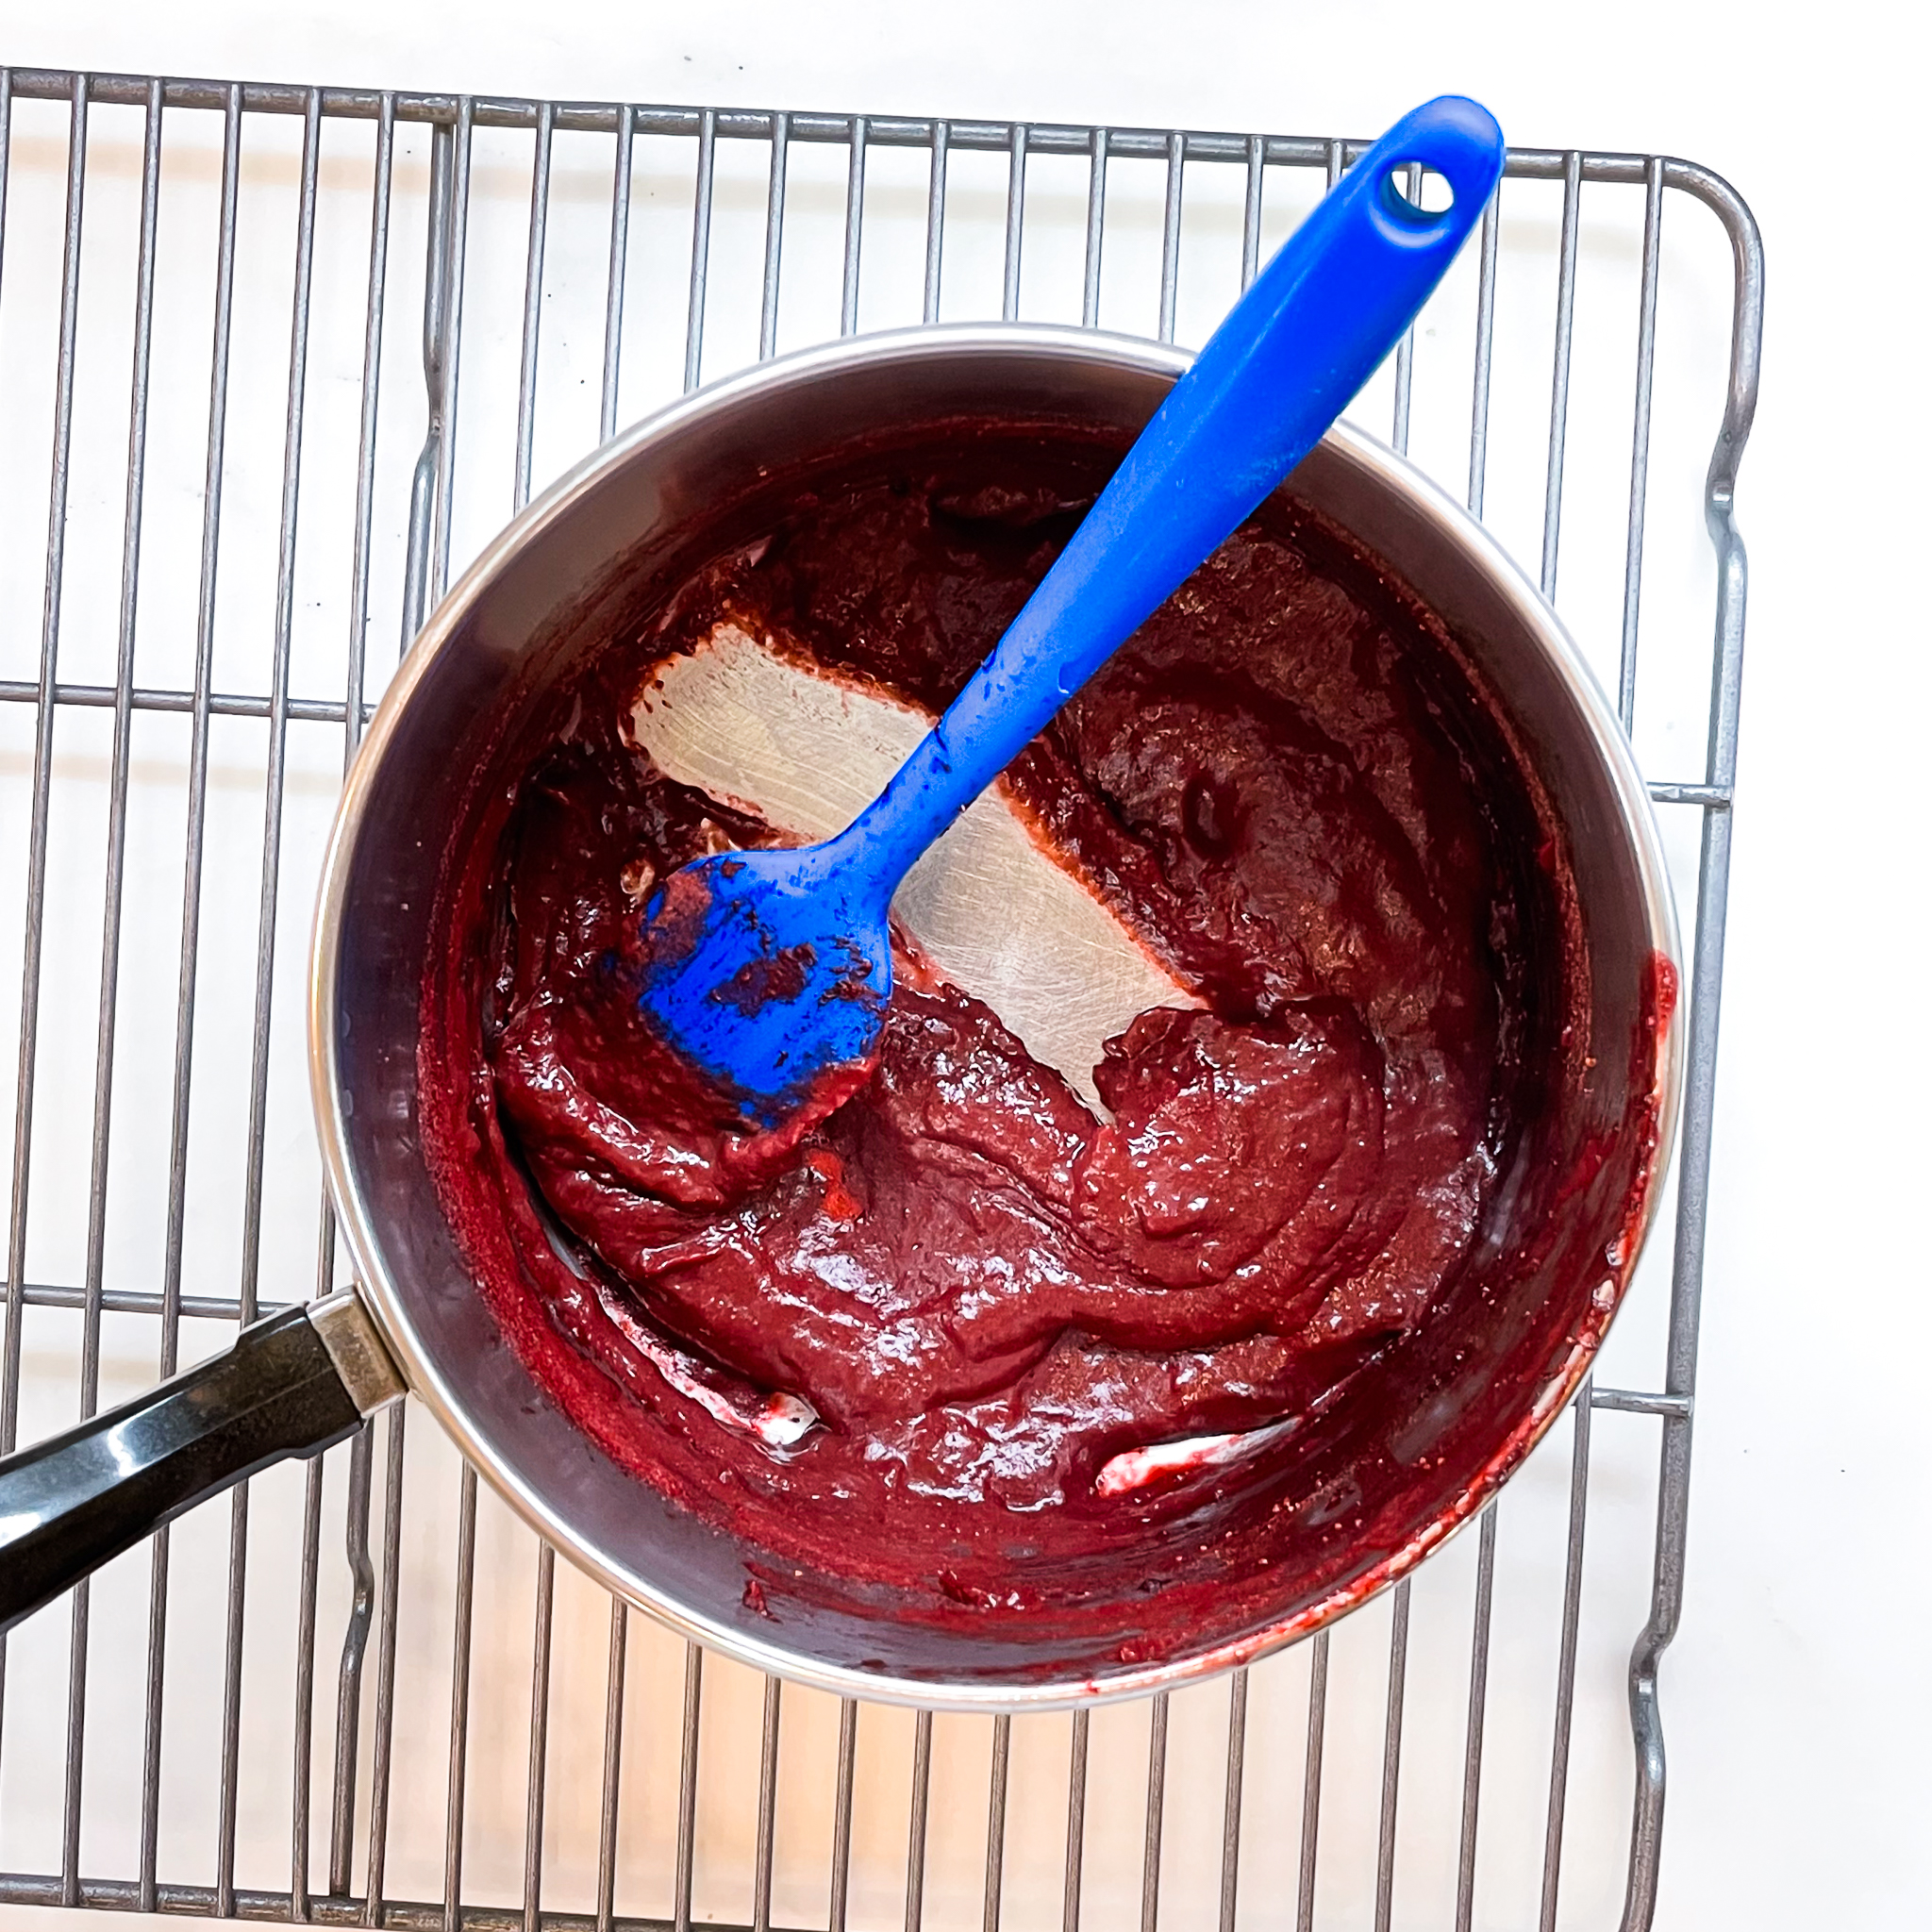
How to Make Strawberry Paste
The key to success to the Strawberry Brioche dough is cooking down the strawberries in order to significantly reduce the liquid. I am calling this strawberry paste rather than puree because the end result is more reminiscent of a tomato paste in terms of look, although not quite as thick as tomato paste. Making the strawberry paste is actually quite simple and requires only one ingredient: strawberries! That said, if you want to “up” the strawberry flavor, you can grind up some freeze dried strawberries (12 grams or 1/2 cup) in a blender to turn it into a powder and cook it with the puree.
Fresh or Frozen Strawberries?
When I decided to go down this strawberry path, I discovered that the local markets did not have very nice looking strawberries, and what they did have were astronomical in terms of price. I believe that is because it is not yet strawberry season in my area, and we usually get strawberries this time of year from Texas. Earlier this year, however, Texas experienced unusually cold weather that killed much of the strawberry crop. Such is life.
I did not want the lack of fresh strawberries to slow me down, so I opted for frozen strawberries. A dear friend of mine who lives in California and has an abundance of fresh, sweet strawberries has made this dough recipe with fresh strawberries. While she obtained a delicious, fluffy brioche, she reported back that it did not have any strawberry flavor. Since I have not been able to try it out myself with fresh strawberries, this recipe only uses frozen strawberries.
That said, if you want to use fresh strawberries, make sure that they are very ripe and sweet. One of the benefits of using frozen strawberries is that they are picked and frozen at their peak. The downside to using frozen strawberries is that they have even more water in them. All that means is that it needs to cook longer. No biggie.
In the U.S., Dole sells 1-pound sized bags of whole strawberries, which should be enough for this recipe. I have also used other brands that sell 10 ounce bags (which is almost two-thirds of a pound), in which case I have pureed and cooked down 20 ounces at a time. While I have had success with other brands, I have found that Dole has a little less water in them, resulting in a faster cook time. I will also tell you that when I last cooked down 20 ounces of strawberry puree from a generic brand, it took 2.5 hours when I had the flame as low as possible. (I will get into cook time in Step 2, below.)
Step 1: Puree the Strawberries
When using frozen strawberries, allow them to thaw at least a half hour, if not longer, before pureeing. Even if you have a strong blender like a Vitamix, it will be easier to puree them when they aren’t so frozen.
Step 2: Cook the Puree to a Paste
Regardless of whether you use fresh or frozen strawberries, the trick is to make sure you cook down the puree until it is a paste. When you slide a spatula against the bottom of the pan, the mounds on either side should hold their shape so you can see the bottom of the pan. Even when you are at that point, I recommend to keep cooking for a bit. I call this a paste because it should look similar to tomato paste.
When cooking the puree, do not start by bringing it to a boil, as the sides may burn and stick to the pan. Your best bet is to set the flame on medium-low, giving it a stir every 10-15 minutes. If using frozen berries, it will take longer to reach the paste consistency.
Once cooked, allow it to cool at least 15 minutes before making the dough. While it can be warm, you do not want it to be much warmer than 115° F so you do not kill the yeast when you first mix all the dough ingredients. You can also make the strawberry paste in advance and store it in the refrigerator for up to one week. Just let it get to room temperature before mixing it with the rest of the dough ingredients.
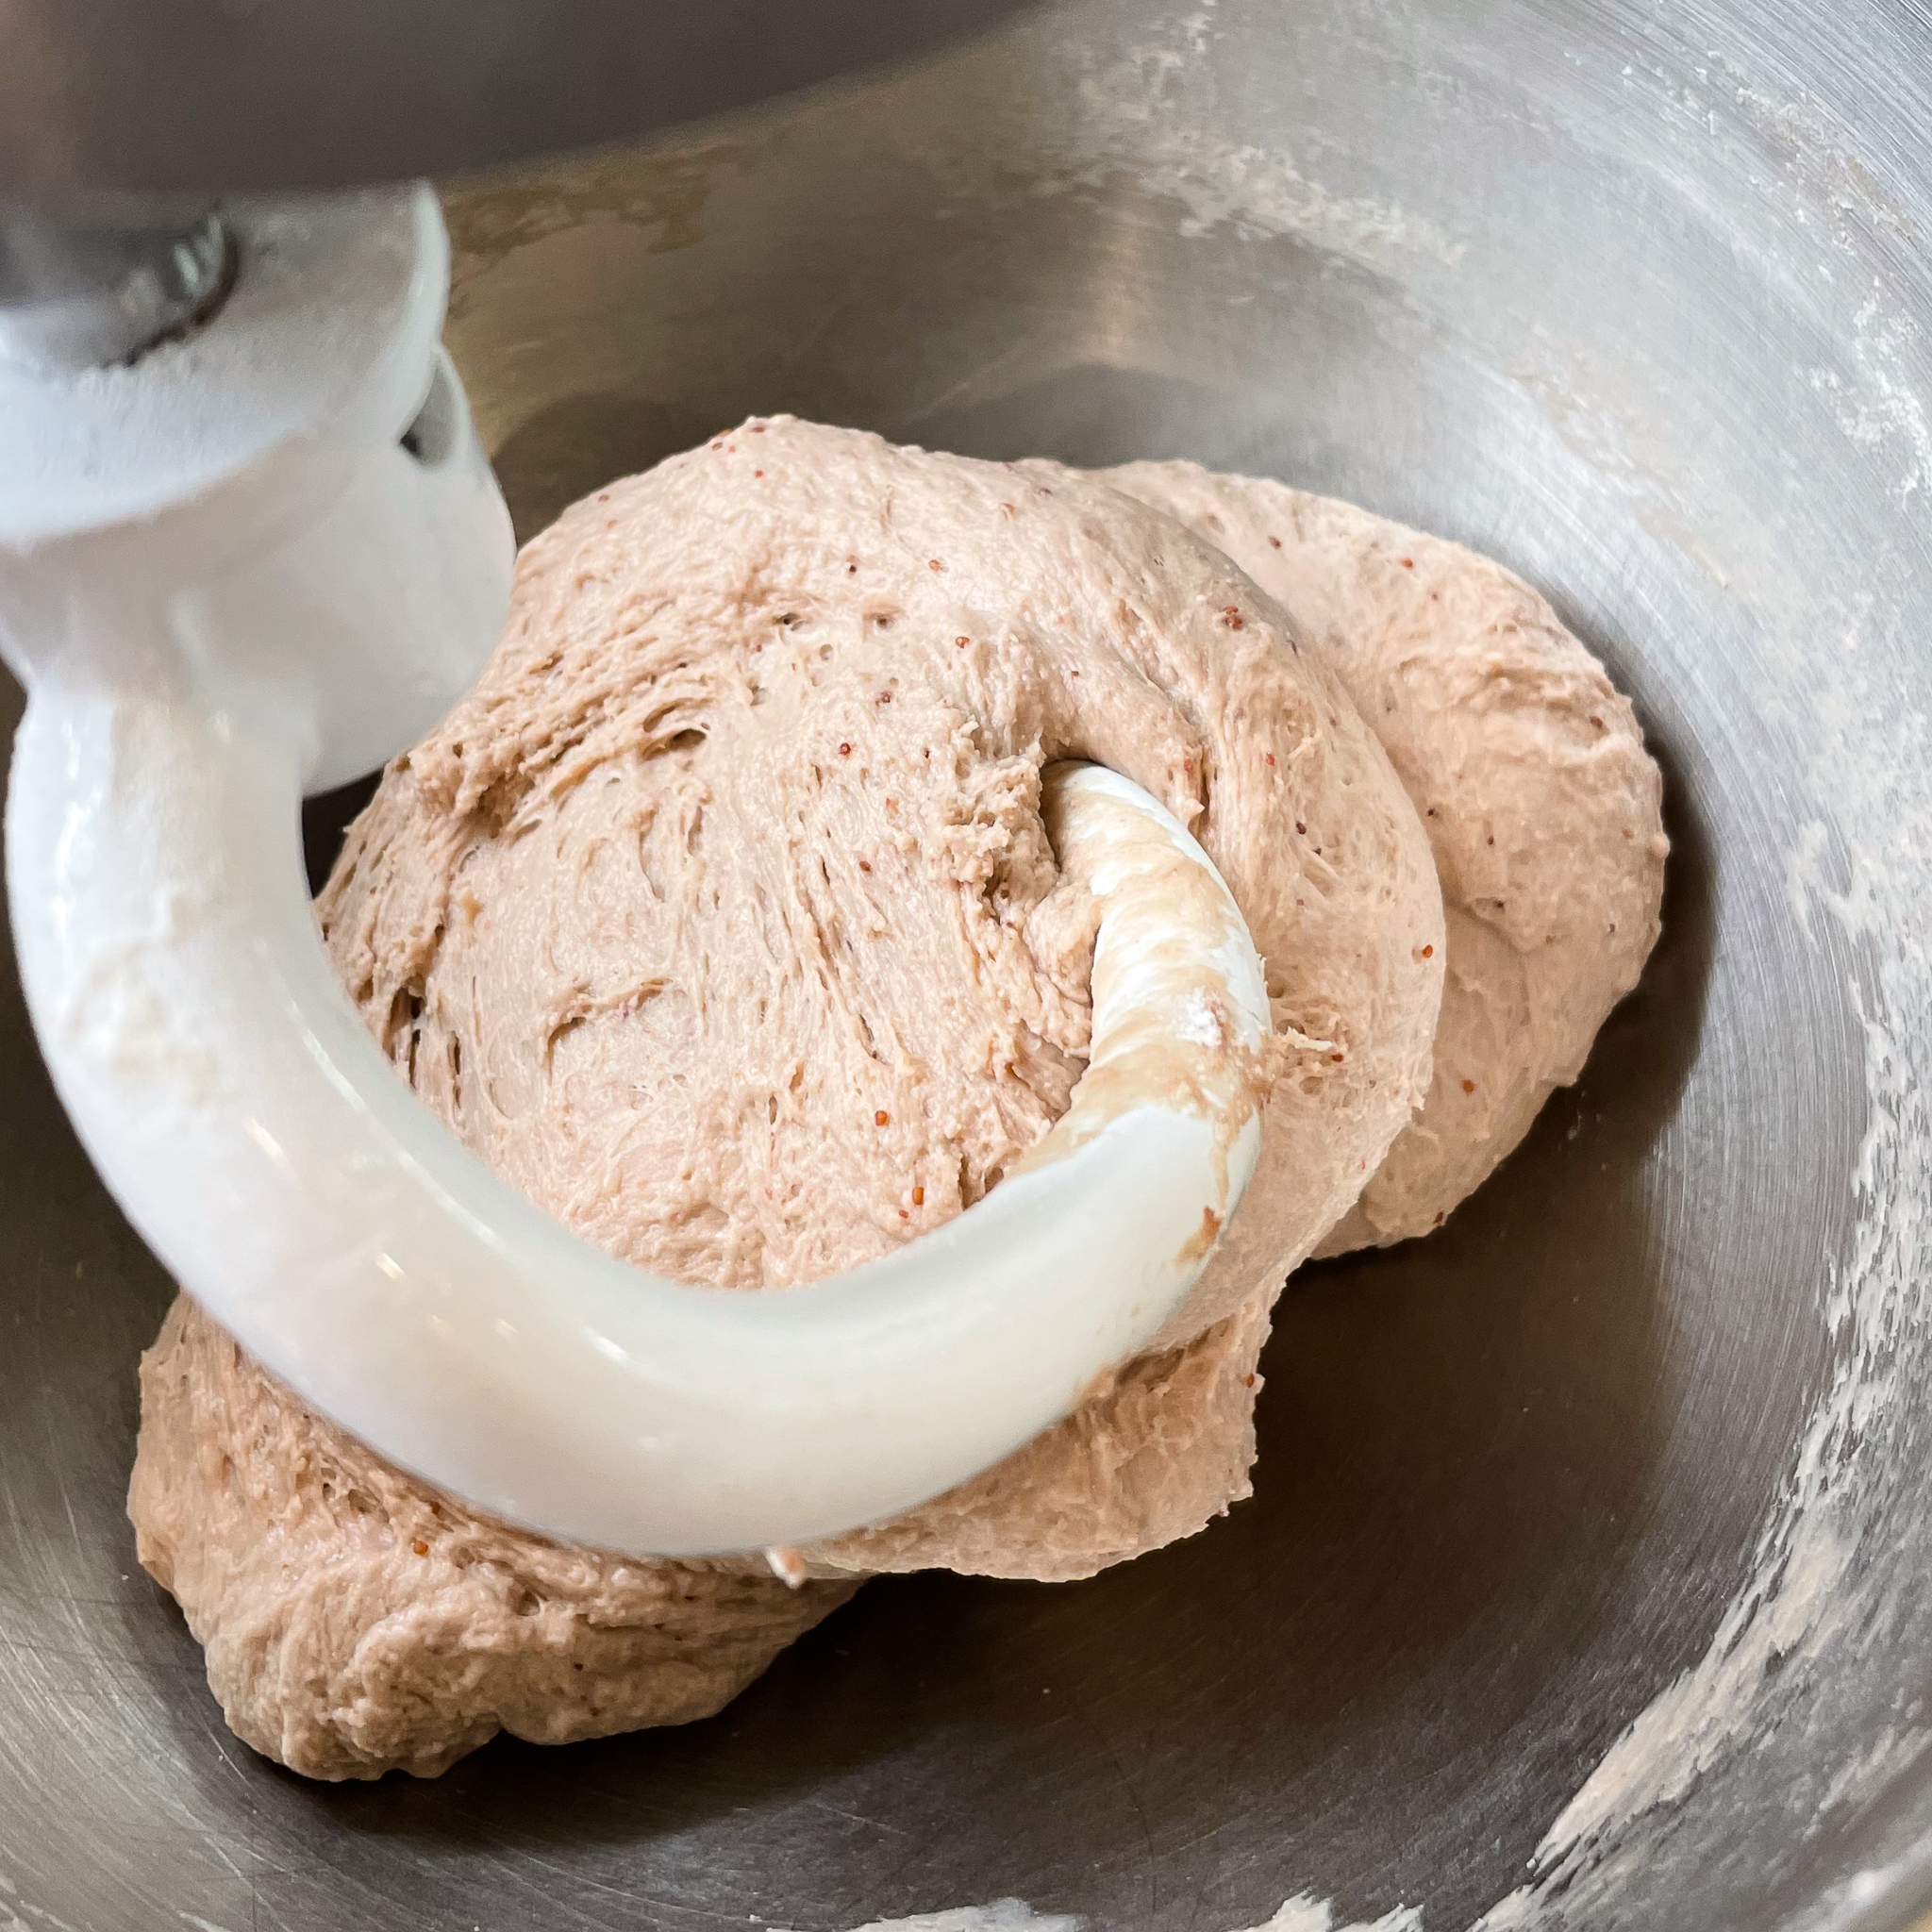
Five Easy Steps to Make Strawberry Brioche
1. Mix the Strawberry Brioche Dough
Using a KitchenAid mixer makes this step seamless. Especially if you are using dry active yeast, the important thing here is to make sure that your eggs and butter are at room temperature. Forgot to take them out of the refrigerator and feeling so excited to get started that you do not want to wait 30-60 minutes for the eggs and butter to get to room temperature? No sweat. Check out my Getting to Room Temperature post.
2. Knead Until it Passes the Window Pane Test, then Add the Butter
You may need to stop your mixer to wipe down the sides as it kneads. I highly recommend using a dough scraper, although a rubber spatula can work too. The dough should clean the bottom of the bowl, meaning that it does not stick to the bowl. Although the dough should not be overly sticky, it should be slightly tacky. If the dough is not cleaning the bottom and sides of the bowl, add 10 g. (1 Tablespoon) of flour at a time. Because we all may cook down the strawberries to different stages, you may have more liquid in your dough. Adding small amounts of flour like this will allow you to control the dough until it gets to the point of cleaning the bottom and sides of the bowl. It should take 5-10 minutes for the dough to be kneaded.
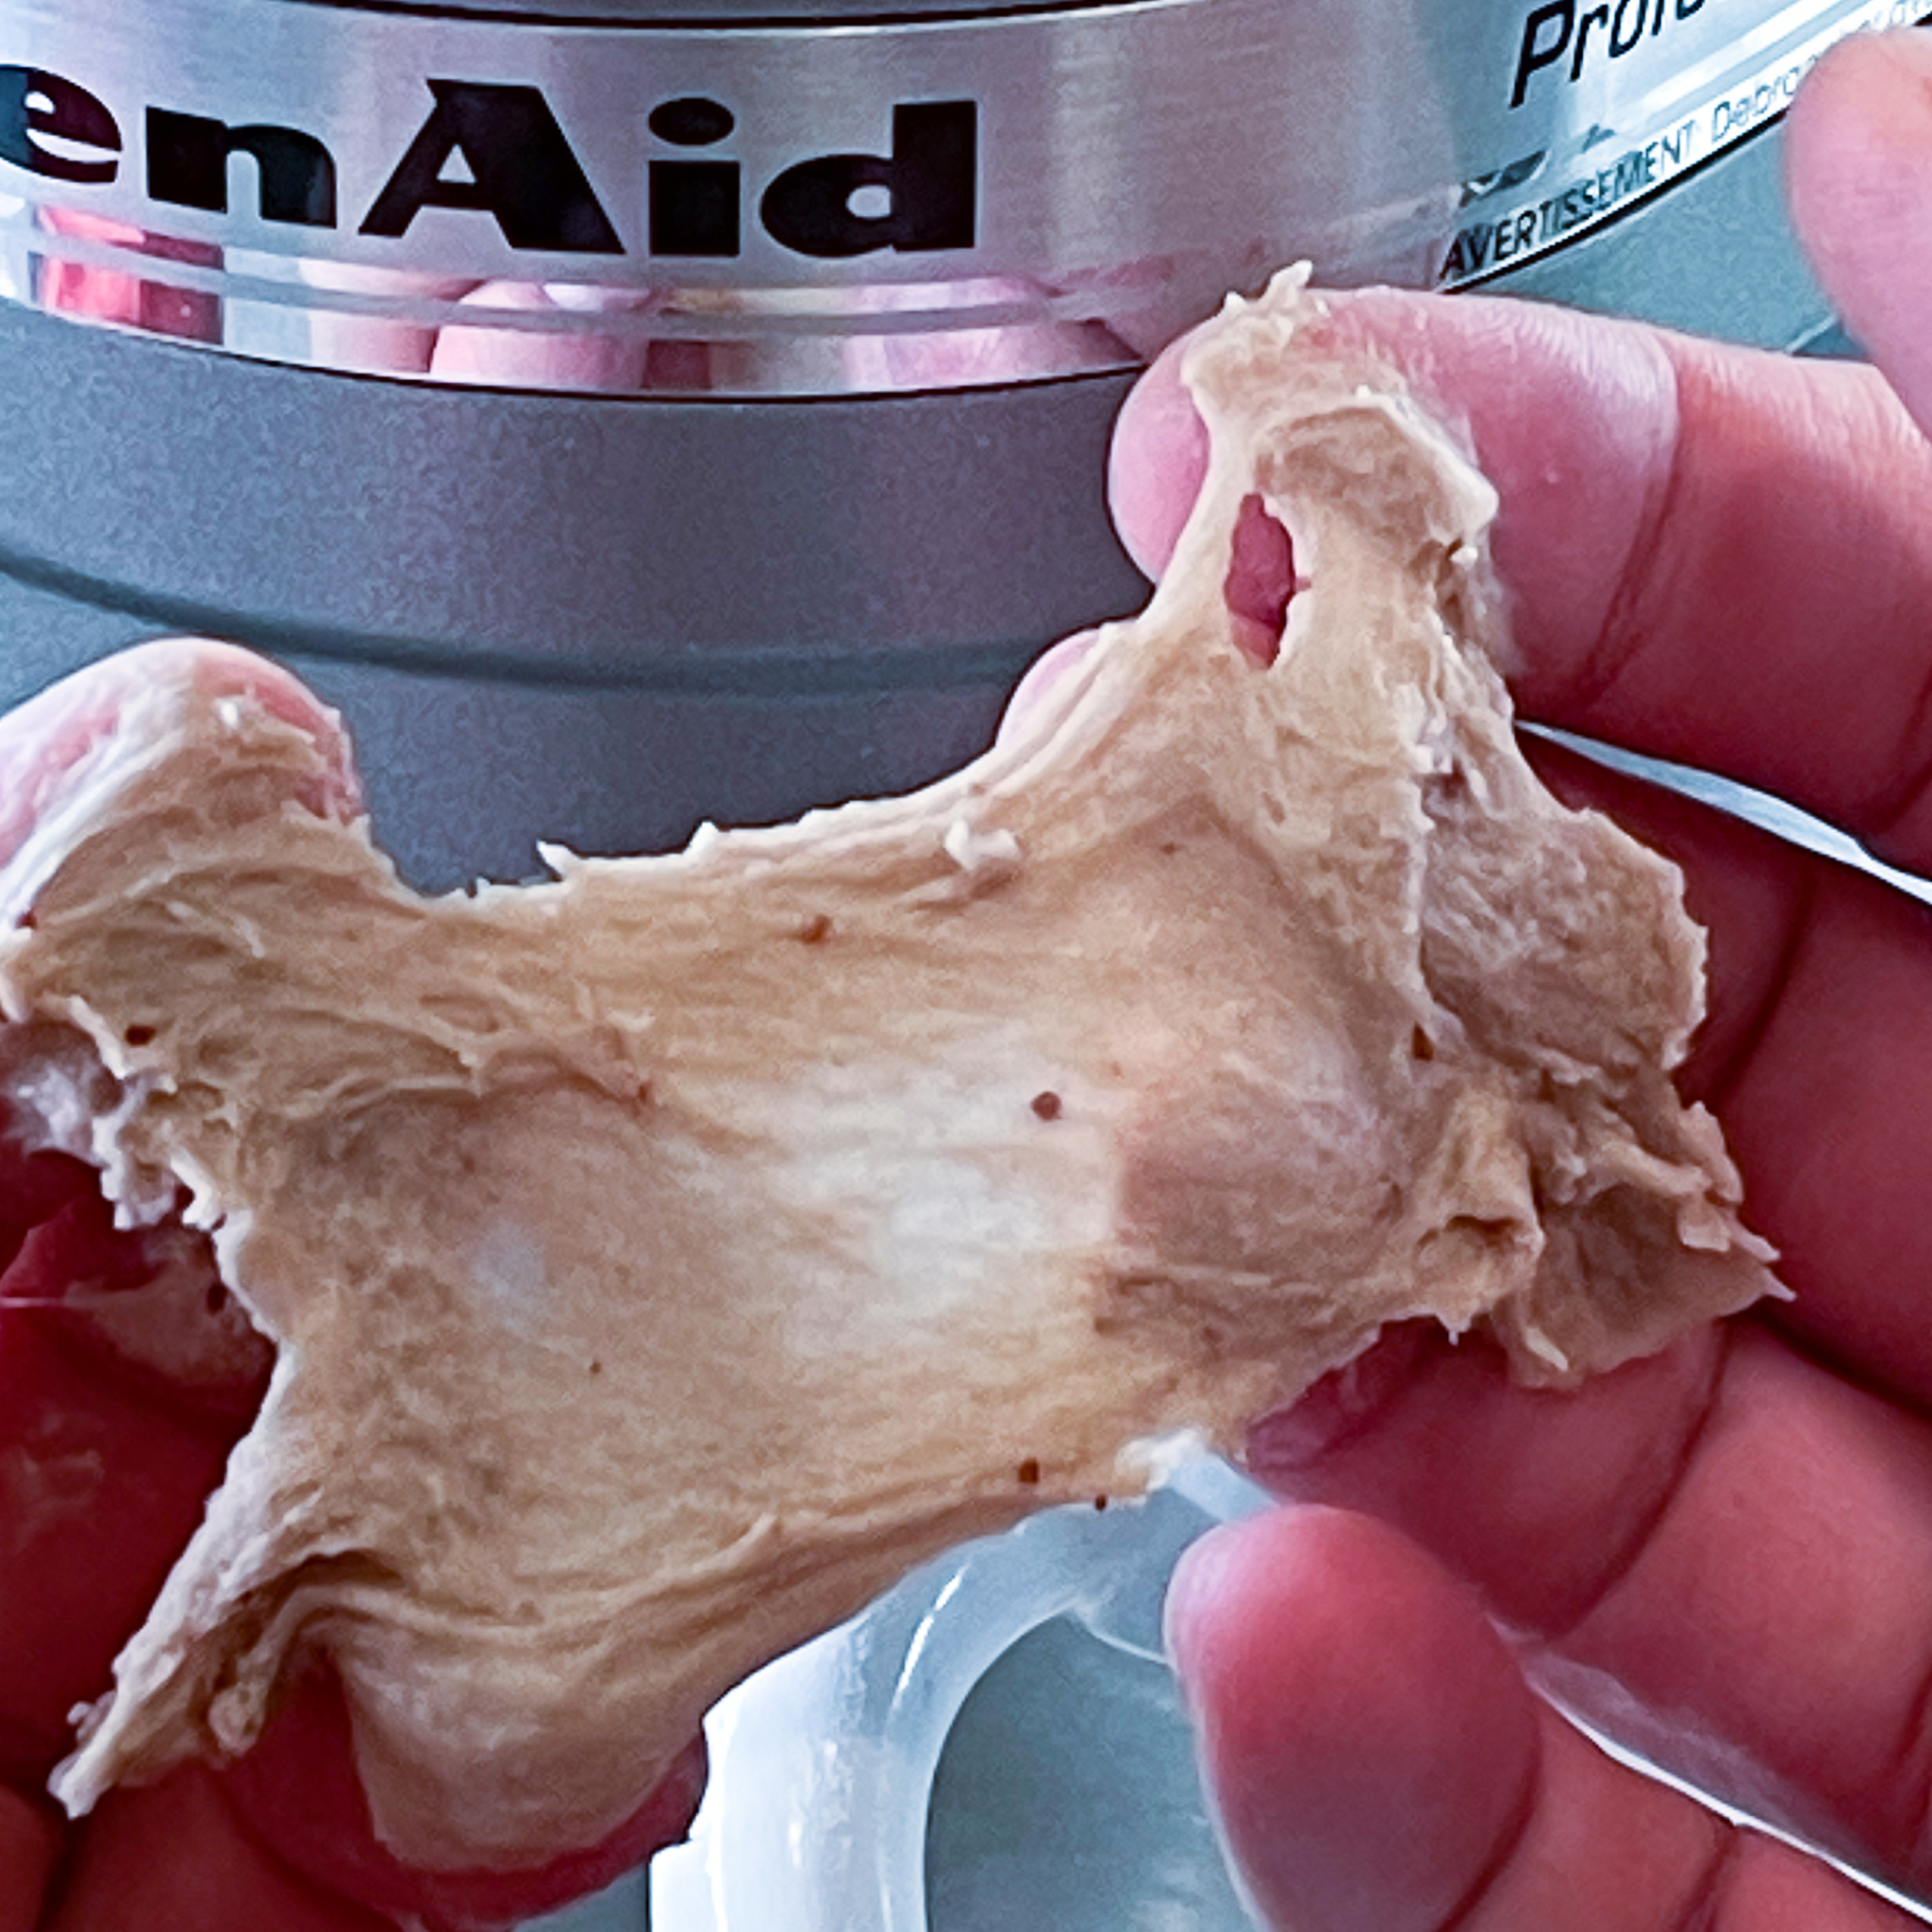
You will know it is done when you take a small piece of it and carefully spread it thin. If it doesn’t rip and is translucent, it has passed the window pane test! At this point, put the mixer back on and add the butter, 1 Tablespoon at a time, allowing each Tablespoon to be fully incorporated before adding the next.
3. Allow the Strawberry Brioche Dough to Rest
At room temperature, bulk fermentation will take approximately 1 hour. If you want to break this recipe up, instead cover the bowl with plastic wrap and place it in the refrigerator overnight. You can keep it in the refrigerator for up to 24 hours.
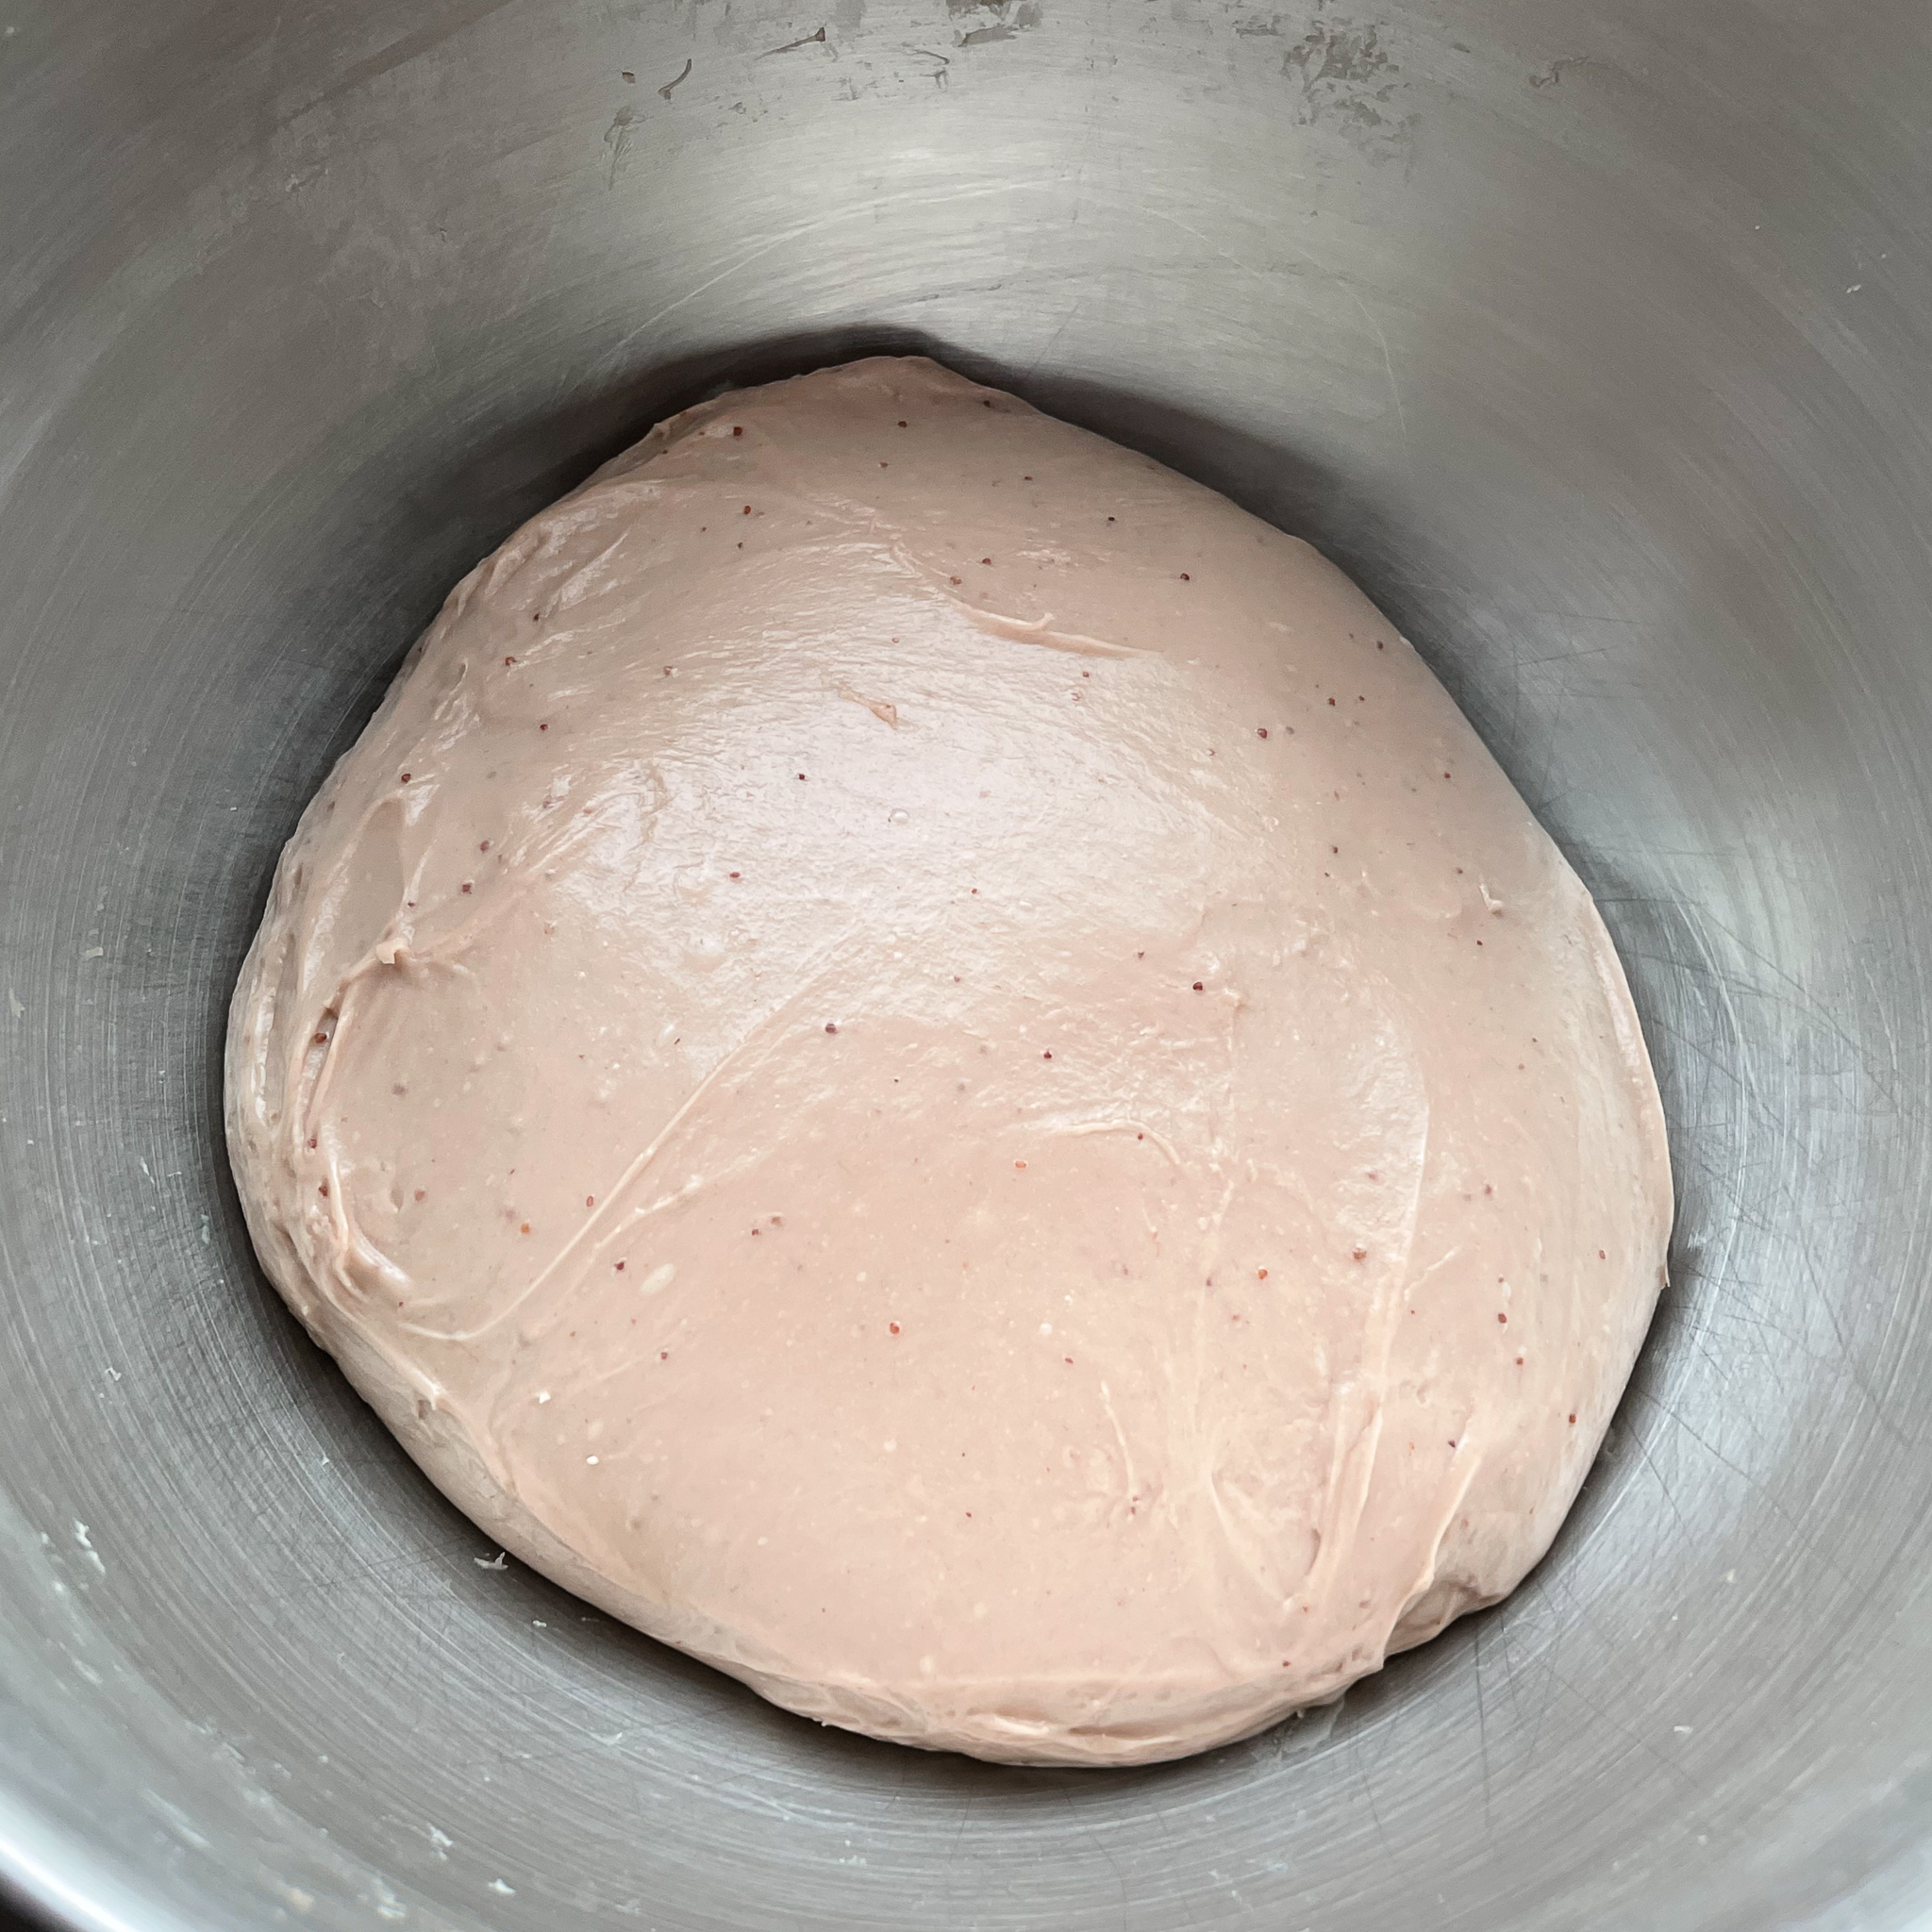
4. Shape the Strawberry Brioche Dough
While you can certainly make rolls or use traditional brioche molds with this dough, I like to make a couple of loaves. The recipe will make two loaves baked in standard 8½” x 4½” loaf pans. You can shape the dough into one large loaf, or make two or three equal sized balls of dough and place them next to each other in each loaf pan. (I prefer two for this size loaf pan.) Let the dough rise until it has doubled in size, which should take approximately 1-1½ hours.
If you want to shake things up a bit, you can make one loaf of brioche, and use the other half of the dough to make half a batch of Strawberry Donuts or one Strawberry Fig Babka.
5. Bake the Strawberry Bread
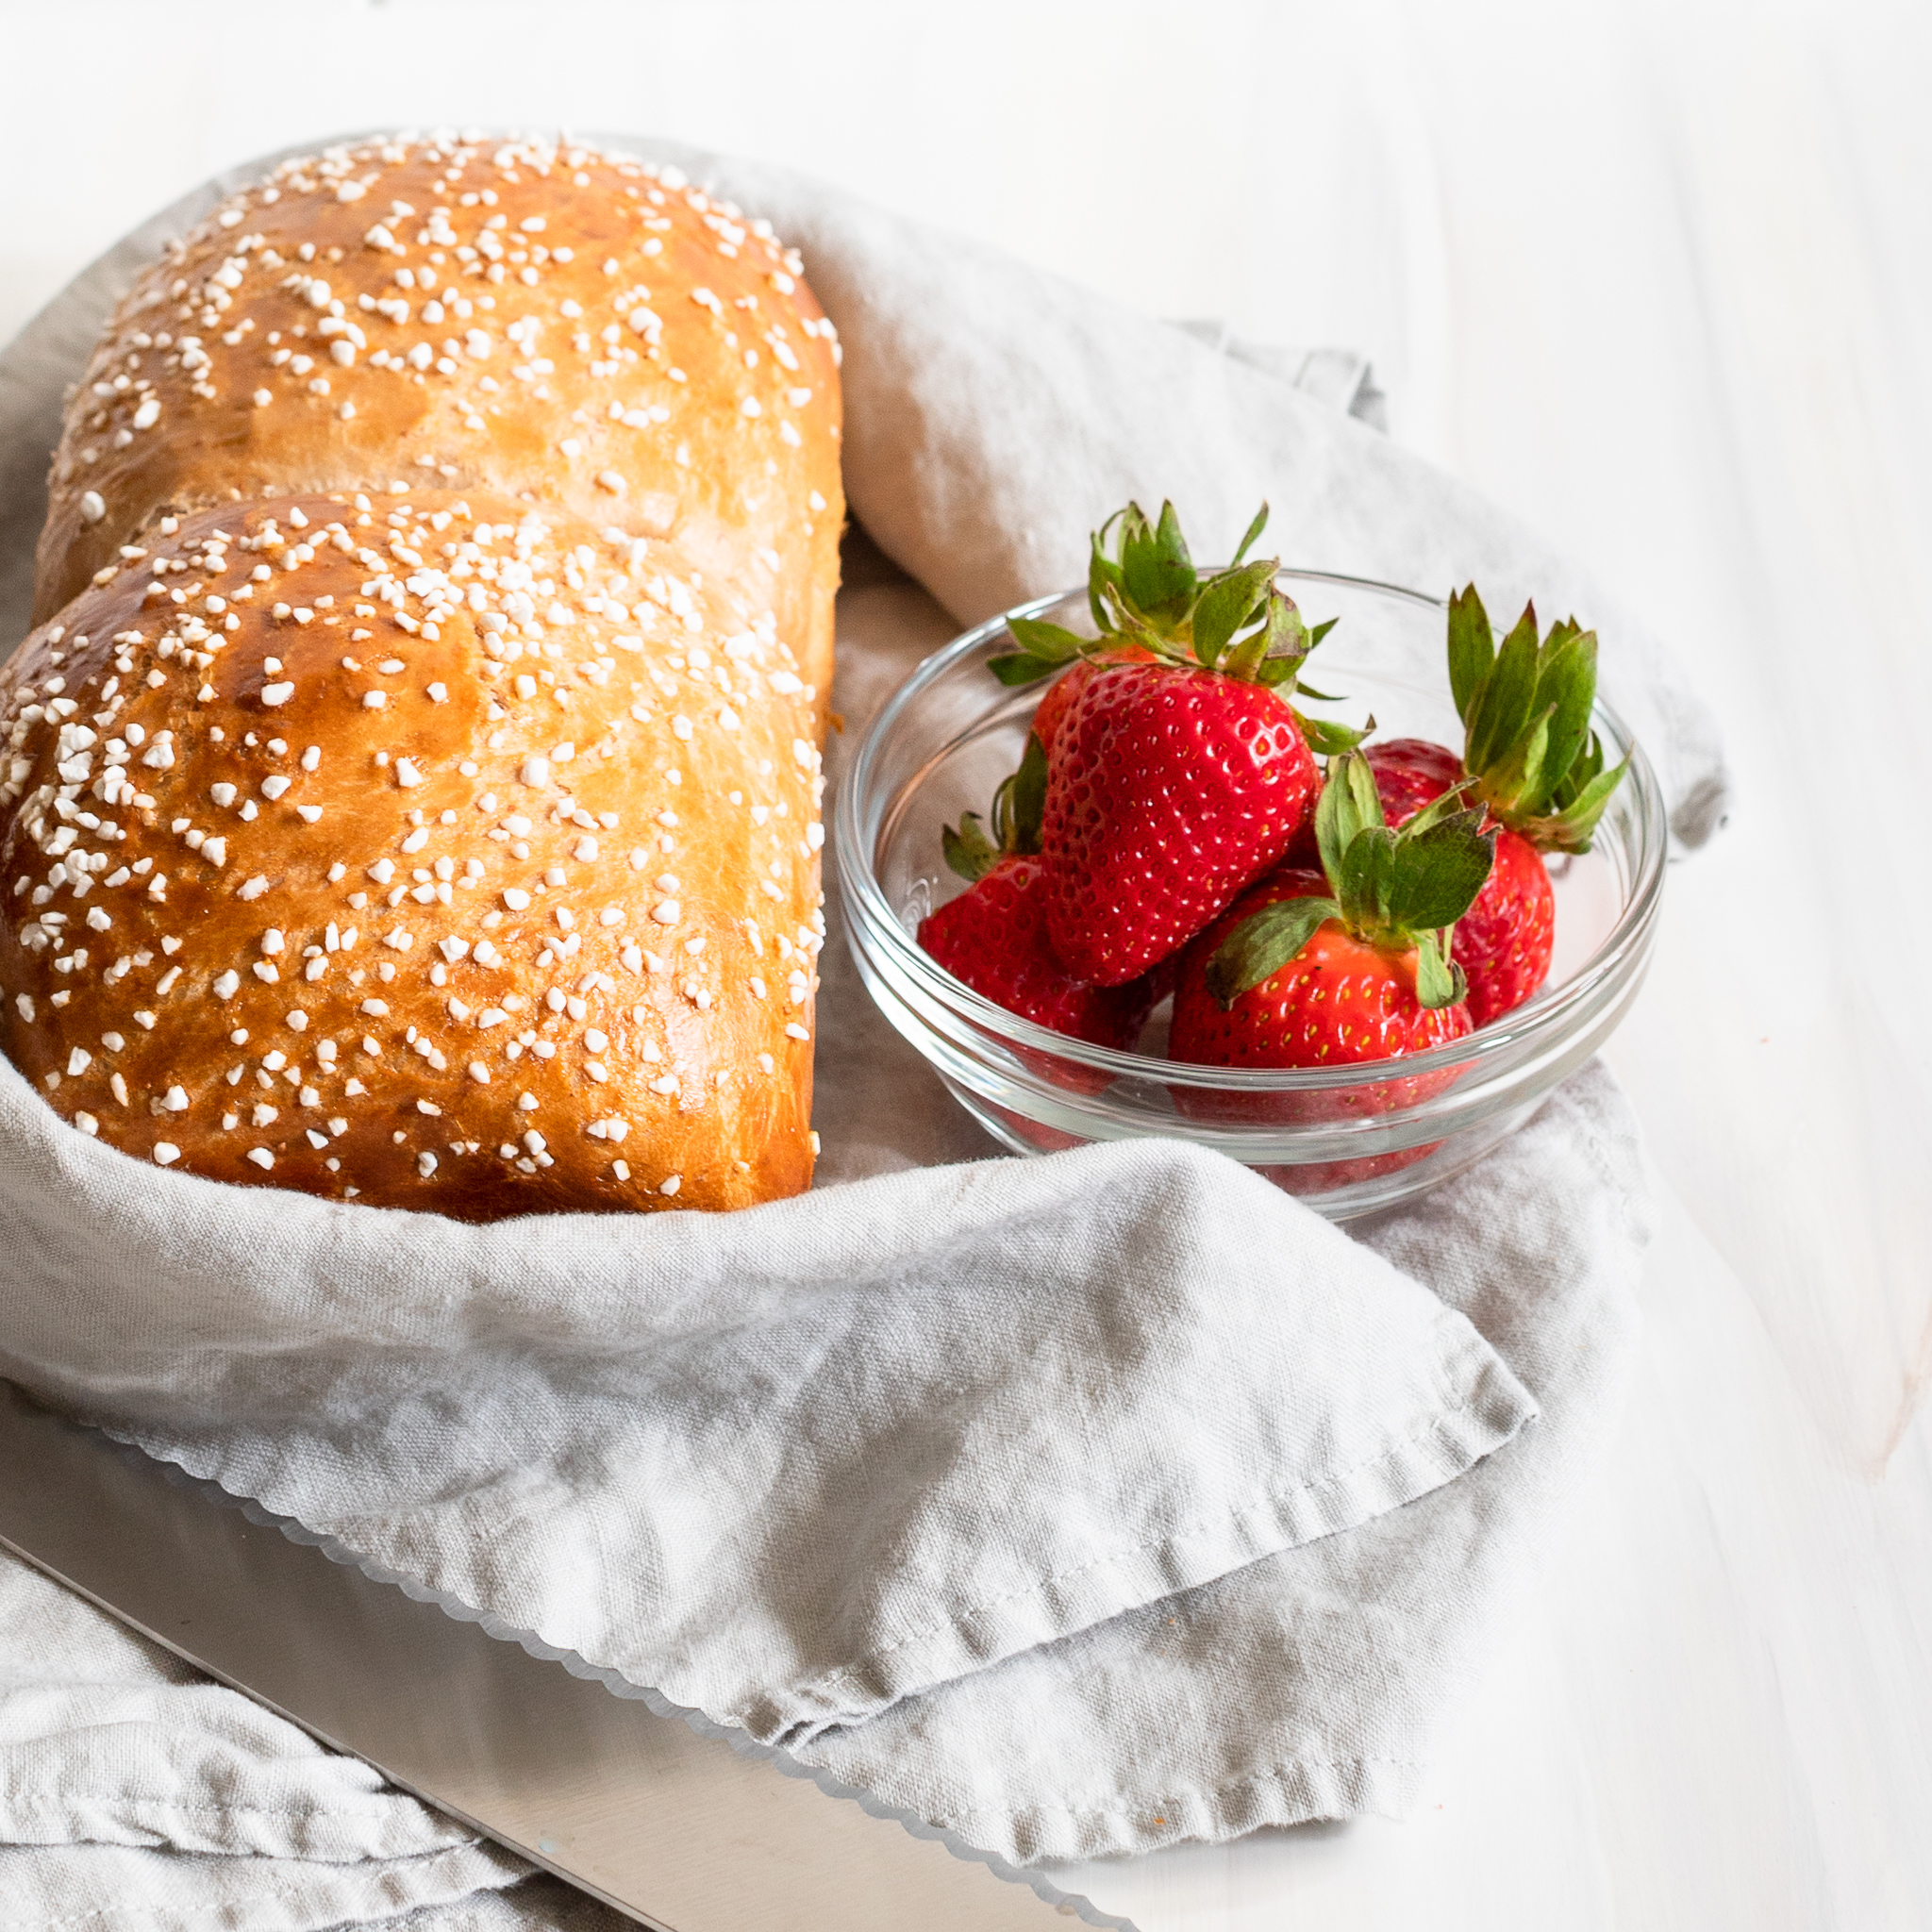
Just prior to baking, give the tops of the Strawberry Brioche an egg wash. What people use for an egg wash is entirely subjective. I recommend beating one egg. Some people like to water down the egg with 1-2 teaspoons of water. (I think the water diminishes the shine too much on the final baked good.) Others use just a yolk for a deeper, browned color, which is a method I prefer for Challah. I love to sprinkle Swedish pearl sugar on top of the Strawberry Brioche just prior to baking. In addition to being super pretty (Swedish pearl sugar keeps its shape in the oven’s hot heat), the little touch of sugar on top enhances the strawberry flavor.
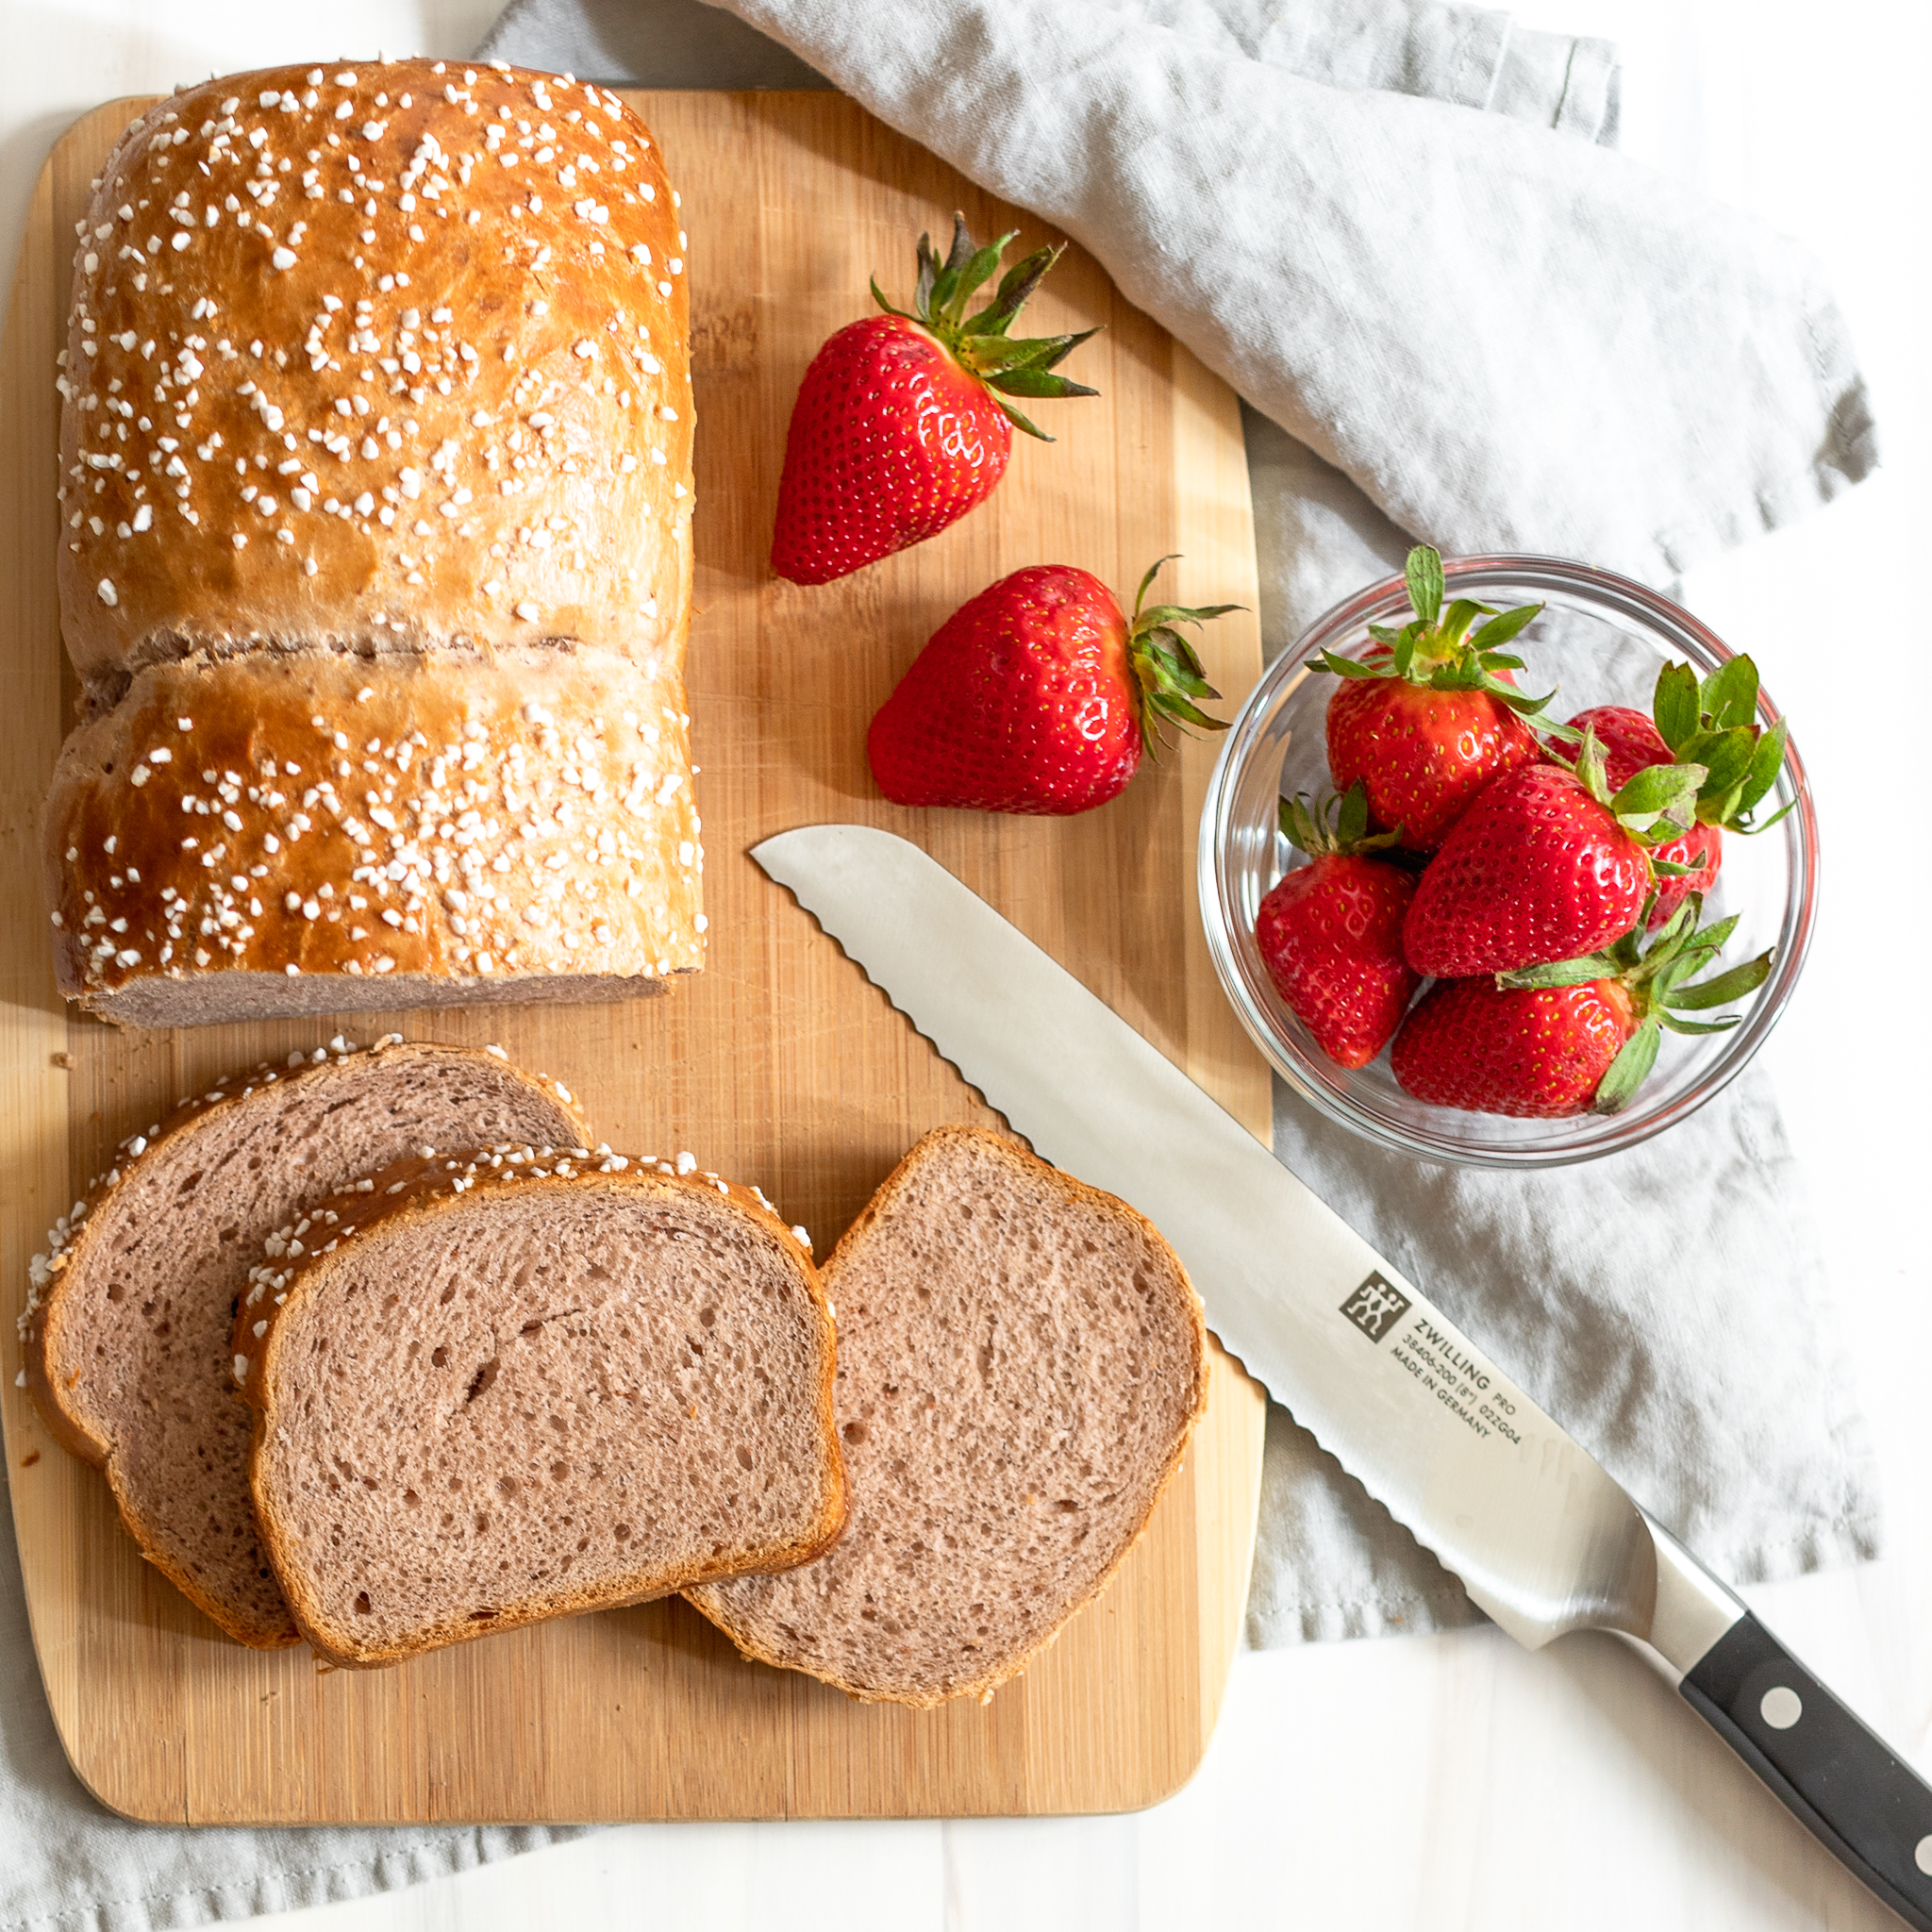
Uses for Strawberry Brioche
Naturally, this Strawberry Brioche is ideal for Strawberry Donuts and Strawberry Fig Babka. On its own, this strawberry bread is delish with just a shmear of butter or strawberry jam. It also makes phenomenal French toast as well as peanut butter and jelly (strawberry, of course) sandwiches.
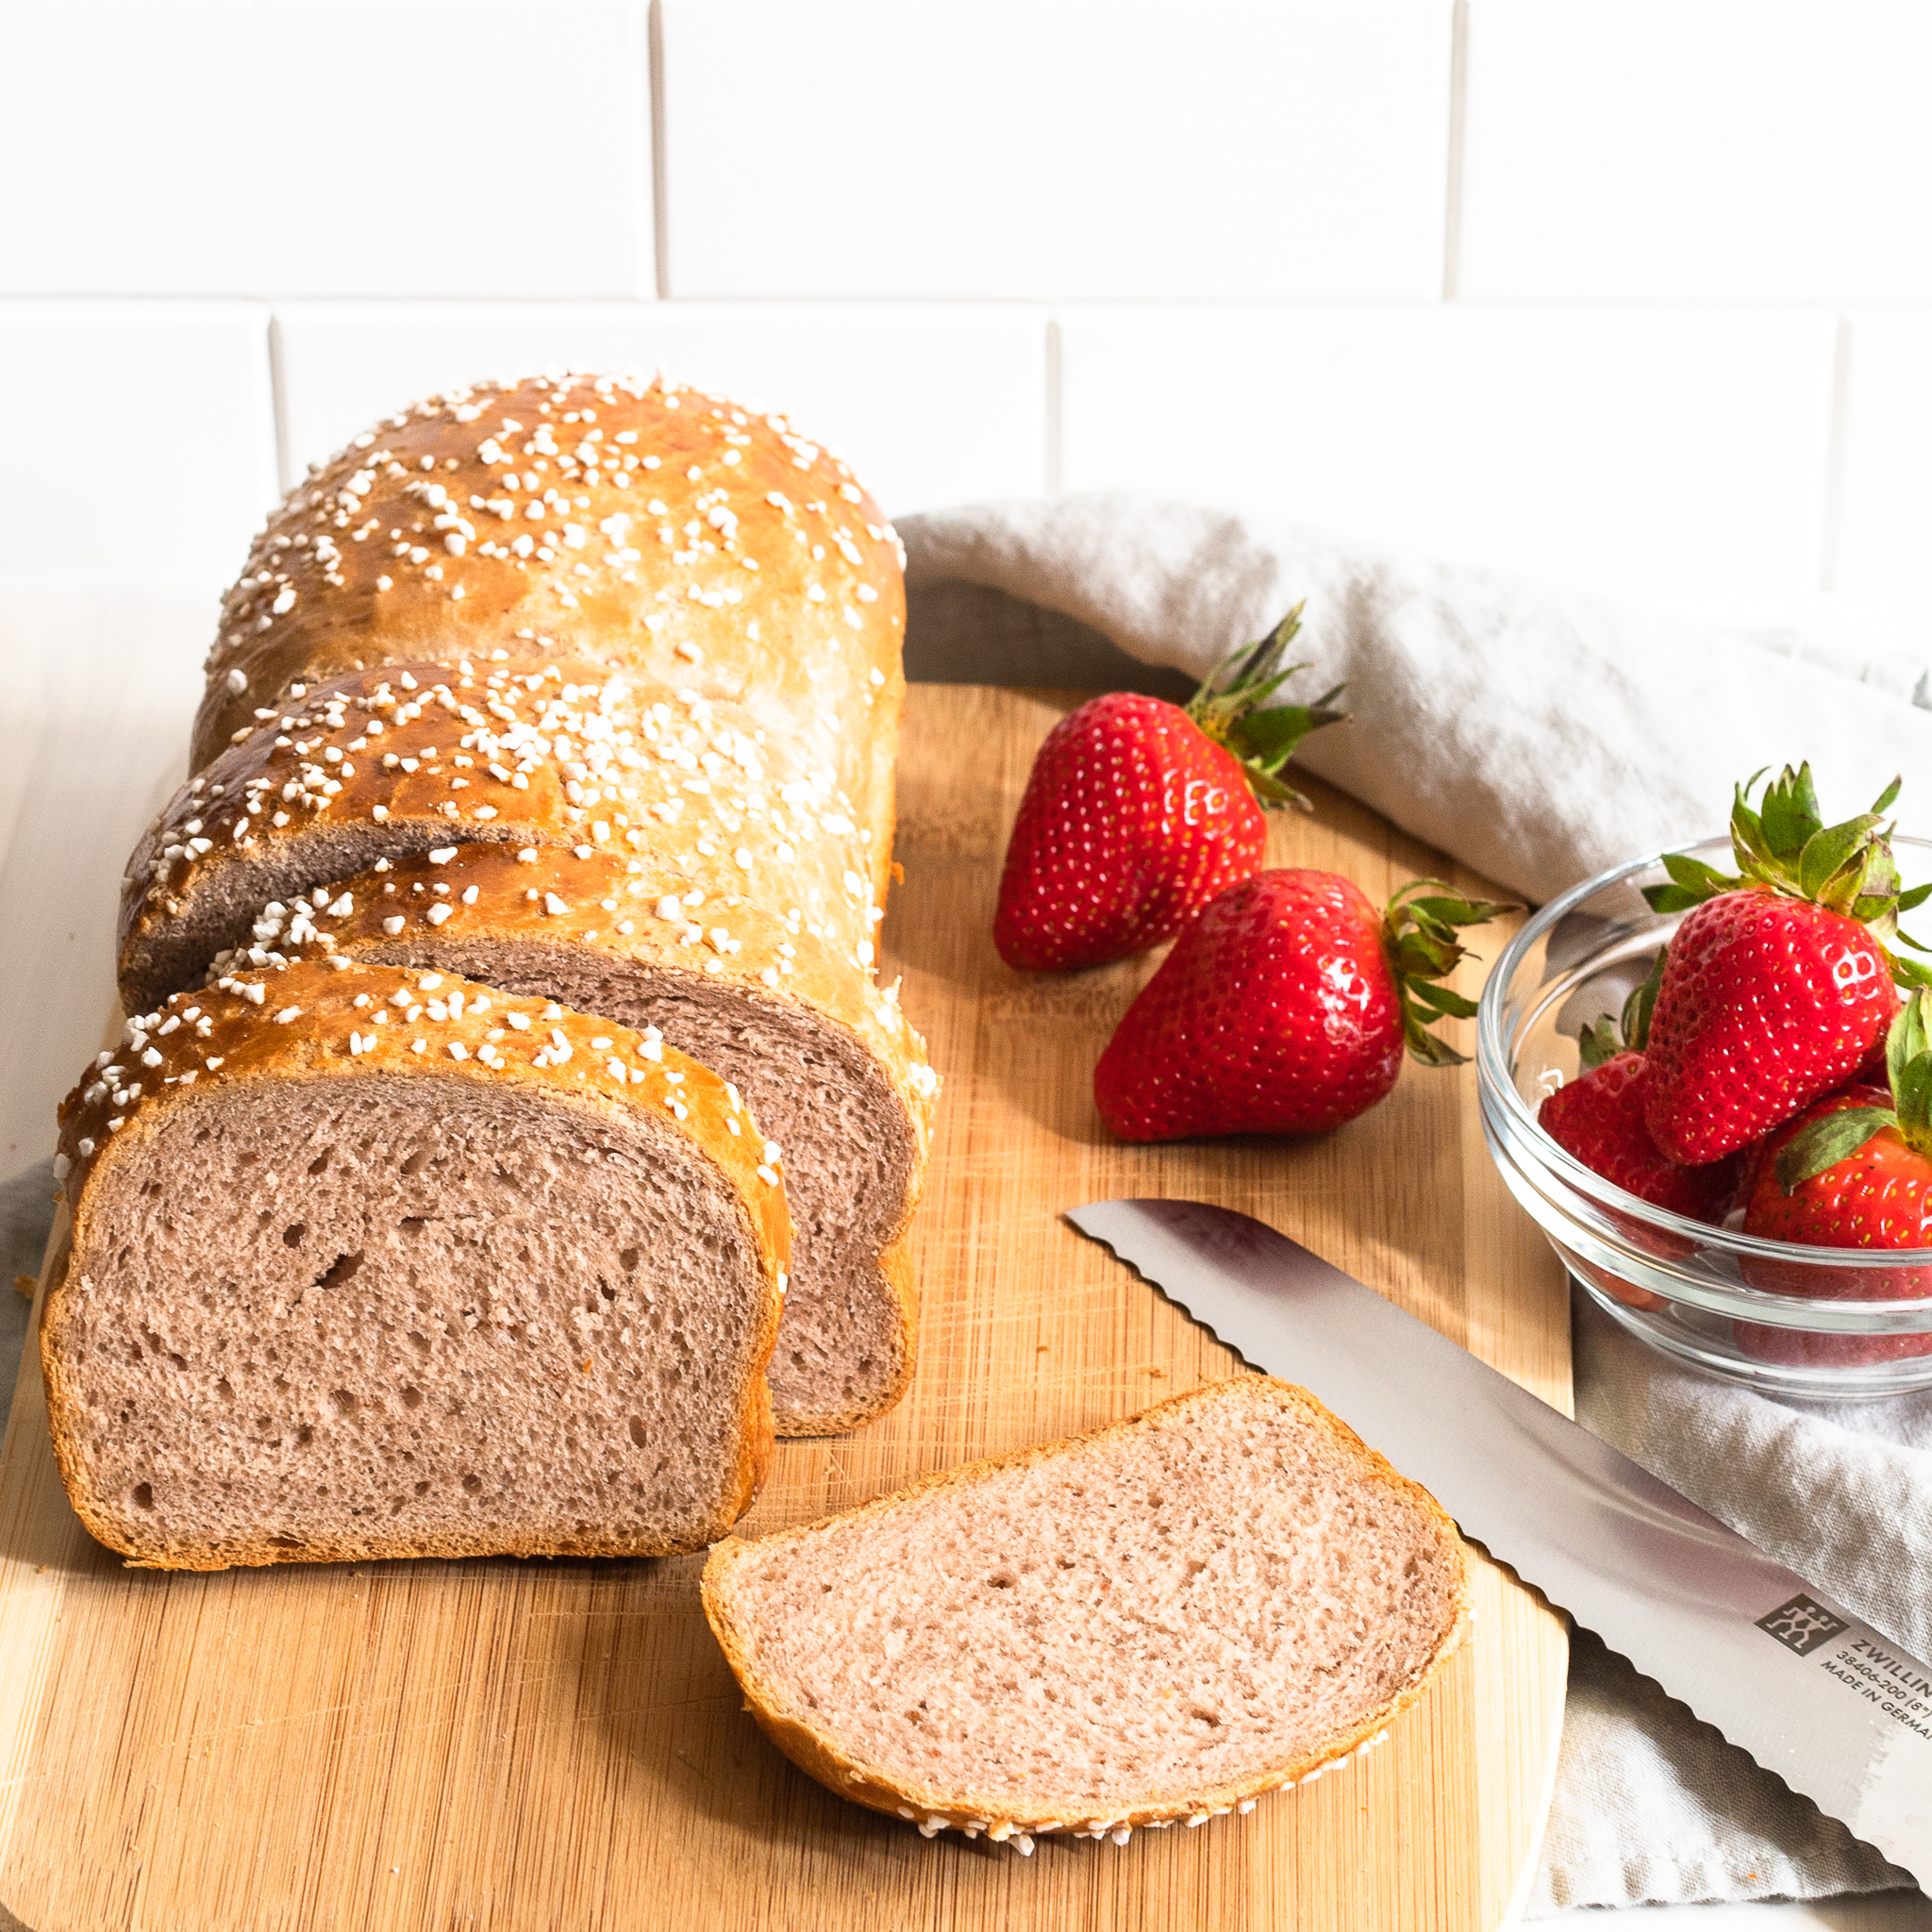
Strawberry Brioche
Ingredients
- 7 grams active dry or instant yeast (2¼ teaspoons or 1 envelope)
- 245 grams milk* (1 cup)
- 75 grams granulated sugar (⅓ cup plus 2 teaspoons)
- 1 large egg (at room temperature)
- 1 large egg yolk (at room temperature)
- 2 teaspoons vanilla extract
- 130 grams strawberry paste** (½ cup, packed)
- 550 grams all purpose flour (4½ cups plus 1 Tablespoon)
- 1 teaspoon salt
- 113 grams unsalted butter, at cool room temperature, cut into 8 pieces (8 tbsp. or ½ cup)
- 1 large egg (for egg wash)
- Swedish pearl sugar or other decorative sugar (optional)
Instructions
- [If using instant yeast, skip to Step 3 and add the yeast and the milk with the rest of the ingredients.] In microwave at 20 second intervals, stirring after each interval, warm milk to body temperature, generally between 105°F and 110°F. Alternatively, you can heat the milk in a saucepan on a low flame, stirring constantly. Either way, do not let the milk get above 115°F. (If you do, just let it sit out at room temperature for a couple of minutes constantly checking it until it cools to body temperature.)
- Place warmed milk into bowl of electric mixer. Sprinkle yeast and approximately 1 tsp. of the sugar over the milk. Using a fork, stir the mixture to distribute the sugar and hydrate the yeast granules. Allow to sit for approximately 3-5 minutes until the mixture gets foamy.
- Add the room temperature egg, the room temperature egg yolk, the strawberry paste, and the vanilla to the mixture. Using the dough hook, turn the mixer on at a low speed and add the rest of the sugar. With the mixer running at the lowest speed, add the flour. As the flour starts to get absorbed by the liquid mixture, raise the mixer to a medium speed. You may need to turn the mixer off once or twice to wipe down the sides of the bowl with a dough scraper or rubber spatula. Allow to knead for approximately 3 minutes. The dough should clean the sides of the bowl and be tacky, but not too sticky. If it is too wet (sticking to the sides and bottom of the bowl), add some flour, no more than 1 Tbsp. at a time. If the mixture is too dry, add a little milk, 1 tsp. at a time.
- Lower the mixer speed to low (1 or 2 on the KitchenAid) and slowly add the salt, allowing it to knead into the dough, an additional 3 minutes. Stop the mixer and take a small piece (approximately 1 tsp.) of dough and stretch it between your fingers. It should form a “window pane”, meaning it should get thin enough that it is translucent without it ripping. If it is not at that point yet, continue kneading in the machine at 1 minute intervals. (It may just need an additional minute or two to reach the window pane stage. If it still isn’t there yet, check to see if the dough is too dry. If it is, add ½ tsp. water and knead another minute.)
- With the mixer running at medium speed, add the butter. It is best to add it one piece at a time, waiting until it is fully integrated into the dough before adding the next piece. You may need to turn off the mixer from time to time to push the slab of butter back into the range of the dough and the hook. This process will take approximately 5-10 minutes. Once all the butter is incorporated, the dough will look shiny and be slightly tacky. (If, after approximately ten minutes, the butter is still not fully incorporated, do not panic. Just move to the next step – having some unincorporated butter is not problematic in this recipe. That said, the key to incorporating the butter is nothing more than patience.)
- Lightly grease a bowl with a little butter or nonstick cooking spray. Form dough into a ball and place it in the bowl. Turn the dough over to coat it in the butter or nonstick cooking spray and cover tightly with plastic wrap.*** Let the dough sit in a warm area on the counter until doubled in size, approximately one hour.
- Lightly spray two 8½" x 4½" loaf pans with nonstick cooking spray or grease with butter. (Using butter imparts more flavor on the edges of your brioche.) For an even easier pan removal, use parchment paper on the bottom and/or sides of the pan, but be sure to coat the parchment with nonstick cooking spray or butter.
- Once dough has doubled in size, remove the plastic wrap and de-gas it by folding it over onto itself and knead it a few times by hand. Divide it in half, preferably by weight. Cover one half with plastic wrap until you are ready to work with it. Divide the half of the dough you are working with into two equal portions, shaping each into rounds. Place each round into a loaf pan. Cover loosely with plastic wrap and let rise for another hour. Repeat with remaining dough.
- Approximately 30 minutes into the second rise, preheat oven to 350°F.
- Once the brioche have doubled in size, beat an egg and, using a pastry brush, egg wash the tops of the brioche. Sprinkle with Swedish pearl sugar. Bake for 55-65 minutes.
- Cool brioche in pans for 10-15 minutes and then remove them from their pans onto a wire rack. (Use a metal spatula or flat knife against the sides of the pans before turning the pans over.)
- Once at room temperature, if not eating immediately, cover in plastic wrap. If they actually last so long, they stay fresh for several days wrapped in plastic and stored at room temperature. They also freeze beautifully, wrapped in plastic wrap, for up to 3 months. (Tip: individually wrap slices in plastic wrap prior to freezing so you can grab a slice or two whenever the craving hits.)

1 Comment
Nothing beats the homemade bread! This looks bakery perfect…so soft and tender.