This post may contain affiliate links. As an Amazon Associate, I earn from qualifying purchases. For more information, please visit my Privacy Policy.
I don’t know why, but Pie Dough is one pastry item that many home bakers freak out about. While I acknowledge that I learned some great dough techniques in culinary school (which I am sharing with you here), I loved to make Pie Dough long before I went to school. Once you learn how to make Pie Dough properly, you will see just how easy and quick it is. The result is a far superior dough than what you can buy pre-made in the grocery store.
I recently posted a Cherry Pie recipe which contains information on how to make Pie Dough. It is such an important pastry to make that I thought it deserves its own post — with a video. So, here we go!
Oh, wait a sec. Before we get going, one thing: This recipe is enough dough for bottom and top pie doughs for a 9-inch DEEP dish pie plate. While you can certainly make this recipe for a regular pie plate, you will have excess dough, which you can roll out and use to cut out designs to place on top of your pie to make it more decorative. Eventually, I will provide a recipe for a regular 9-inch pie plate. (Pinky promise!) My pie recipes are currently all for deep dish because I have 3 deep dish pie plates for the simple reason that I prefer a deep dish pie! Why? More filling in each piece.
OK, now let’s get down to business.
What ingredients do you need to make pie dough?
Here’s what you need to make a basic pie dough:
- Flour: For pie dough, you do not need a flour with high protein content. Most pastry chefs use pastry flour, which has a lower protein content than all purpose flour. The reason for this is that we want to avoid developing the gluten in the flour. If you develop the gluten, your crust will be tough and not enjoyable to eat. That said, us home bakers can use all purpose flour, and our pie doughs still come out delish and beautiful. If you can get your hands on pastry flour, by all means, use that instead. These days, I don’t bother buying pastry flour for my pies, and I just use all purpose flour.
- Butter: This is the basis for the flavor in your pie dough. Use a good quality, unsalted butter. There are recipes out there that use part vegetable shortening and part butter. Some bakers use this combination because shortening does not have any water and therefore tends to keep its shape better than butter when the dough bakes. (The water turns to steam and evaporates in the oven.) However, those bakers recognize the importance of the butter taste, so they use a combination of both, usually going halfsies. I am not a fan of shortening and adore an all butter crust. While my all butter crust will not entirely hold its shape in the oven, I will give you a couple tricks to make sure your pie comes out of the oven looking pretty. Oh, and if you need to make your pie dough dairy free, I highly recommend using vegan butter in place of the real stuff here. I particularly like Earth Balance’s Vegan Buttery Sticks.
- Sugar: While you do not need a lot of sugar for a pie dough (and can certainly skip it entirely if you’re making a savory pie), sugar does two things. First, it adds just a touch of sweetness to complement the sweetness of your pie filling. Second, it helps the pie dough to brown. (Nerd alert: This is called the Maillard reaction. Named after the dude who identified the browning of food when heated, the Maillard reaction is basically a chemical reaction between amino acids and sugars when heated.)
- Salt: Adding a drop of salt helps balance the flavor and provides a very slight contrast to the sweet filling.
- Ice Water: Liquid is what brings the ingredients together. Water is the most ideal liquid for this purpose. We use ice water because cold water slows down the gluten development in the flour. If you use warm water in your pie dough, just handling the dough and rolling it out would cause the gluten to develop which would create an undesirable, chewy pie dough. Some people use some vodka with ice water because several years ago America’s Test Kitchen put out an article that vodka also slows down gluten development. I can tell you that I have made very many pie doughs with and without vodka and have never experienced a material difference. I therefore do not bother with vodka in my pie dough.
- Your Hands: While you can make pie dough using a food processor or a mixer, when making just one or two pies, I find it much easier to do it by hand. If you are turning out lots of pies, then the electrical equipment would certainly make life easier. Making pie dough by hand also enables you to — literally — have a feel for the dough to know when it is hydrated enough by the ice water. All this being said, I am also providing you with directions below for how to make the pie dough in a food processor and in a mixer.
How can I set my pie dough apart from other pie doughs?
Play with the flavors. Depending on what the dough is for, I sometimes add in various spices (cinnamon, allspice, nutmeg, cloves, and/or ginger) or I scrape in some vanilla seeds. None of this is necessary, but it can add another depth of flavor to your pie. I particularly enjoy vanilla in the dough of Cherry Pie. I did the same thing for Blueberry Pie. Although the vanilla flavor was not prominent in the Blueberry Pie, it did add a nice background flavor in bites that had a higher dough to filling ratio. Play around with different spices and have fun with your Pie Dough!
How to Make Pie Dough
As I said, pie dough is super easy to make. If you’re using vanilla seeds in your pie dough, use your fingertips to first work them into the sugar. Then whisk in the salt and the flour so that everything is well mixed up. (If you are adding any spices, toss them in with the salt and flour.)
Then dump in your cold butter, tossing it in the flour mixture to coat all the butter pieces. Use your fingertips to squeeze each piece of butter. The warmth from your hands should help to flatten the butter pieces. Keep tossing and pressing until the mixture almost resembles sand with pea-sized pieces of butter.
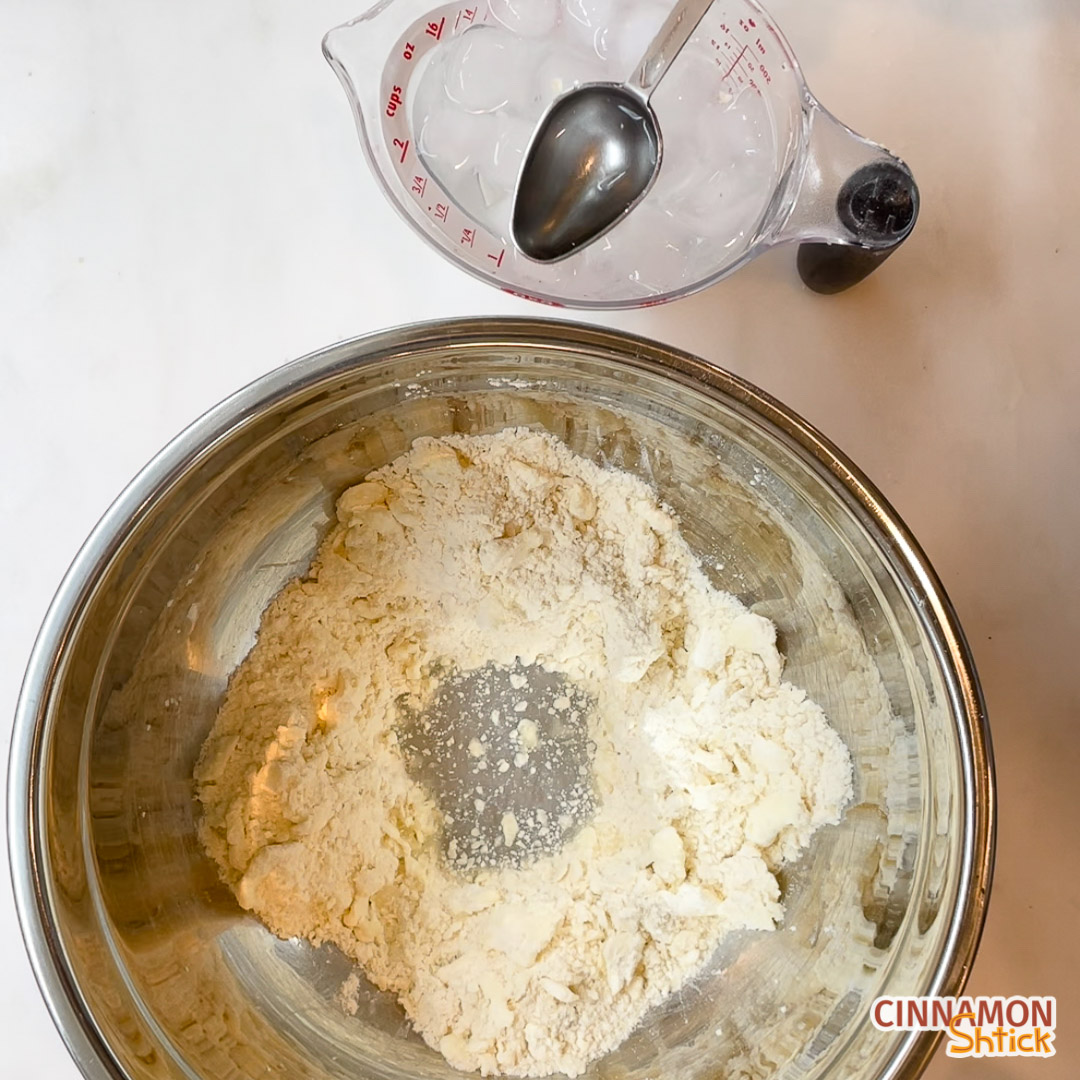
Make a well in the middle and add about half the ice water. Use your hands to toss the flour/butter mixture into the water. Make another well and add 1 Tablespoon more of water at a time until the dough just starts to feel hydrated. Be careful not to over-hydrate the dough.
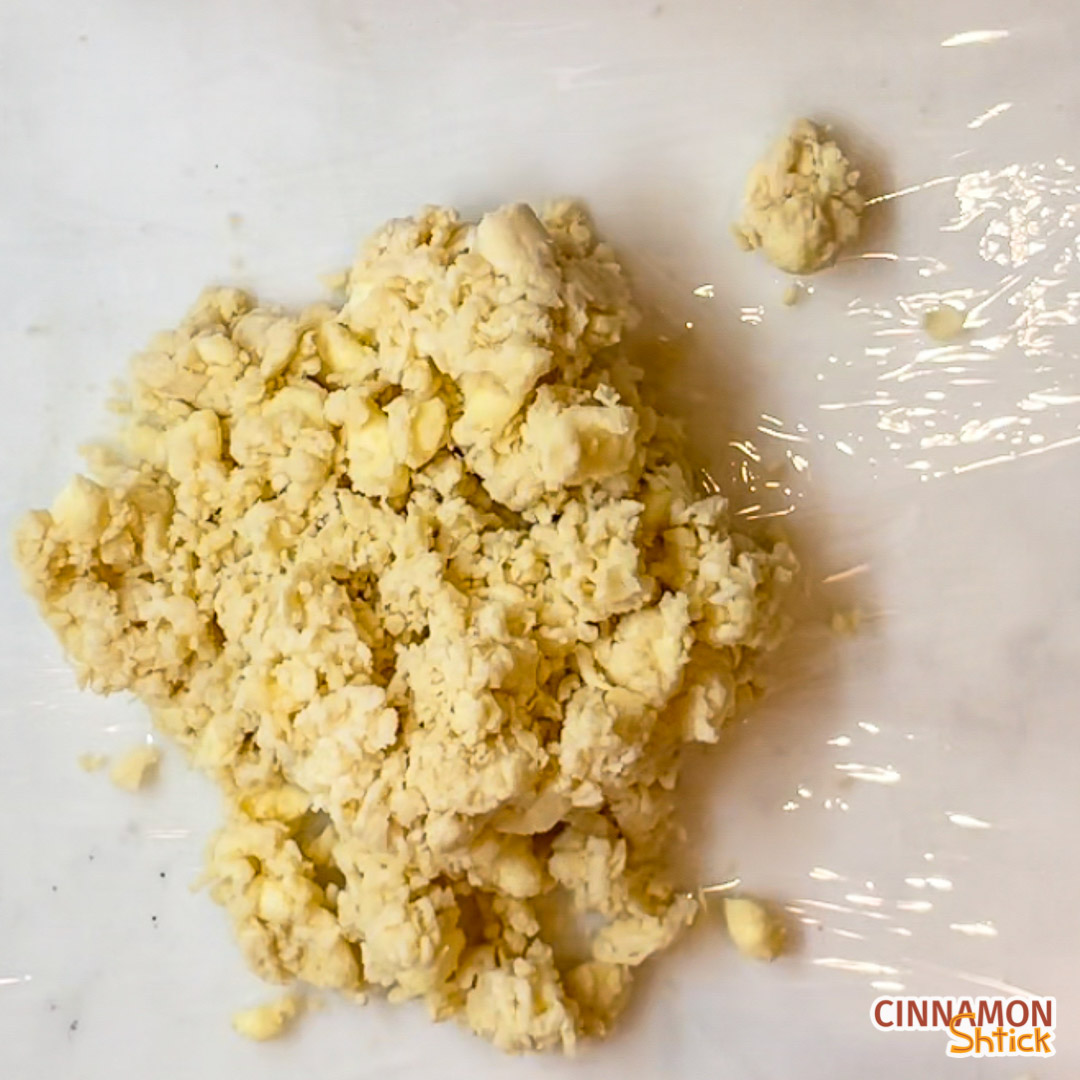
Dump approximately half the dough (it will be in broken clumps) onto a piece of plastic wrap. Use the plastic wrap to press the dough into itself. Then wrap the dough in the plastic wrap for at least 30 minutes. Repeat with the rest of the dough. You want to only work with cold dough to avoid developing the gluten.
How to Make a Super Flaky Dough
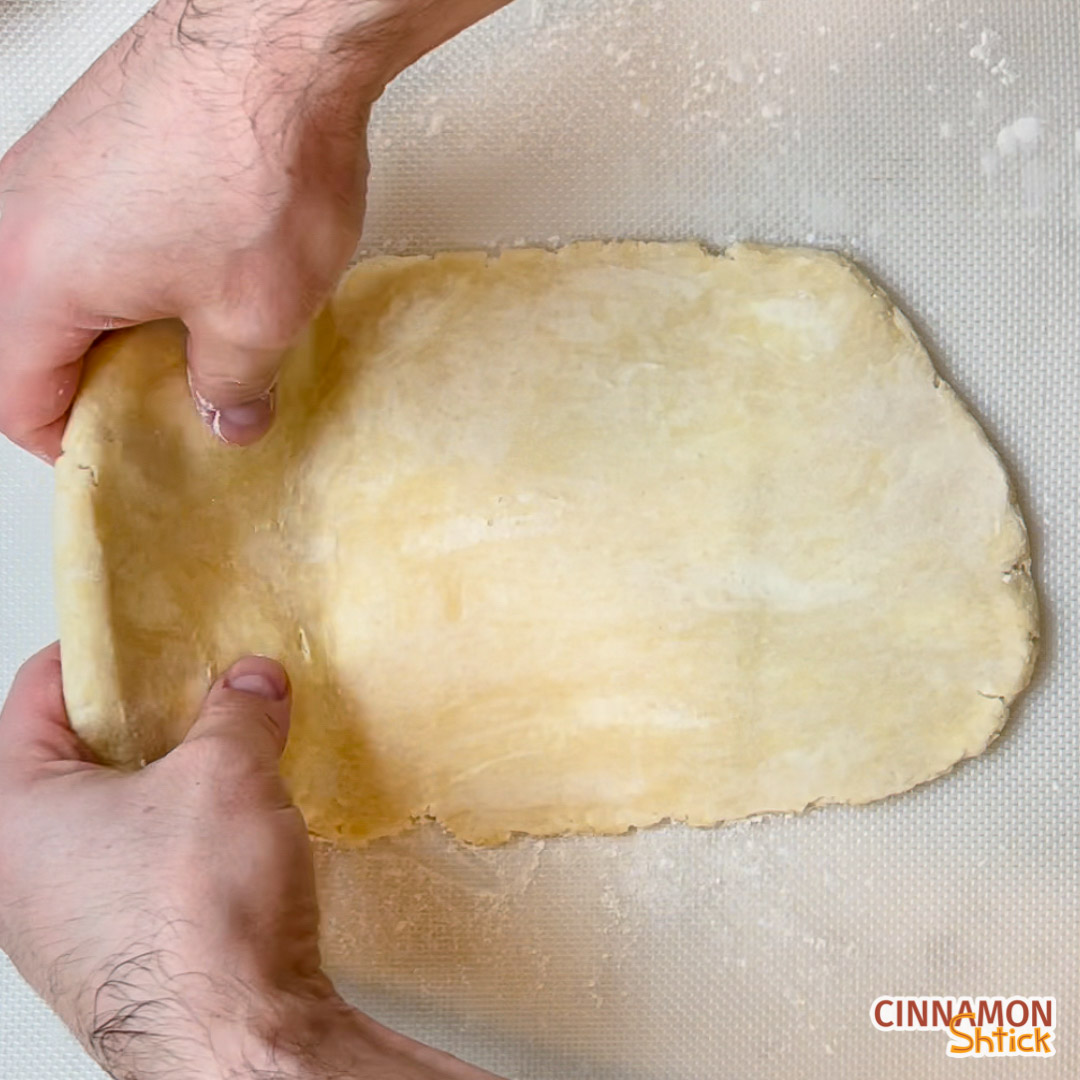
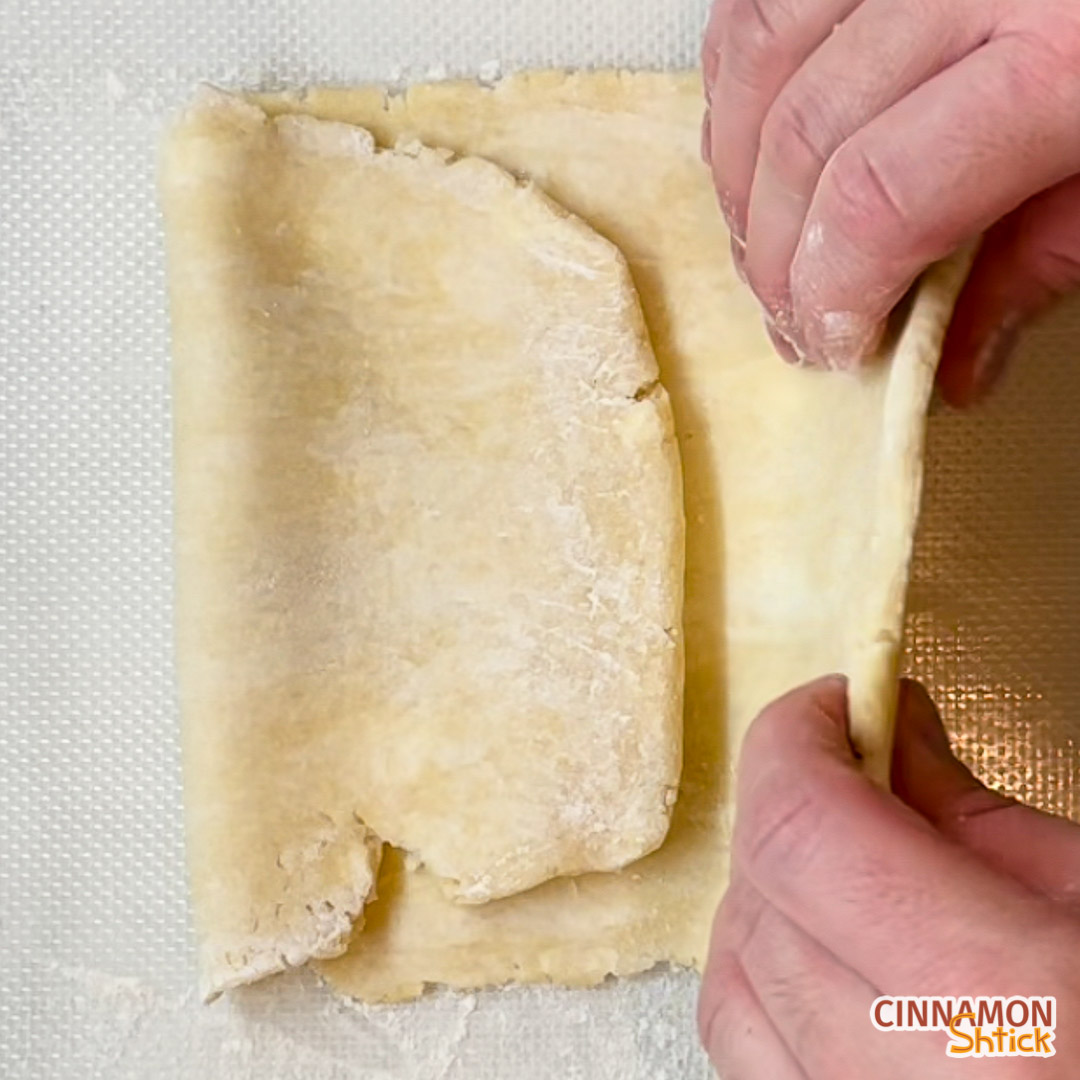
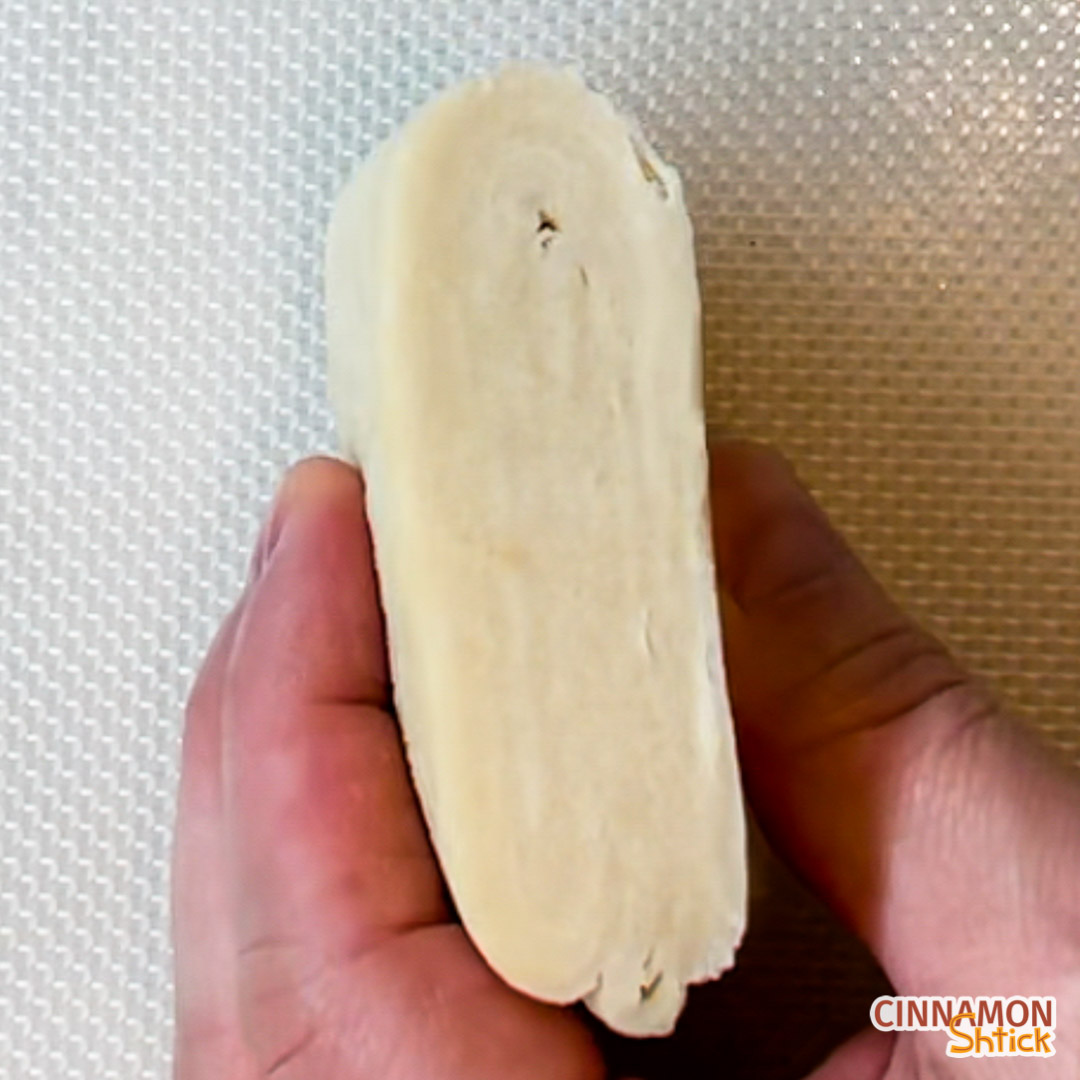
After that 30 minute rest, you can roll out your dough to fit into your pie plate. However, I like to roll my dough out (both pieces), fold them like a letter, turn the folded letter 45 degrees clockwise, roll it out and do one more letter fold. Then pop the dough back in the refrigerator for another half hour. Doing one or two folds will give the dough additional layers and a much flakier crust. (Puff pastry is generally made this way but with three folds. I find one or two folds perfect for Pie Dough. Any more and the top dough and edges become too flaky.)
How to Roll Out Pie Dough
Take the bigger portion of dough from the refrigerator. Very lightly flour your work surface and rolling pin. Place the dough on the lightly floured work surface, lightly sprinkle the top with flour, and roll. If the dough is cracking, it just means that it is too cold and you should let it sit for a few minutes. Roll the dough so that it is at least a few inches in diameter bigger than your 9 inch pie plate. You want to have some dough overhang on the sides once you place it in. Keep moving the dough around to make sure it is not sticking to the work surface. If it is sticking, add a little more flour under the dough. You can also flip the dough over while you are rolling it out.
To transport the dough into your pie plate, gently fold it in half, then in half again, without pressing on it. Place the dough so the point is in the center on the pie dish, and unfold it. Alternatively, you can roll the dough up on your rolling pin and unroll it over your pie dish.
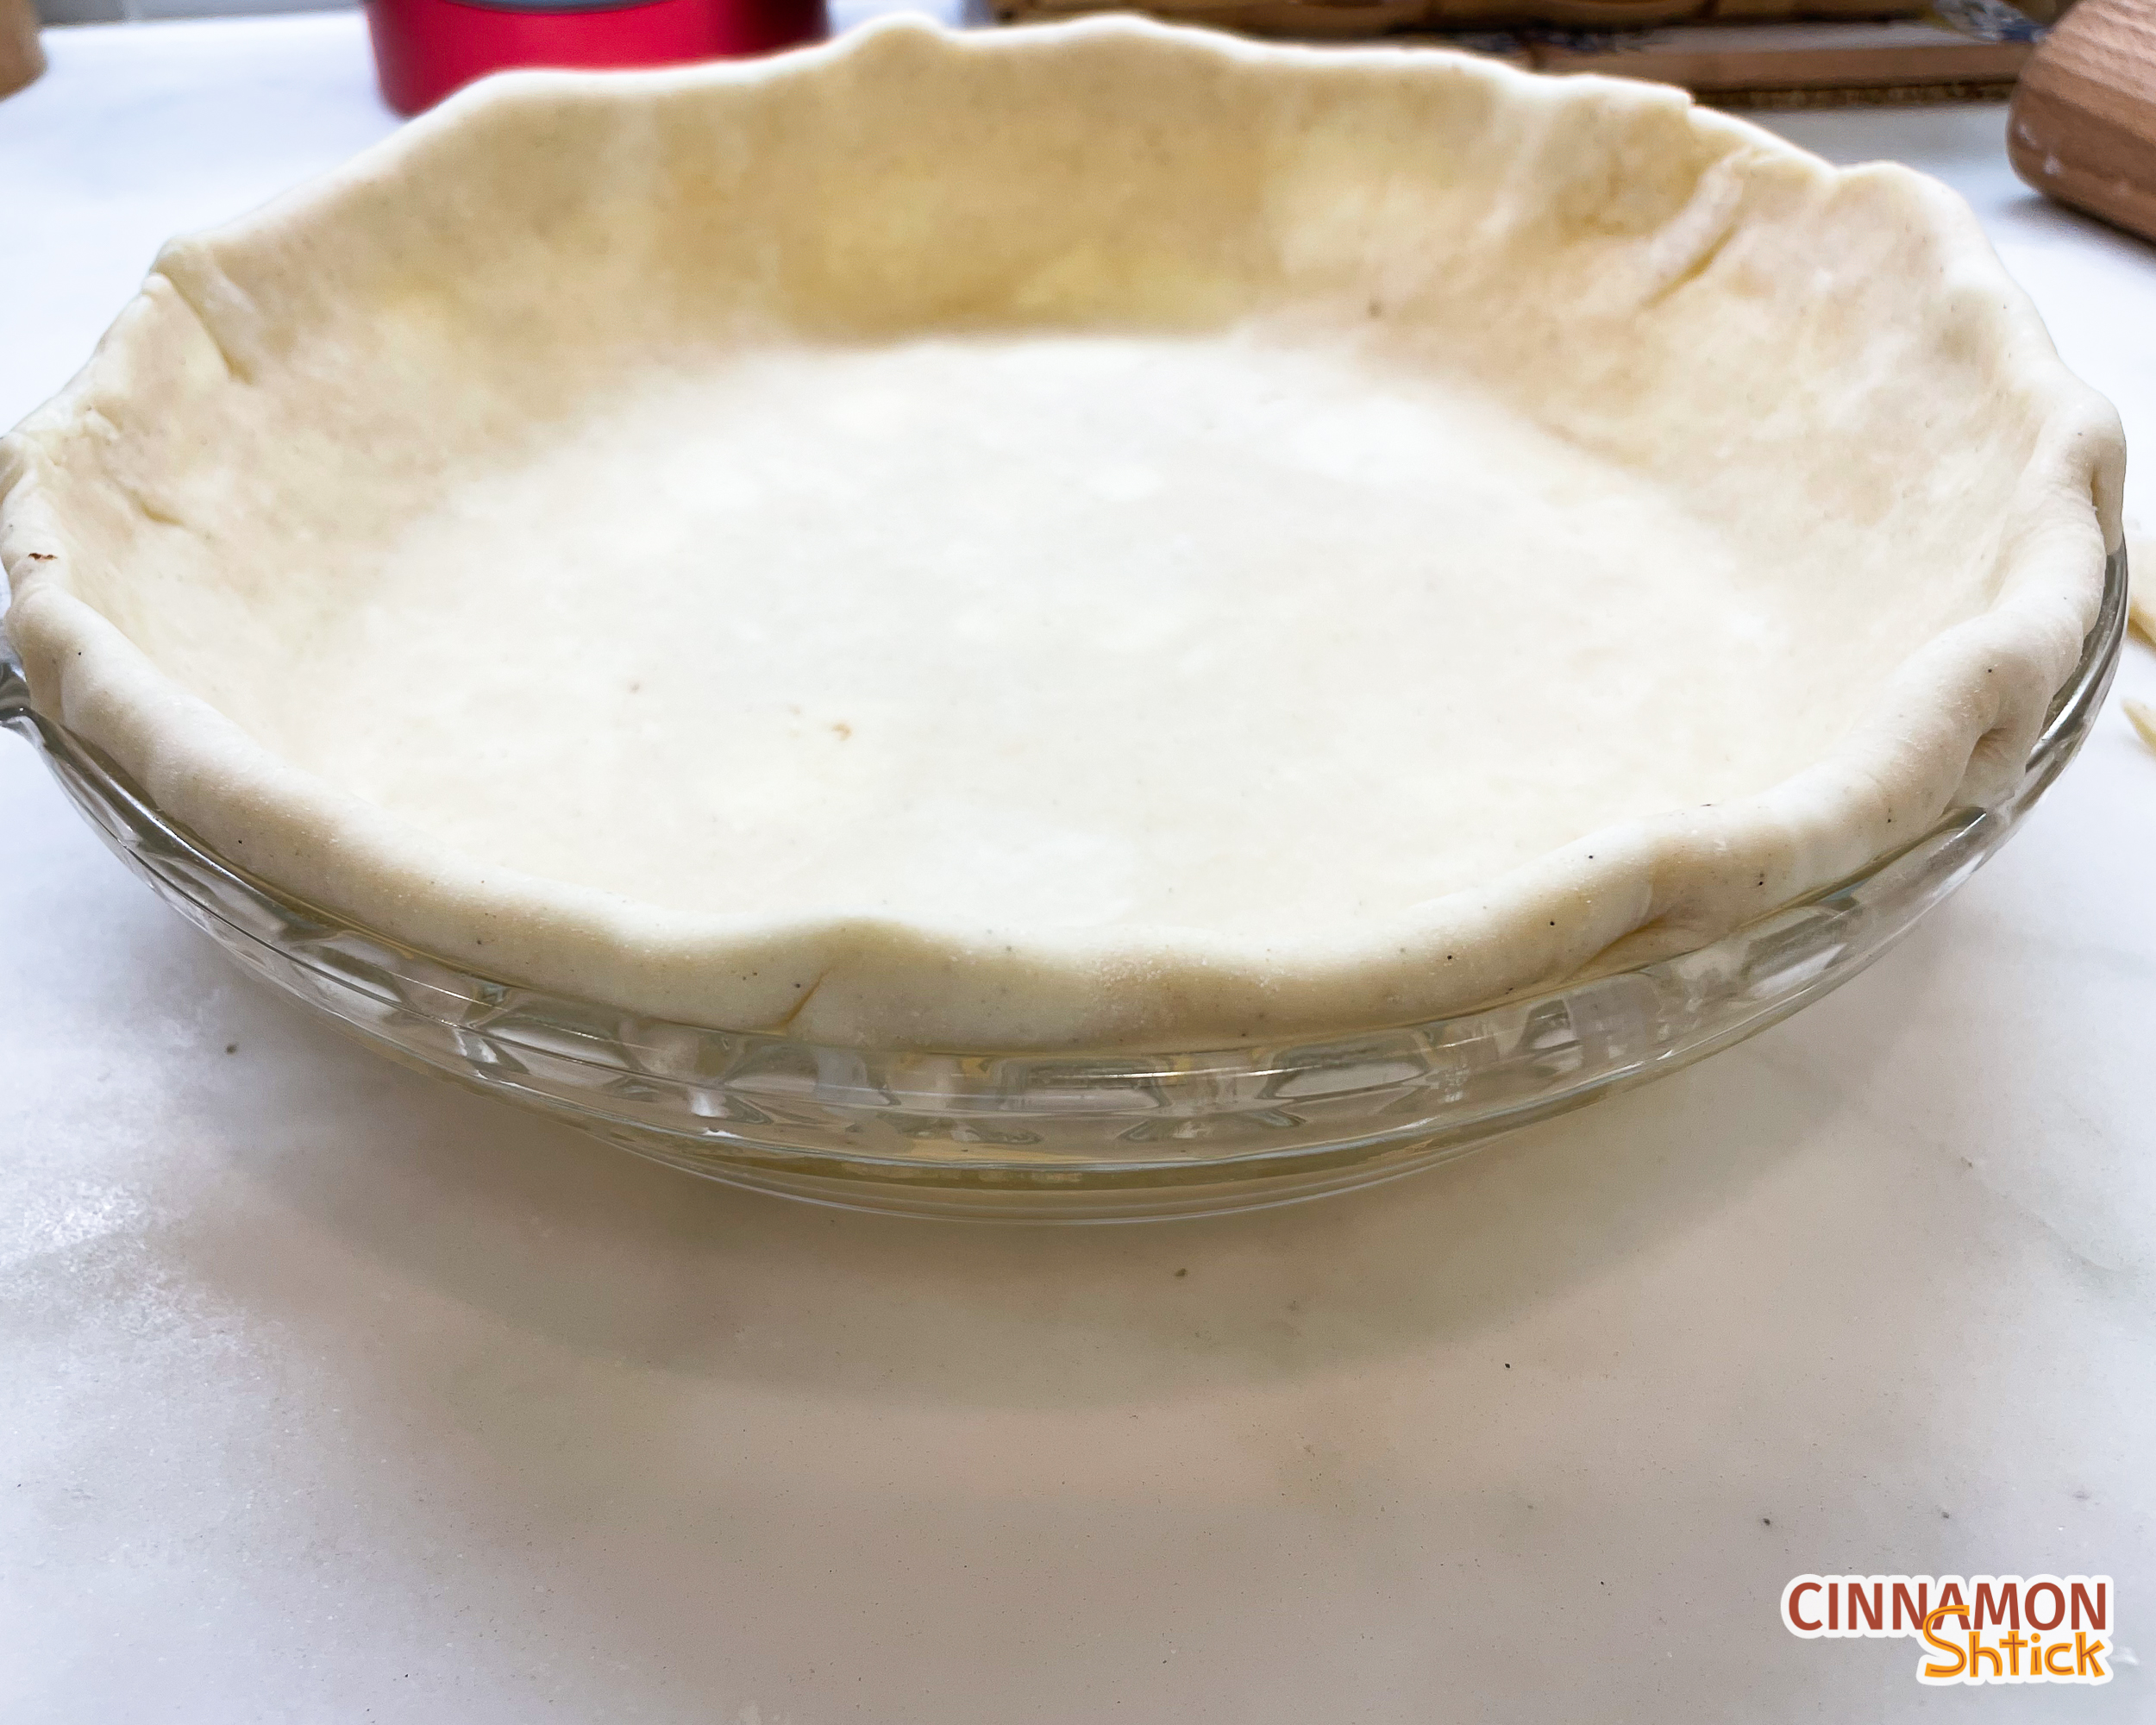
Press the dough into the pie plate so that there are no air bubbles. If too much dough is overhanging, use scissors to trim it, but try to leave an inch or so of dough overhanging. If there are places along the edge where it seems there is not enough dough, work the trimmings into those gaps. Place the pie plate with the prepared dough back in the refrigerator.


How to Cover a Pie with Pie Dough
Take the remaining portion of dough from the refrigerator and roll it out just as you did the bottom dough. You can get creative with how you want to add a top crust to your pie. You can make a lattice simply by cutting strips of dough and weaving them on top. Or use small cutters to cut pieces of dough to place on top.

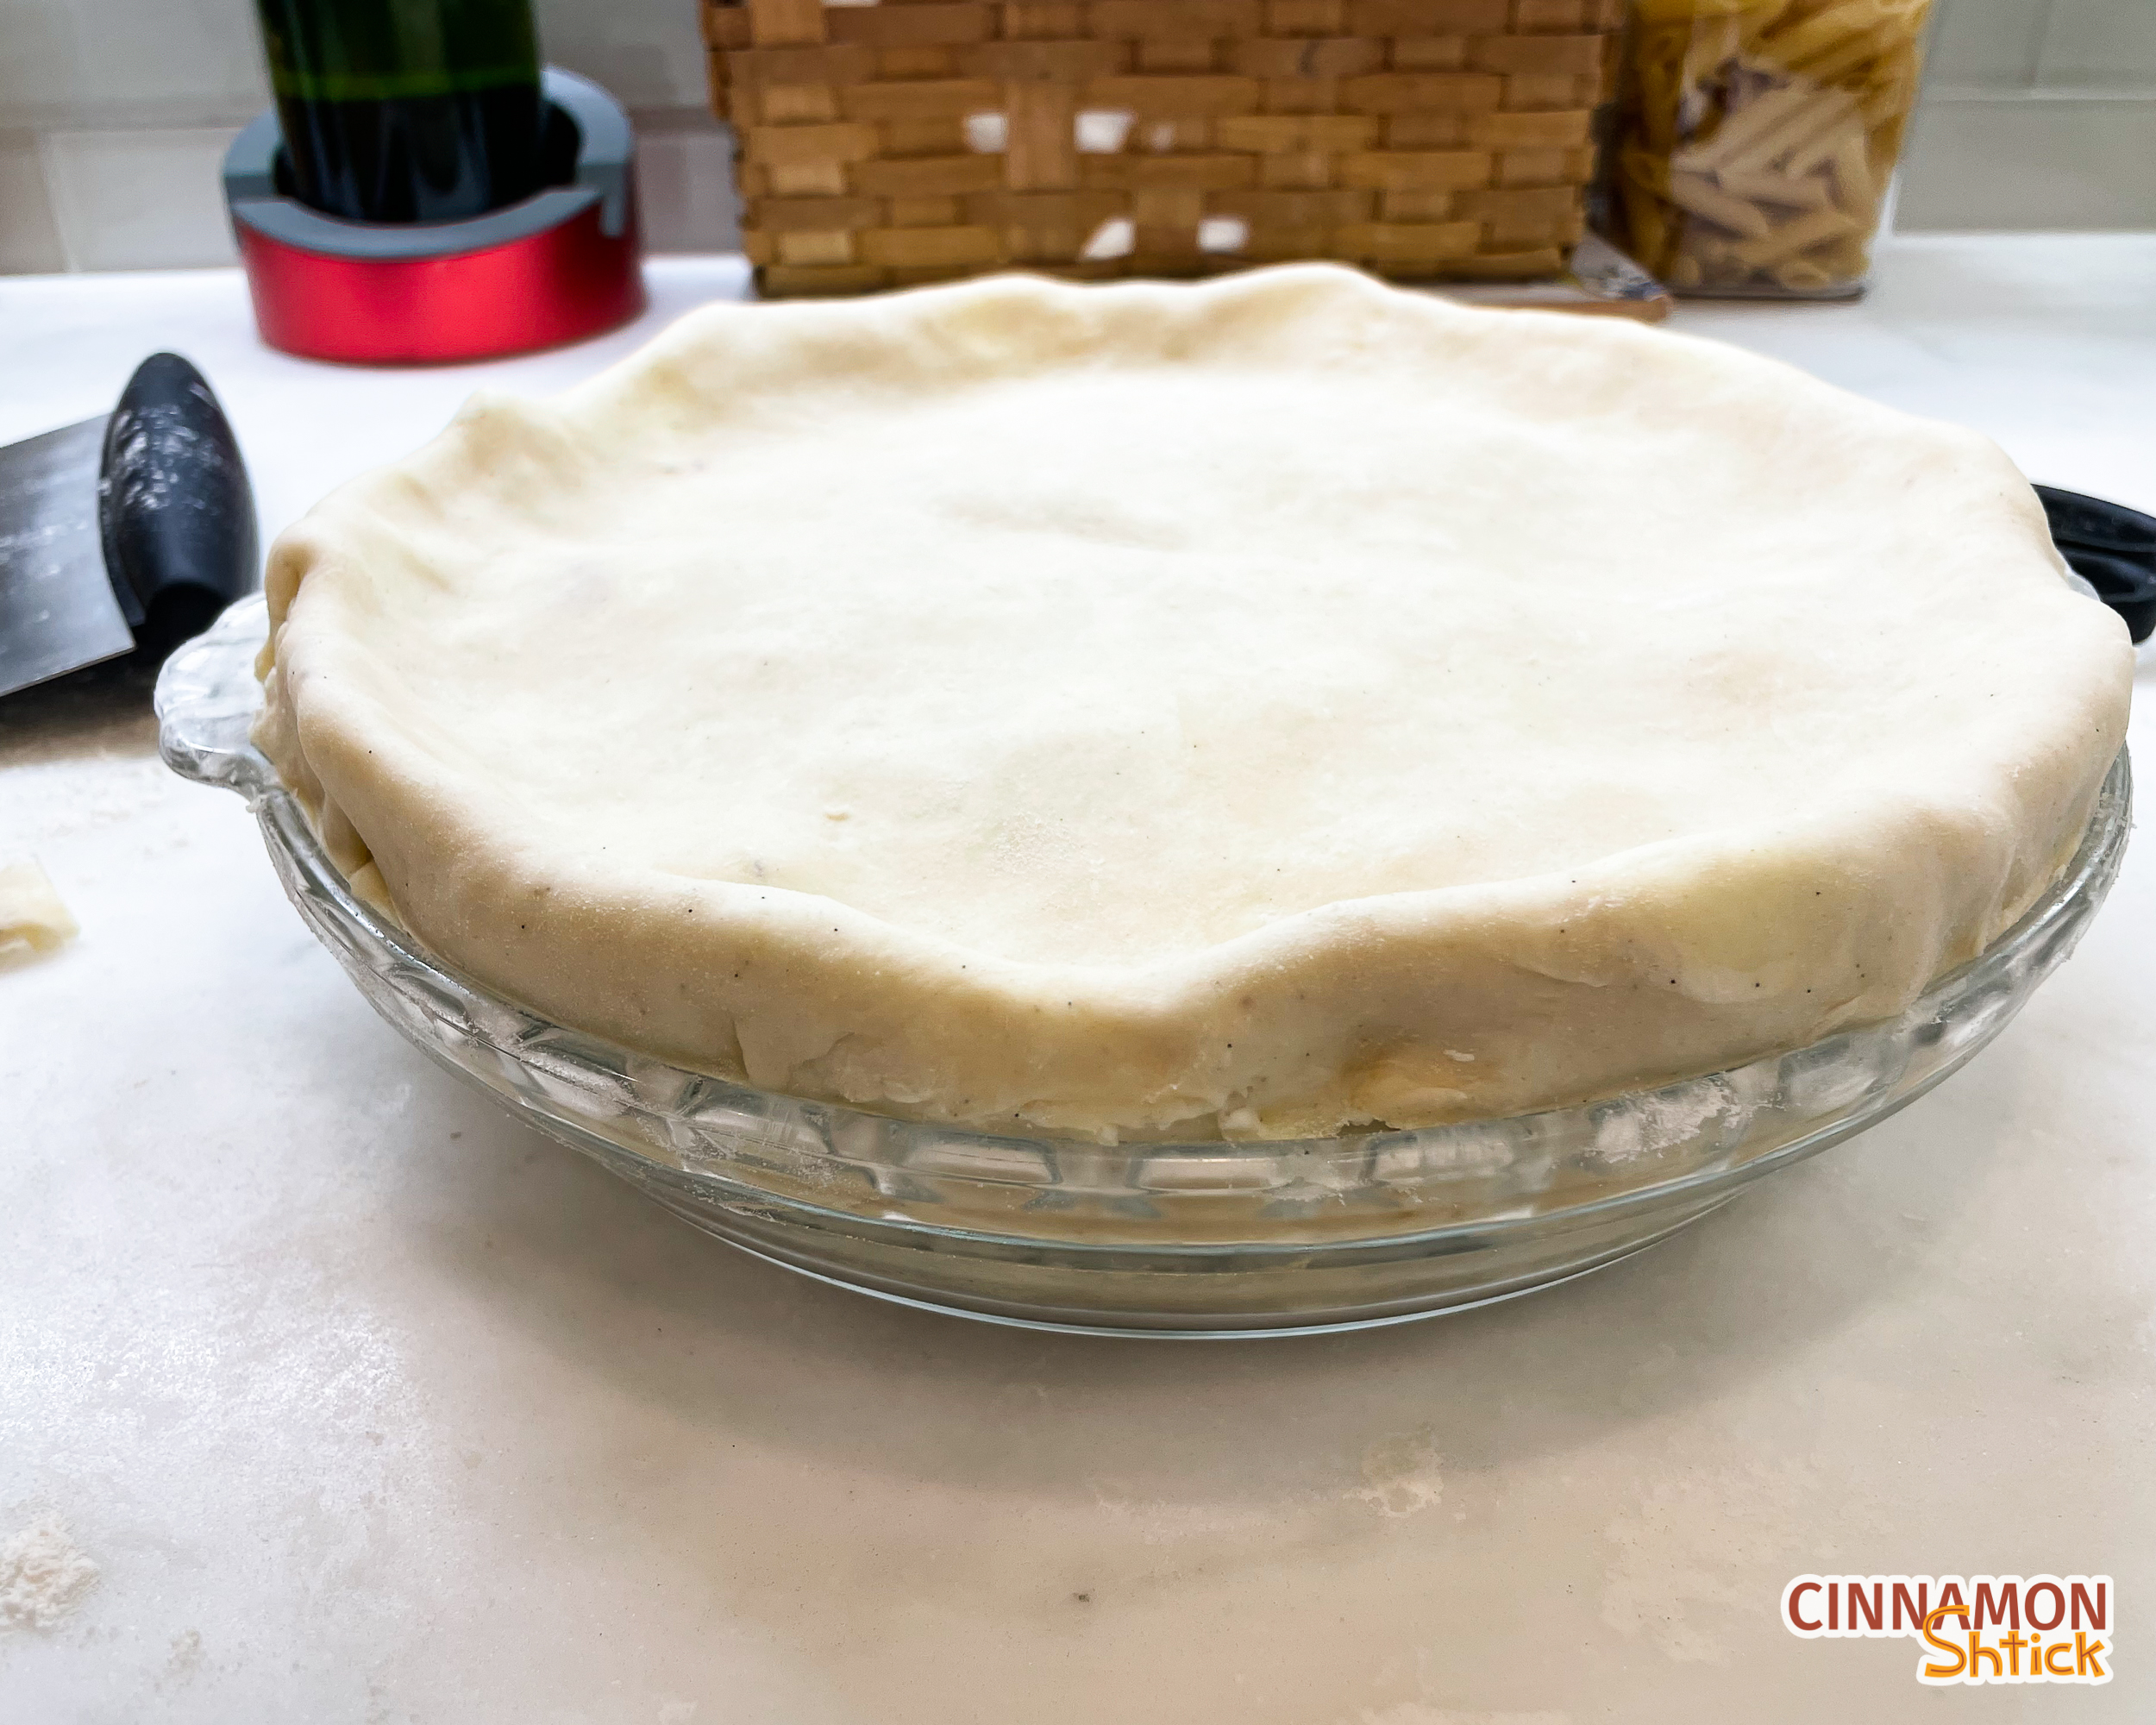
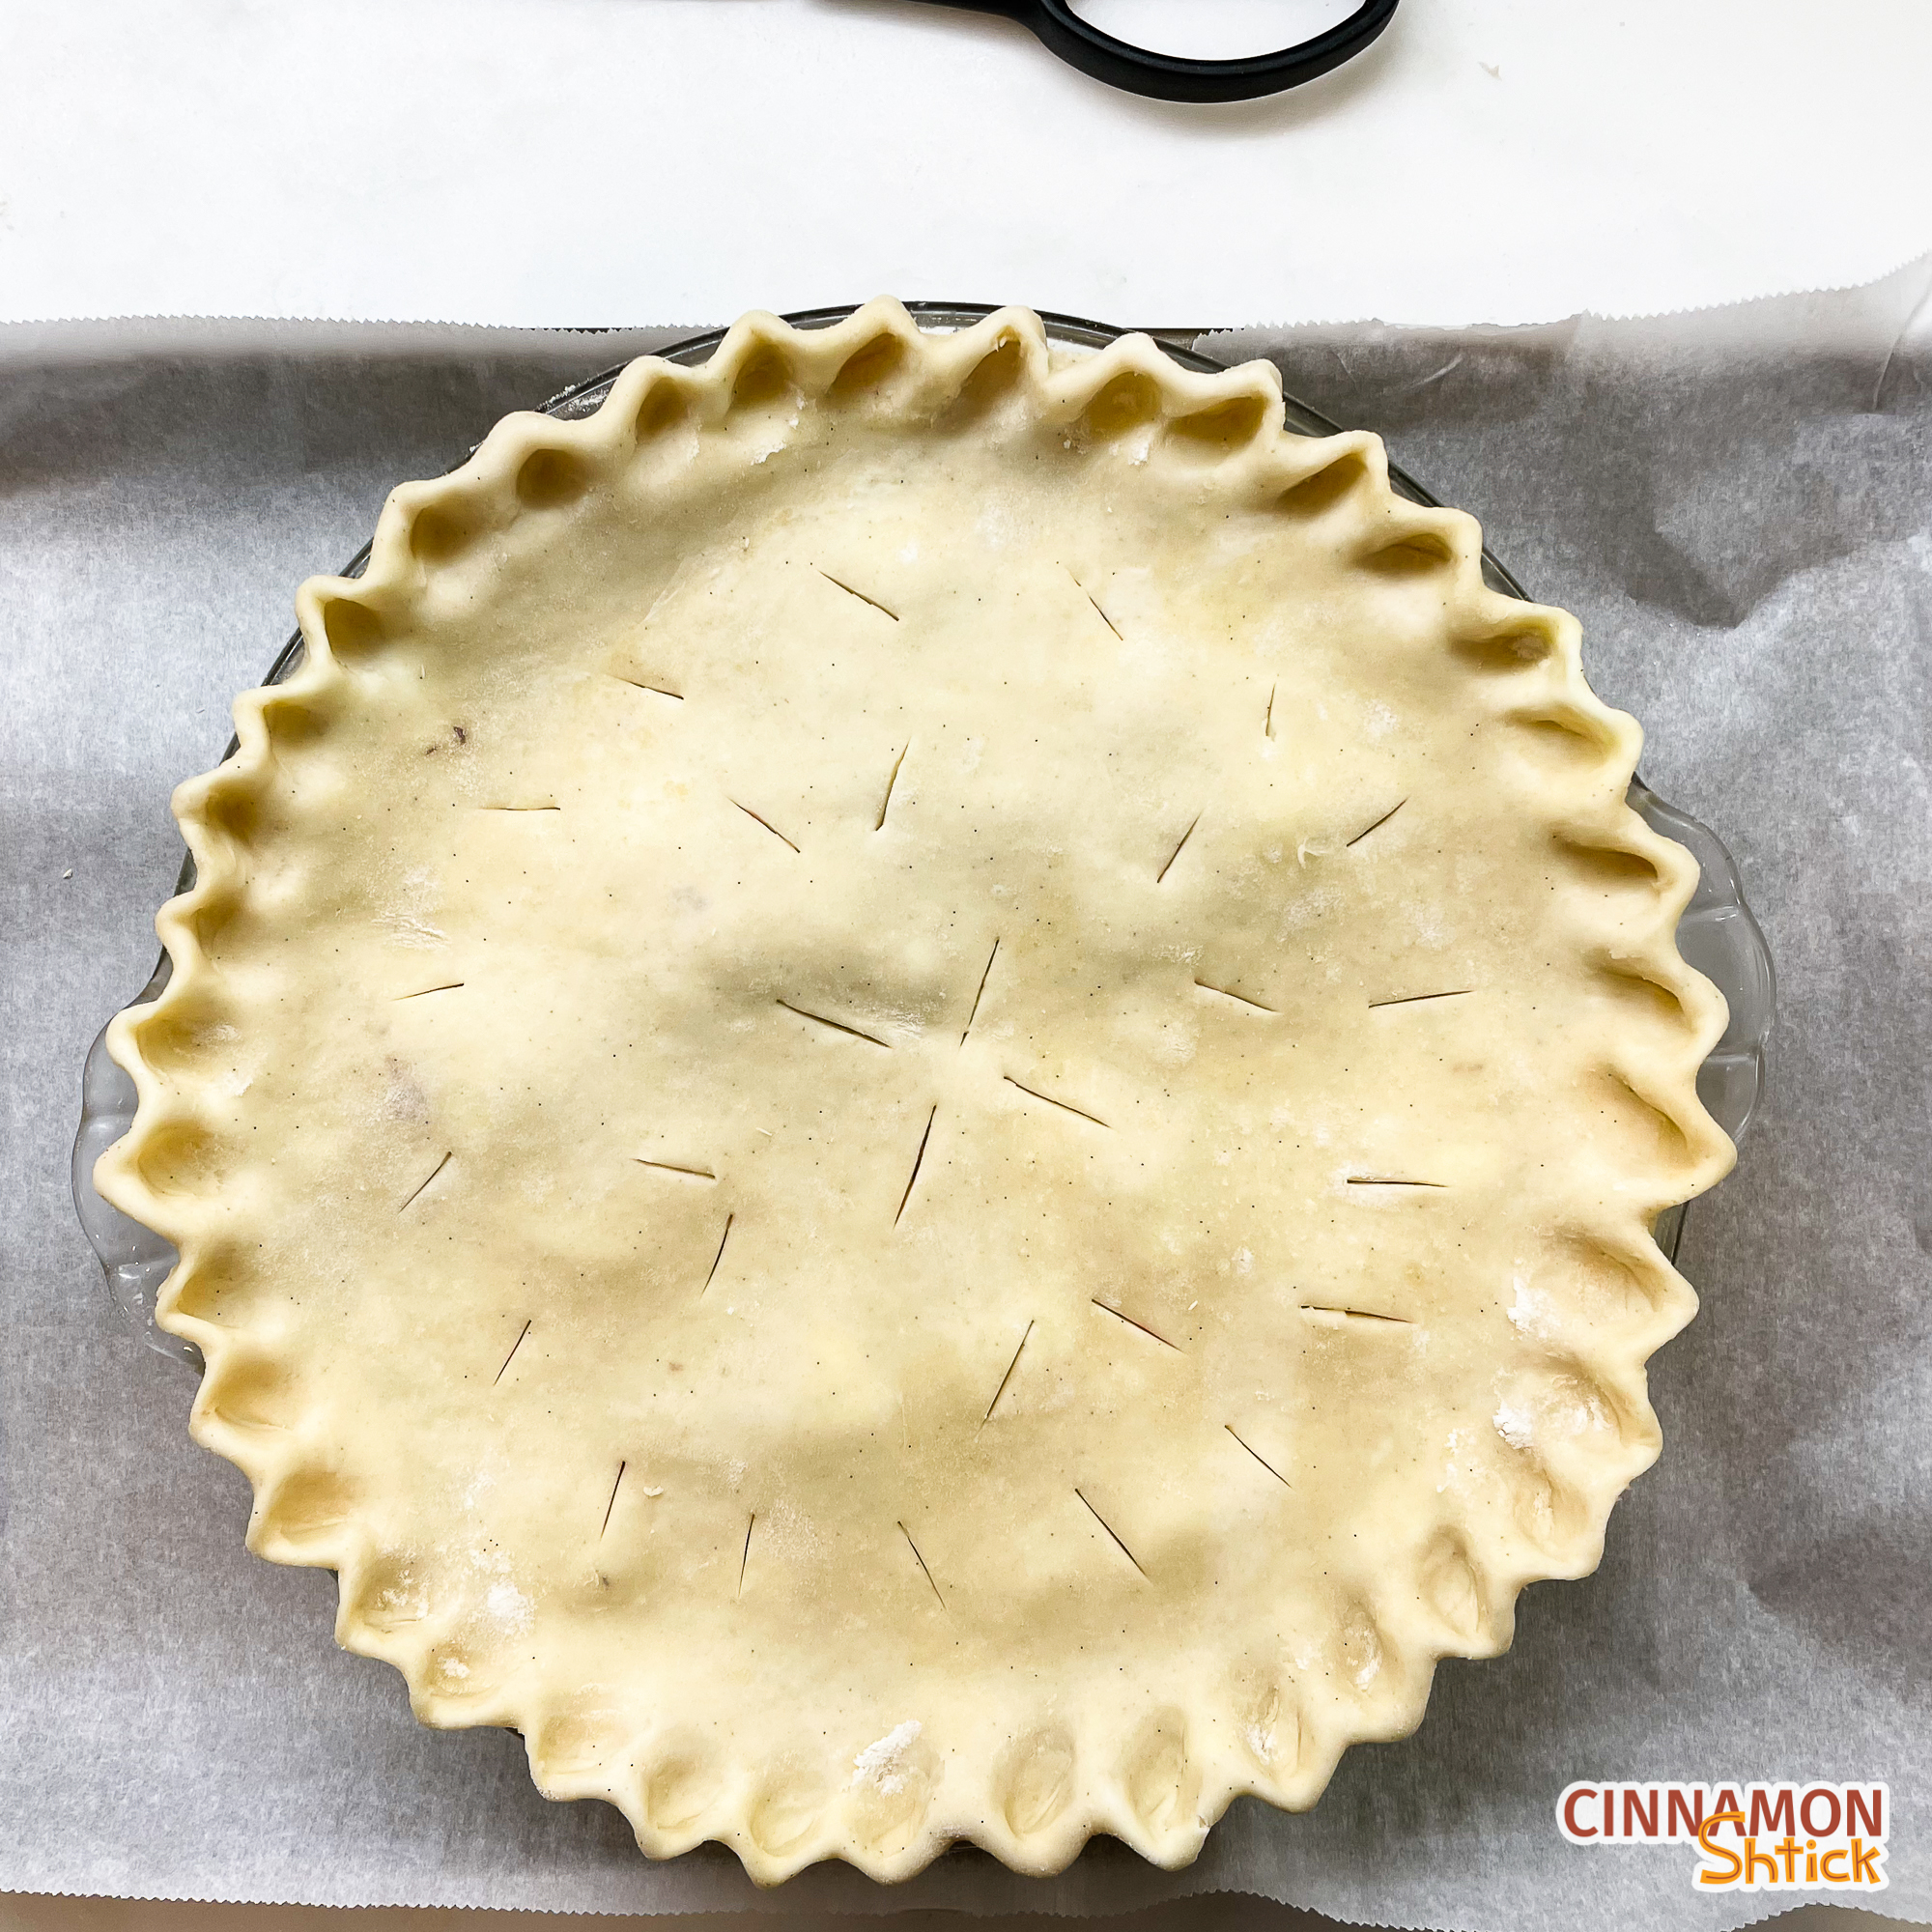
To cover a pie with dough, roll the dough out so that it is at least an inch larger in diameter than your pie pan. Cover the pie and tuck in the overhang from the top dough behind the bottom dough. (If there is more than an inch or so of dough, use scissors to trim the edges.) You will end up with approximately half an inch of dough sticking up from the pie plate. You can press down on that half inch with a fork or use your index finger of your less dominant hand to push the dough in between the index finger and thumb of your dominant hand to crimp all the way around.
Place the pie back in the refrigerator for about 20 minutes or the freezer for 10 minutes. You can then make your crimping or decorations a bit cleaner if you wish while the dough is cold.
Make Sure the Pie Can Vent
Using a lattice top has the added bonus that some of the filling will be exposed. If you cover the filling entirely, take a paring knife and make some decorative slices so that the steam created while in the oven has somewhere to escape from. Without allowing the steam to escape, there will be big air pockets between your filling and the top crust, and the bottom of the pie will end up soggy.
How to Avoid Pie Shrinkage
Generally, an all butter pie dough will experience some shrinkage in the oven as the water from the butter turns to steam and evaporates. It’s really no biggie. Two tips to avoid shrinkage:
- When you roll the dough out (bottom and top), make sure to have half some overhang, generally a little less than an inch. You can crimp the edges so that they are higher than the pie plate. Any shrinkage should hopefully not visibly effect the actual pie.
- Put your pie in the oven when it is cold. Not cool. I mean cold. I like to put my entire pie, fully shaped, vented, and crimped, in the freezer for 10-15 minutes just prior to baking. Pull it out of the freezer, apply the egg wash, and pop it in the oven immediately. The drastic change from cold to hot helps avoid shrinkage because the butter has less time to melt. It goes from cold to starting to bake quickly.
How to get a Browned Top Pie Crust
To get a nicely browned top Pie Crust, it is best to egg wash it. You can just beat a whole egg, but I like to add a drop of water to it. The water helps delay the browning so that the top doesn’t get too browned. If the top starts looking too dark, you can loosely place some foil over the pie as it continues to bake.
Frequently Asked Questions About Making Pie Dough
Why does the butter have to be cold?
For pie, we want a flaky crust because it has a great mouthfeel. If we develop the gluten in the flour, the crust will be less flaky, or not flaky at all, and will be tough and chewy, like bread. Using cold ingredients like cold butter and ice water inhibits the gluten development of the flour. We want to keep the ingredients and, once mixed, the dough, always cold. If the dough starts to feel warm as you are rolling it out, pop it back into the refrigerator for 20-30 minutes or the freezer for 10 minutes.
Can I use other flours in my pie dough?
Absolutely! Flours such as rye and wheat add another flavor to the pie dough. Check out my Brown Butter Rye Pie Dough as an example. I would start by replacing a small percentage (like 10%) of the all purpose flour with another flour. From there, each time you make a pie dough you can increase the amount of an alternative flour until you reach the flavor/texture profile you like.
Can I make Pie Dough in advance?
Yes! Once made, you can store pie dough wrapped in plastic wrap in the refrigerator for up to 48 hours. (It will be just as good for a longer period, but it may start to gray as the butter oxidizes.) You can also store it in the freezer for up to 3 months, either in a block before rolling it out or already placed in a pie plate.
Can I make this Pie Dough dairy free?
Yes! For dairy free pie dough, I highly recommend using vegan butter in place of the real stuff here. I particularly like Earth Balance’s Vegan Buttery Sticks. I have made some lovely dairy free pie doughs with vegan butter.

Pie Dough
Ingredients
- 25 grams sugar (2 Tablepoons)
- ½-1 vanilla bean, scraped (optional)
- 300 grams all purpose flour (2½ cups)
- 1 teaspoon fine sea salt (or table salt)
- 227 grams refrigerator cold unsalted butter, cut into ¼ inch pieces (if mixing in a food processor, place your cut up butter in the freezer for at least 15 minutes before using) (16 Tablespoons or 1 cup)
- ½ cup ice water*
Instructions
- Dough by hand. In a mixing bowl, rub the vanilla seeds into the sugar. Whisk in the flour and salt. Add all the butter. Using your hands, coat each piece of butter with the flour mixture. Pinch the pieces of butter to flatten them a bit. Keep working the mixture for a couple of minutes until the mixture resembles coarse sand with most of the clumps of butter the size of peas. Make a well in the middle. Add ¼ cup of ice cold water. Using your hands, scoop the flour from the sides and the bottoms to hydrate the flour with the water. Repeat, making a well in the middle and adding 1 Tbsp. of ice cold water at a time. You know you are done when the dough is slightly clumpy and becomes smooth when flattened in the palm of your hand. Divide the mixture in half, pouring each half onto a sheet of plastic wrap. Push down on the plastic wrap to flatten the dough together into a disc, making it as circular as you can. (If you plan on laminating the dough for a flakier crust, flatten to a rectangle.) Repeat with the remaining portion of dough. Place the wrapped doughs in the refrigerator for at least 30 minutes and up to 24 hours. Continue with Step 4, below.
- Dough by Food Processor. Combine all the vanilla seeds and the sugar in a food processor and pulse several times. Add the flour and salt and pulse several more times. Add all of the frozen butter. Pulse until the mixture resembles coarse sand with most of the clumps of butter the size of peas. Add ¼ cup of ice cold water and pulse a few times to combine. If the mixture is too dry, add more of the ice cold water 1 Tbsp. at a time. You know you are done when the dough is slightly clumpy and when flattened in your palm it is smooth. Divide the mixture in half, pouring each onto a sheet of plastic wrap. Push down on the plastic wrap to flatten the dough together into a disc, making it as circular as you can. (If you plan on laminating the dough for a flakier crust, flatten to a rectangle.) Repeat with the remaining portion of dough. Place the wrapped doughs in the refrigerator for at least 30 minutes and up to 24 hours. Continue with Step 4, below.
- Dough by Mixer. In the mixing bowl of an electric mixer, rub the vanilla seeds into the sugar. Add the flour and salt and mix on low with the paddle attachment until fully combined. Add the refrigerator cold butter and mix until the mixture resembles coarse sand with most of the clumps of butter the size of peas. With the mixer on low, slowly add ¼ cup of ice cold water. If the mixture is too dry, add 1 Tbsp. of ice cold water at a time. You know you are done when the dough is slightly clumpy and when flattened in your palm it is smooth. Divide the mixture in half, pouring each onto a sheet of plastic wrap. Push down on the plastic wrap to flatten the dough together into a disc, making it as circular as you can. (If you plan on laminating the dough for a flakier crust, flatten to a rectangle.) Repeat with the remaining portion of dough. Place the wrapped doughs in the refrigerator for at least 30 minutes and up to 24 hours. Continue with Step 4, below.
- Remove the larger piece of dough from the refrigerator and lightly flour the countertop. Also lightly flour a rolling pin. Place the dough on the lightly floured countertop. Lightly flour the top of the dough.
- Optional: To make a super flaky dough, roll the dough into a long rectangle. Fold the top ⅓ down from the top, then fold the bottom ⅓ up towards the middle, like folding a letter, brushing off any excess flour as you fold. Rotate the dough 90° and roll out into a rectangle again. Repeat the folds one more time. Wrap again in plastic wrap and refrigerate 30 minutes.
- Roll the dough out so that it is a circle (or circle-ish), approximately 12 inches in diameter. The dough should be rolled out enough to go up the sides of the pie plate with at least a couple inches overhanging. (If the dough cracks when you first start rolling, let it sit on the counter for a couple minutes. It just means the dough is too cold.)
- To transport the pie dough into the pie plate, gently fold the dough in half, and again into quarters, being careful not to press down. Lift the dough up and place the pointed corner into the center of the pie plate. Unfold the dough. (Alternatively, roll the dough onto the rolling pin and unroll it over the pie plate.) Press the dough into the pie plate to make sure there are no air pockets. If the dough overhangs by more than a couple of inches, use scissors to trim it. Use the trimmings to fill in any shorter spots. Place the pie plate in the refrigerator for at least 30 minutes.
- Remove the remaining pie dough from the refrigerator and roll it out into a 12 inch diameter circle. Remove the pie dish from the refrigerator and fill it with the filling. Place the rolled out top dough over the pie, tucking the overhang between the bottom pie dough and the pie dish. There should be approximately ½ an inch of dough above the pie plate. Use a fork to press down a decorative pattern or crimp the dough using the index finger of your non-dominant hand to push into the dough between the index finger and thumb of your dominant hand. Place the pie in the freezer for 10-15 minutes or the refrigerator for 30 minutes. Alternatively, you can cut strips from the rolled out dough to make a Latice Top.


5 Comments
Love the pie dough! Perfect for so many things.
I love that this pie dough uses butter instead of lard. Will be making this for the holidays. Thanks!
This looks insanely, incredibly good. Sooo yummy!
I was looking for a good pie dough recipe when I came across yours and I’m so glad that I did! It was perfect!!
Love this pie dough! Perfect and so versatile. Thank you for all the tips and details.