
This post may contain affiliate links. As an Amazon Associate, I earn from qualifying purchases. For more information, please visit my Privacy Policy.
I have mentioned before that my favorite berry (and, frankly, fruit) is the blueberry. Love it. Just LOVE it!!! But, last year while stuck home during pandemic quarantine (fun times, fun times), I had leftover pie dough from a Blueberry Galette I had made and had some fresh cherries in the fridge. I rarely opt for a cherry pie, but I figured I may as well try making one. I made a mini cheery pie, and, thus, the recipe for this Cherry Pie was born.
People have as many opinions about pie consistency as they do about cookies. Some like their pie bottom to be soggy, while others like a flaky crust. Some like a loose, liquidy filling, while others like a more jelled, solid filling. I’m of the school that regardless of the filling (I like loose or solid), the crust must — simply must — be flaky, In addition to just tasting better (in my opinion), the mouthfeel is far superior.
I will walk you through the steps to achieve a flaky pie crust. For a video on how to make the dough, check out my Apple Oatmeal Crumb Tarts post or my Brown Butter Rye Pie Dough post — they both have videos showing how to incorporate the butter and the ice water.

Making Pie Dough is Not Scary!
People seem to get intimidated by making pie dough. It is seriously one of the easiest things to make. The more you make it, the better feel you will have for it. No one should be buying a prepared pie dough. (There. I said it.) In the time it takes to go to the grocery store and buy it, you can make your own that will taste far superior.
What ingredients do you need to make pie dough?
Here’s what you need to make a basic pie dough:
- Flour: For pie dough, you do not need a flour with high protein content. Most pastry chefs use pastry flour, which has a lower protein content than all purpose flour. The reason for this is that we want to avoid developing the gluten in the flour. If you develop the gluten, your crust will be tough and not enjoyable to eat. That said, us home bakers can use all purpose flour, and our pie doughs still come out delish and beautiful. If you can get your hands on pastry flour, by all means, use that instead. These days, I don’t bother buying pastry flour for my pies, and I just use all purpose flour.
- Butter: This is the basis for the flavor in your pie dough. Use a good quality, unsalted butter. There are recipes out there that use part vegetable shortening and part butter. Some bakers use this combination because shortening does not have any water and therefore tends to keep its shape better than butter when the dough bakes. (The water turns to steam and evaporates in the oven.) However, those bakers recognize the importance of the butter taste, so they use a combination of both, usually going halfsies. I am not a fan of shortening and adore an all butter crust. While my all butter crust will not entirely hold its shape in the oven, I will give you a couple tricks to make sure your pie comes out of the oven looking pretty. Oh, and if you need to make your pie dough dairy free, I highly recommend using vegan butter in place of the real stuff here. I particularly like Earth Balance’s Vegan Buttery Sticks.
- Sugar: While you do not need a lot of sugar for a pie dough (and can certainly skip it entirely if you’re making a savory pie), sugar does two things. First, it adds just a touch of sweetness to complement the sweetness of your pie filling. Second, it helps the pie dough to brown. (Nerd alert: This is called the Maillard reaction. Named after the dude who identified the browning of food when heated, the Maillard reaction is basically a chemical reaction between amino acids and sugars when heated.)
- Salt: Adding a drop of salt helps balance the flavor and provides a very slight contrast to the sweet filling.
- Ice Water: Liquid is what brings the ingredients together. Water is the most ideal liquid for this purpose. We use ice water because cold water slows down the gluten development in the flour. If you used warm water in your pie dough, just handling the dough and rolling it out would cause the gluten to develop which would create an undesirable, chewy pie dough. Some people use some vodka with ice water because several years ago America’s Test Kitchen put out an article that vodka also slows down gluten development. I can tell you that I have made very many pie doughs with and without vodka and have never experienced a material difference. I therefore do not bother with vodka in my pie dough.
- Your Hands: While you can make pie dough using a food processor or a mixer, when making just one or two pies, I find it much easier to do it by hand. If you are turning out lots of pies, then the electrical equipment would certainly make life easier. Making pie dough by hand also enables you to — literally — have a feel for the dough to know when it is hydrated enough by the ice water. All this being said, I am also providing you with directions below for how to make the pie dough in a food processor and in a mixer.
What makes the pie dough for this Cherry Pie different from basic pie dough?
Vanilla.
Many cherry pie recipes incorporate almond extract. I have never been a fan of almond extract. While I agree that almond flavor pairs beautifully with cherries, I much prefer that flavor to come directly from almonds. Hey, it’s just how I feel.
I love the taste of cherry with vanilla, so I scrape some vanilla seeds into the pie dough. This is completely optional. But, I will tell you that everyone who tried this pie dough with the vanilla seeds in it thought that this pie dough tasted super good. (They had no idea that there were vanilla seeds hiding in the dough!)
How to Make Pie Dough
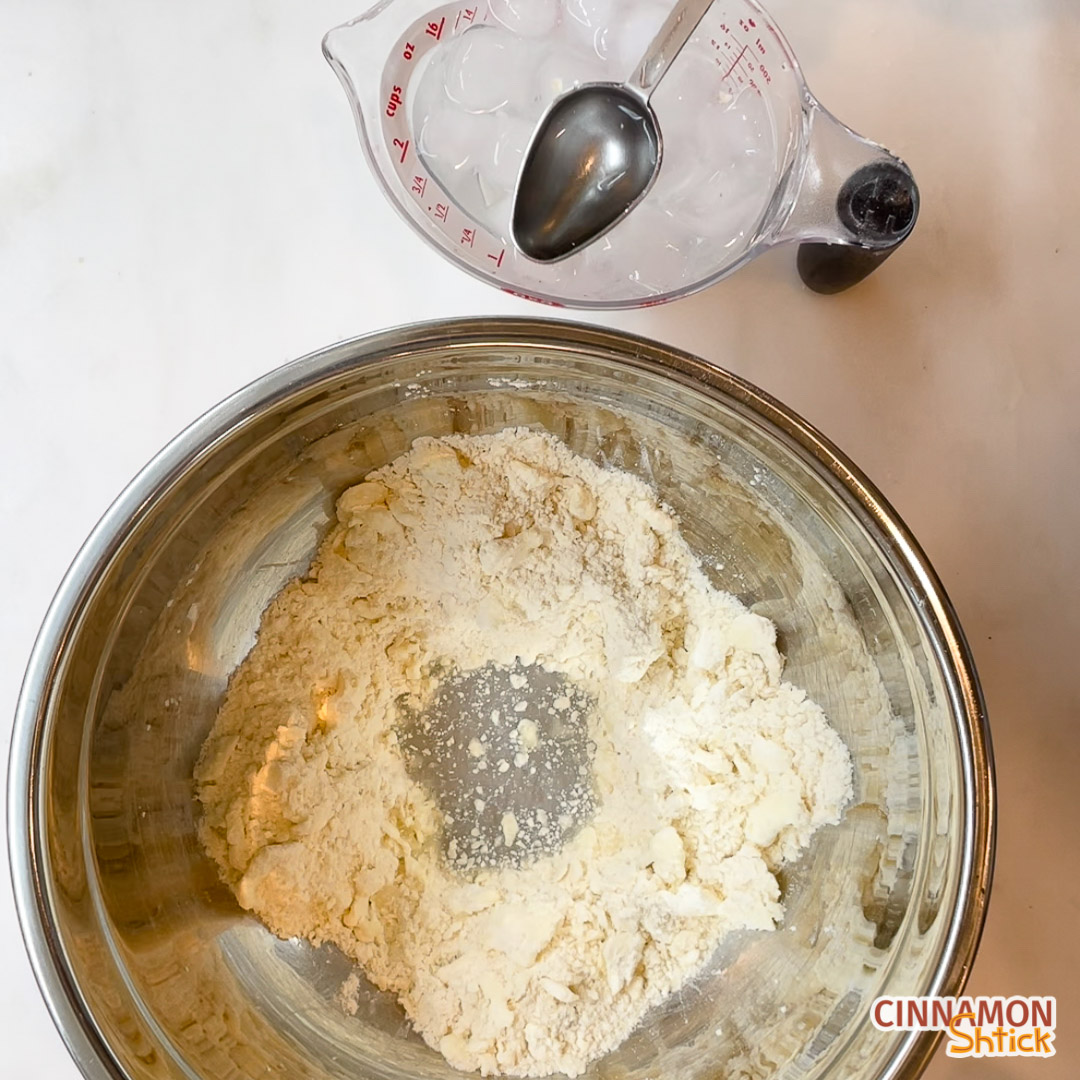
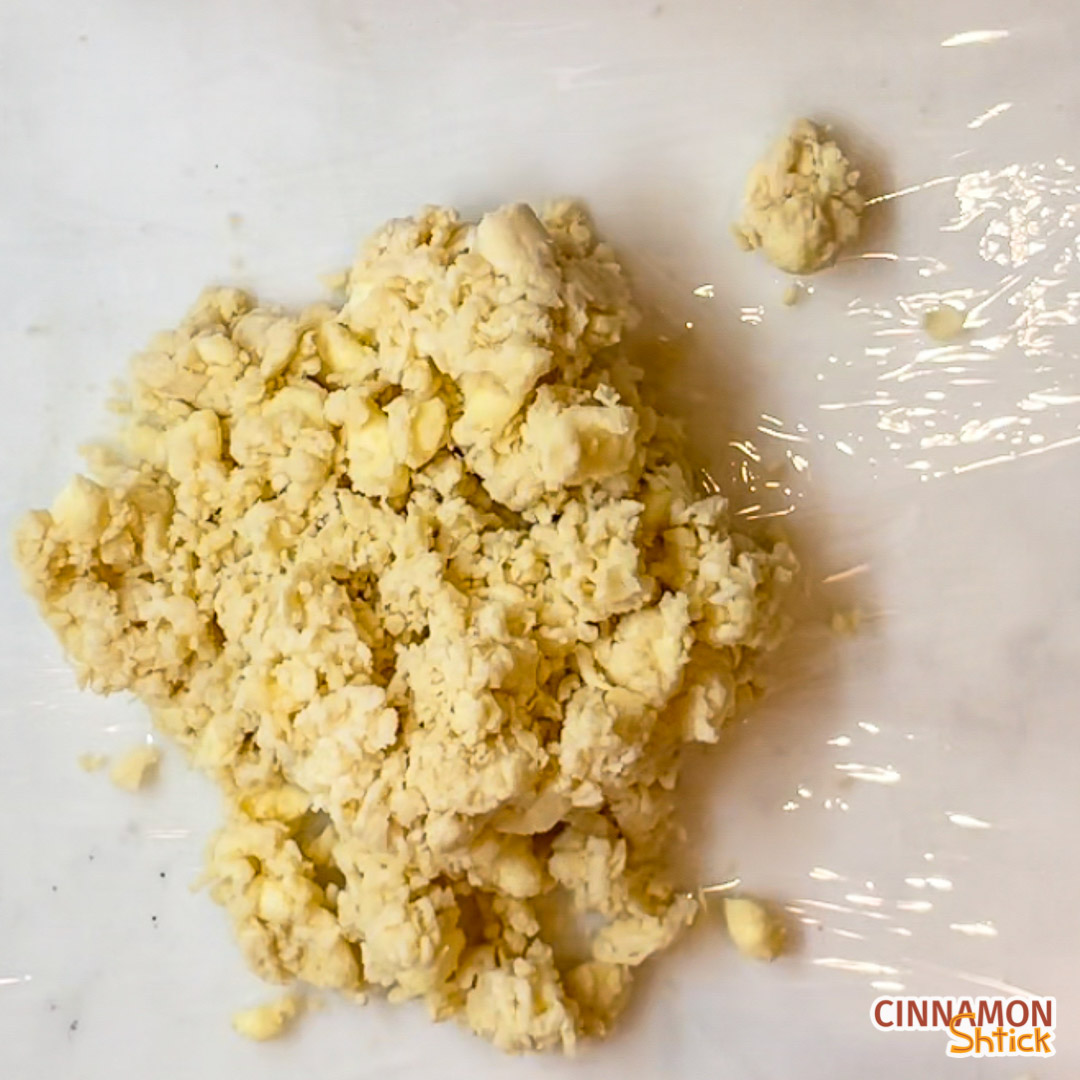
As I said, pie dough is super easy to make. For this recipe, use your fingertips to first work in the vanilla seeds to the sugar. Then whisk in the salt and the flour so that everything is well mixed up. Then dump in your cold butter, tossing it in the flour mixture to coat all the butter pieces. Use your fingertips to squeeze each piece of butter. The warmth from your hands should help to flatten the butter pieces. Keep tossing and pressing until the mixture almost resembles sand with pea-sized pieces of butter. Make a well in the middle and add about half the ice water, Use your hands to toss the flour/butter mixture into the water. Make another well and add 1 Tablespoon more of water at a time until the dough just starts to feel hydrated, being careful not to over-hydrate the dough.
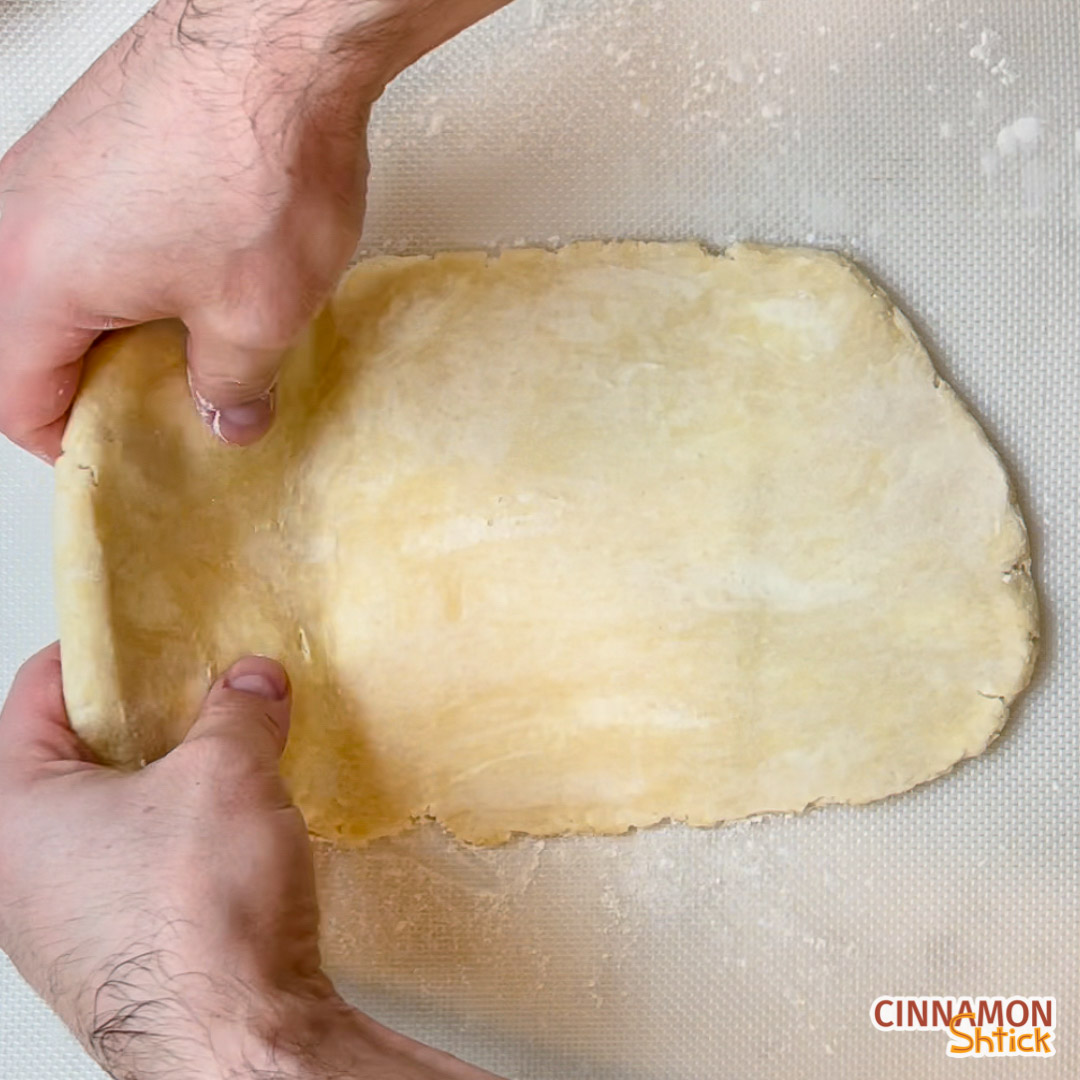
Dump approximately half the dough (it will be in broken clumps) onto a piece of plastic wrap. Use the plastic wrap to press the dough into itself. Then wrap the dough in the plastic wrap for at least 30 minutes. Repeat with the rest of the dough. You want to only work with cold dough to avoid developing the gluten.
How to Make a Super Flaky Dough
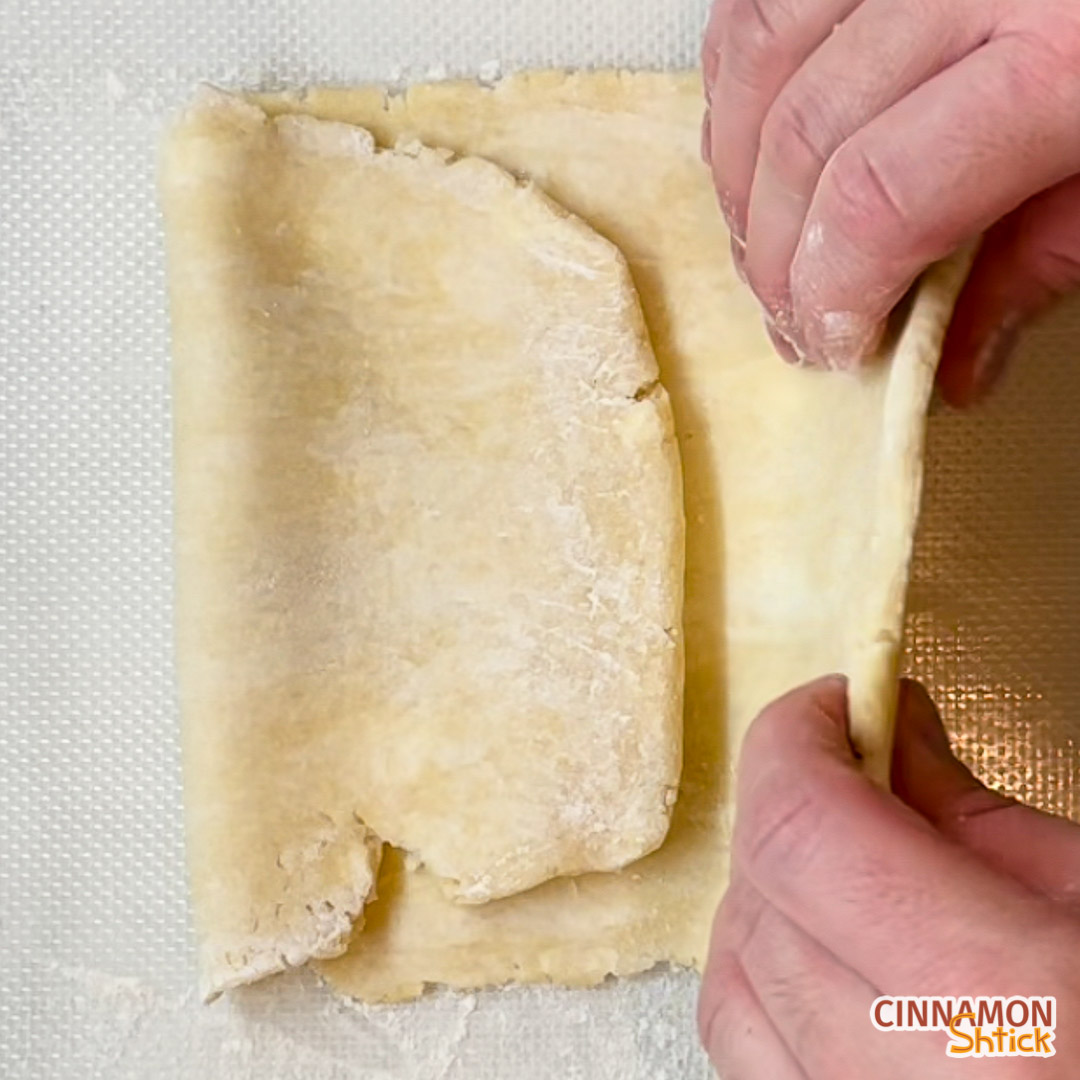
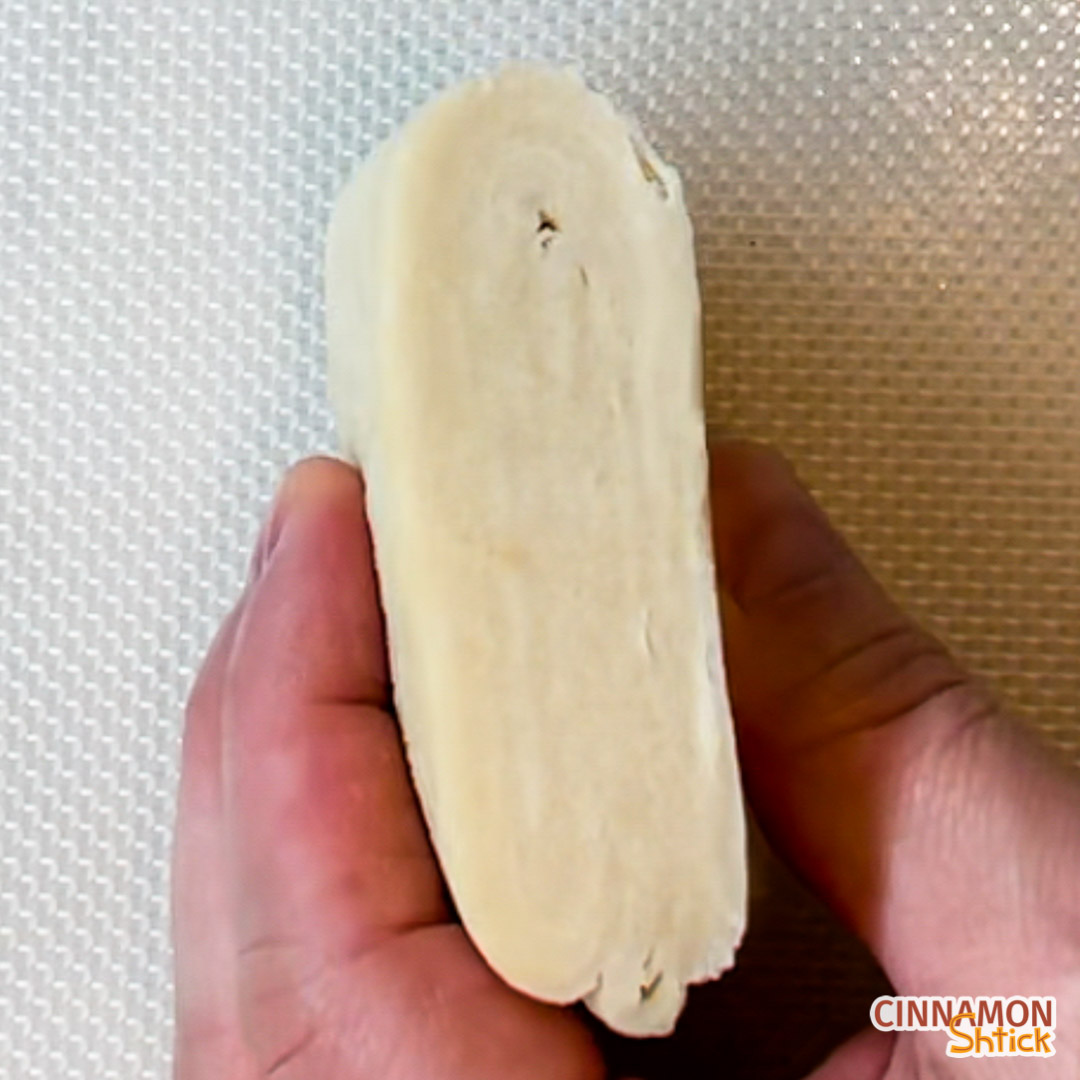
After that 30 minute rest, you can roll out your dough to fit into your pie plate. However, I like to roll my dough out (both pieces), fold them like a letter, and pop them back in the refrigerator for another half hour. Doing one or two folds will give the dough additional layers and a much flakier crust.
How to Roll Out Pie Dough
Take the bigger portion of dough from the refrigerator. Very lightly flour your work surface and rolling pin. Place the dough on the lightly floured work surface, lightly sprinkle the top with flour, and roll. If the dough is cracking, it just means that it is too cold and you should let it sit for a few minutes. Roll the dough so that it is at least a few inches in diameter bigger than your 9 inch pie plate. You want to have some dough overhang on the sides once you place it in. Keep moving the dough around to make sure it is not sticking to the work surface. If it is sticking, add a little more flour under the dough. You can also flip the dough over if the top is not as sticky.
To transport the dough into your pie plate, gently fold it in half, then in half again, without pressing on it. Place the dough so the point is in the center on the pie dish, and unfold it. Alternatively, you can roll the dough up on your rolling pin and unroll it over your pie dish.
Press the dough into the pie plate so that there are no air bubbles. If too much dough is overhanging, use scissors to trim it, but try to leave an inch or so of dough overhanging. If there are places along the edge where it seems there is not enough dough, work the trimmings into those other places. Place the pie plate with the prepared dough back in the refrigerator.


How to Make the Cherry Pie Filling
The filling for this Cherry Pie is super easy. Yes, you need to pit your cherries. It will only take a few minutes of your time, especially if you have a cherry pitter. (The one linked is what I recently bought and I love it!) No biggie. Once pitted, cut the cherries in half. This helps ensure they bake through. Then toss them in the rest of the ingredients. BOOM. You got cherry pie filling!

This recipe is written for fresh cherries. I have not made this pie with frozen or canned cherries, so I cannot tell you if either of those work in this recipe. You will likely need more cornstarch if using frozen cherries. I think that canned cherries will just be too liquidy no matter what you do, but if you try it, please let me know how it works out!
How to Cover the Cherry Pie
Take the remaining portion of dough from the refrigerator and roll it out just as you did the bottom dough. You can get creative with how you want to add a top crust to your Cherry Pie. You can make a lattice simply by cutting strips of dough and weaving them on top. Or use small cutters to cut pieces of dough to place on top.
For a Cherry Pie, I like having lots of pie dough with the filling, so I just make a whole top portion. Tuck in the overhang from the top dough behind the bottom dough. You will end up with approximately half an inch of dough sticking up from the pie plate. You can press down on that half inch with a fork or use your index finger of your less dominant hand to push the dough in between the index finger and thumb of your dominant hand to crimp all the way around.
Place the pie back in the refrigerator for about 20 minutes or the freezer for 10 minutes. You can then make your crimping or decorations a bit cleaner if you wish while the dough is cold.


Make Sure the Pie Can Vent
Using a lattice top has the added bonus that some of the filling will be exposed. If you cover the filling entirely as I do, take a paring knife and make some decorative slices so that the steam created while in the oven has somewhere escape from. Without allowing the steam to escape, there will be big air pockets between your filling and the top crust, and the bottom of the pie will end up soggy.
Bake Your Cherry Pie
Preheat your oven to 400° F with a baking sheet in it.
Just prior to baking, use a pastry brush to give the top dough (or pieces of dough) a light egg wash. Top with a coarse sugar if you have it, or just use granulated sugar.
When it’s time to bake, remove the baking sheet from the oven and place your pie on it. Bake for 20 minutes, then reduce the oven to 375° F, continuing to bake the pie for an additional 45-50 minutes. Check on it every 10 minutes or so. If any part of the top is getting too browned, cover that part loosely with aluminum foil.
The pie is done when the top is nicely browned and the fruit filling is bubbling.

How to Serve Cherry Pie
Do NOT cut the Cherry Pie until it has fully cooled. The filling will continue to thicken as it cools. If you cut the pie while it is still warm, the filling will slide out and be messy.
To cut as clean a slice as possible, use a serrated (bread) knife to press into the pie where you intend to cut. Do not saw like you would a loaf of bread. Then use a paring knife to cut along the impression you left from the serated knife. Make sure to cut all the way through the bottom crust. Slide a pie server under the bottom crust and lift.

Frequently Asked Questions About Making Cherry Pie
What size pie pan do I need for this Cherry Pie?
This recipe is for a 9-inch deep dish pie pan. I only own deep dish pie pans because I prefer more filling in my pies. I therefore have not figured out how to decrease the recipe for a regular 9-inch pie pan.
Can I make any part of the pie in advance?
Yes! You can make components in advance or even the entire pie in advance. The pie dough can be made up to 48 hours in advance, wrapped in plastic wrap and stored in the refrigerator. Also, once the pie is assembled, you can keep it in the freezer for up to a few months. Bake it directly from the freezer, but know that it may need to bake slightly longer.
Do I have to use butter in the dough?
Using a good quality, unsalted butter is what gives pie dough its flavor. That said, you can use part vegetable shortening and part butter, which some bakers prefer because shortening does not have any water and therefore tends to keep its shape better than butter when the dough bakes. (The water turns to steam and evaporates in the oven.) If you need to make your pie dough dairy free, I highly recommend using vegan butter in place of the real stuff here. I particularly like Earth Balance’s Vegan Buttery Sticks. Whatever fat you use in the dough, just remember to always keep the dough cold.

Cherry Pie
Equipment
- 9-inch deep dish pie pan
Ingredients
Pie Dough:
- 25 grams sugar (2 Tablespoons)
- ½ vanilla bean (scraped)
- 300 grams all-purpose flour (2½ cups)
- 1 teaspoon fine sea salt (or table salt)
- 227 grams refrigerator cold unsalted butter, cut into ¼ inch pieces (if mixing in a food processor, place your cut up butter in the freezer for at least 15 minutes before using) (16 Tablespoons or 1 cup)
- ½ cup ice water
Cherry Filling:
- 150 grams sugar (¾ cup)
- ½ vanilla bean, scraped
- 43 grams cornstarch (¼ cup plus 2 Tablespoons)
- ¼ teaspoon cinnamon
- 1 Tablespoon lemon juice
- ½ teaspoon vanilla extract
- 908 grams fresh cherries, pitted and halved (2 pounds)
Instructions
- Dough by hand. In a mixing bowl, rub the vanilla seeds into the sugar. Whisk in the flour and salt. Add all the butter. Using your hands, coat each piece of butter with the flour mixture. Pinch the pieces of butter to flatten them a bit. Keep working the mixture for a couple of minutes until the mixture resembles coarse sand with most of the clumps of butter the size of peas. Make a well in the middle. Add ¼ cup of ice cold water. Using your hands, scoop the flour from the sides and the bottoms to hydrate the flour with the water. Repeat, making a well in the middle and adding 1 Tbsp. of ice cold water at a time. You know you are done when the dough is slightly clumpy and becomes smooth when flattened in the palm of your hand. Divide the mixture in half, pouring each half onto a sheet of plastic wrap. Push down on the plastic wrap to flatten the dough together into a disc, making it as circular as you can. (If you plan on laminating the dough for a flakier crust, flatten to a rectangle.) Repeat with the remaining portion of dough. Place the wrapped doughs in the refrigerator for at least 30 minutes and up to 24 hours. Continue with Step 4, below.
- Dough by Food Processor. Combine all the vanilla seeds and the sugar in a food processor and pulse several times. Add the flour and salt and pulse several more times. Add all of the frozen butter. Pulse until the mixture resembles coarse sand with most of the clumps of butter the size of peas. Add ¼ cup of ice cold water and pulse a few times to combine. If the mixture is too dry, add more of the ice cold water 1 Tbsp. at a time. You know you are done when the dough is slightly clumpy and when flattened in your palm it is smooth. Divide the mixture in half, pouring each onto a sheet of plastic wrap. Push down on the plastic wrap to flatten the dough together into a disc, making it as circular as you can. (If you plan on laminating the dough for a flakier crust, flatten to a rectangle.) Repeat with the remaining portion of dough. Place the wrapped doughs in the refrigerator for at least 30 minutes and up to 24 hours. Continue with Step 4, below.
- Dough by Mixer. In the mixing bowl of an electric mixer, rub the vanilla seeds into the sugar. Add the flour and salt and mix on low with the paddle attachment until fully combined. Add the refrigerator cold butter and mix until the mixture resembles coarse sand with most of the clumps of butter the size of peas. With the mixer on low, slowly add ¼ cup of ice cold water. If the mixture is too dry, add 1 Tbsp. of ice cold water at a time. You know you are done when the dough is slightly clumpy and when flattened in your palm it is smooth. Divide the mixture in half, pouring each onto a sheet of plastic wrap. Push down on the plastic wrap to flatten the dough together into a disc, making it as circular as you can. (If you plan on laminating the dough for a flakier crust, flatten to a rectangle.) Repeat with the remaining portion of dough. Place the wrapped doughs in the refrigerator for at least 30 minutes and up to 24 hours. Continue with Step 4, below.
- Remove the larger piece of dough from the refrigerator and lightly flour the countertop. Also lightly flour a rolling pin. Place the dough on the lightly floured countertop. Lightly flour the top of the dough.
- Optional: To make a super flaky dough, roll the dough into a long rectangle. Fold the top ⅓ down from the top, then fold the bottom ⅓ up towards the middle, like folding a letter, brushing off any excess flour as you fold. Rotate the dough 90° and roll out into a rectangle again. Repeat the folds one more time. Wrap again in plastic wrap and refrigerate 30 minutes.
- Roll the dough out so that it is a circle (or circle-ish), approximately 12 inches in diameter. The dough should be rolled out enough to go up the sides of the pie plate with at least a couple inches overhanging. (If the dough cracks when you first start rolling, let it sit on the counter for a couple minutes. It just means the dough is too cold.)
- To transport the pie dough into the pie plate, gently fold the dough in half, and again into quarters, being careful not to press down. Lift the dough up and place the pointed corner into the center of the pie plate. Unfold the dough. (Alternatively, roll the dough onto the rolling pin and unroll it over the pie plate.) Press the dough into the pie plate to make sure there are no air pockets. If the dough overhangs by more than a couple of inches, use scissors to trim it. Use the trimmings to fill in any shorter spots. Place the pie plate in the refrigerator for at least 30 minutes.
- Cherry Filling. In a bowl, press the vanilla seeds into the sugar. Mix in the cornstarch and cinnamon. Toss the cherries in the mixture. Add the lemon juice and vanilla extract, tossing until combined.
- Line a baking sheet with aluminum foil and place in oven. Preheat the oven to 400° F.
- Remove the remaining pie dough from the refrigerator and roll it out into a 12 inch diamater cirlce. Remove the pie dish from the refrigerator and fill it with the cherry filling. Place the rolled out top dough over the pie, tucking the overhang between the bottom pie dough and the pie dish. There should be approximately ½ an inch of dough above the pie plate. Use a fork to press down a decorative pattern or crimp the dough using the index finger of your non-dominant hand to push into the dough between the index finger and thumb of your dominant hand. Place the pie in the freezer for 10-15 minutes or the refrigerator for 30 minutes.
- Prepare egg wash by mixing together an egg with 1 tsp. of water. Once the dough is cold, you can "clean up" any crimping. Use a paring knife to make decorative cuts into the top pie dough. Using a pastry brush, apply a thin layer of egg wash. Sprinkle coarse or granulated sugar on top. Remove baking sheet from oven and place pie plate on it. Return to oven and bake for 20 minutes.
- After 20 minutes, reduce heat to 375° F and continue to bake for 40-50 minutes, checking the pie after 30 minutes. If the top is browning too much on top, cover that part loosely with foil. The pie is done when the top is nicely browned and the fruit is bubbling up. Allow to cool completely before cutting.
Notes
- For best results, make sure the dough is always cold prior to putting the pie into the oven. If the dough gets too warm at any point, stop and put it back into the refrigerator for 20-30 minutes.
- It is best to put the pie in the oven when it is cold. Once fully shaped and before applying the egg wash, place it in the freezer for 15 minutes or the refrigerator for 30 minutes.
- Do not cut the pie until it has completely cooled to at least room temperature.
- Store the pie in an airtight container or with plastic wrap. It should keep for several days at room temperature, but we enjoy this pie cold, so I keep it in an airtight container in the refrigerator where it is good for up to one week.
3 Comments
Now THIS is a pie! Will definitely be making it again!
This looks so yummy. The crispiness outside and the juiciness inside make it so enticing and tempting. Got to make this at home and indulge the family with it.
I love this pie. Simple ingredients that made those cherries pop. Thanks, I’ll be making this again.