
This post may contain affiliate links. As an Amazon Associate, I earn from qualifying purchases. For more information, please visit my Privacy Policy.
Have you noticed that, when you go to an ice cream shop, most maple ice cream has nuts in it? It’s usually maple walnut. Why is that? I mean, I get it — the flavors pair well. And don’t get me wrong. I enjoy those flavors together. But there has to be other mix-ins for a maple ice cream. There just has to be!
I had a hankering for maple ice cream a couple weeks ago. Clearly, I wanted something else in it other than nuts.
I love lots of junk in my ice cream. The different flavors and varying textures comprise a symphony in each spoonful. I started thinking about what else I could mix into my maple ice cream: Oreos, cookie dough, cookies…. Too obvious.
Then, out of nowhere, my hankering drifted to a deep craving for a blueberry pie. (Yes, my cravings flow from one sweet to another. Constantly.) That’s when I realized, I wanted blueberry pie with maple ice cream. Voila! There’s a different mix-in for maple ice cream!
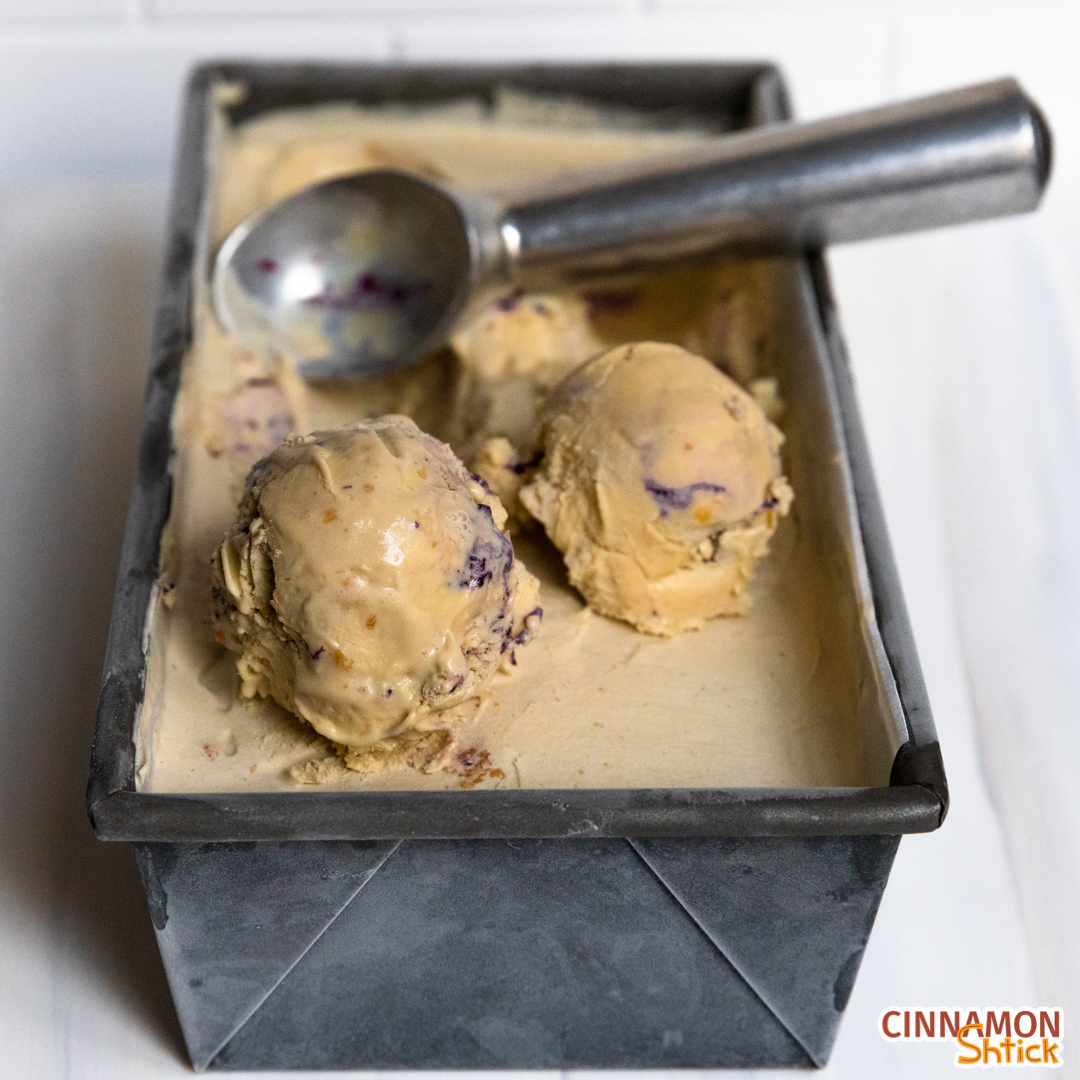
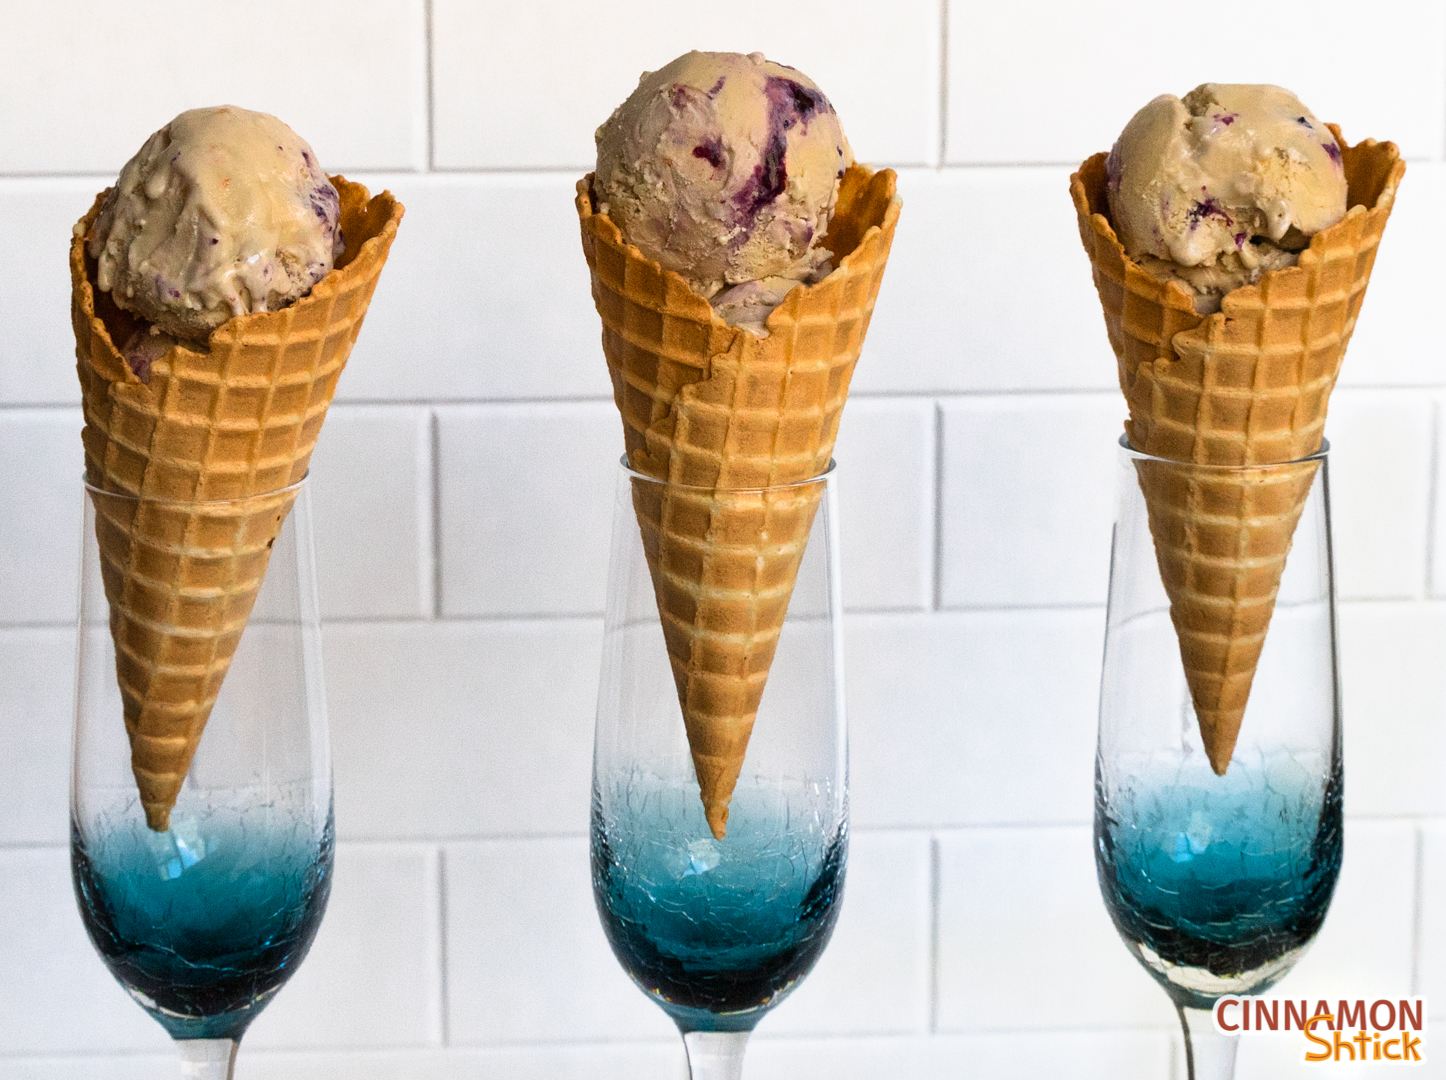
So, I present to you my Maple Blueberry Pie Ice Cream!
Don’t like Blueberry Pie? This Maple Ice Cream is Divine on Its Own
Let’s just get something straight right at the outset here. If you don’t like blueberries or blueberry pie, or if you don’t like junk in your ice cream, that’s perfectly acceptable. I mean, I will judge you, but it’s acceptable. I’m telling you that because this maple ice cream is downright freakin’ delish. So, if you want maple ice cream with nothing mixed in, this is your recipe. If you want maple walnut ice cream, toast up some walnuts (probably about 1/3 to 1/2 cup), cool them, chop ’em up, and mix them in just after you churn the ice cream. Want Oreos mixed in? Fine! Just do it! But this is your go-to maple ice cream base. Trust me.
OK. With that out of the way, let’s get back to this divine ice cream treat.
What makes this so fun and delish is that maple is the prominent flavor. The blueberries from the “pie” create beautiful color and give a lovely background taste of blueberry pie. The pie crust maintains its flakiness, even frozen, and adds a delightful crunch to the ice cream. If you like lots of junk in your ice cream, this recipe is for you.
For more in-depth tips on making ice-cream generally, check out my Cinnamon Stick Ice Cream Post.
Here are a few tips for making this Maple Blueberry Ice Cream:
Use Pure Maple Syrup
This is not the time to be using your kid’s watered down, corn syrup-fake maple syrup. If that’s what you’re working with, do not bother making this recipe. Harsh, I know, But I wouldn’t want you wasting your time. When it comes to pure maple syrup however, there are different grades. Long story short, when I was making this years ago, I would shop for Grade B maple syrup because it is darker in color and more robust in flavor. Good luck finding Grade B these days though. For whatever reason, “they” (I don’t really know who “they” are; hence the quotes) changed the grading system. So, what I knew as Grade B is now called Grade A Dark Color. (For more information about syrup grades, check this site out.) In an ideal world, that’s what you should look for. But do not panic if you cannot find it. I have made this ice cream with Grade A Amber Color, and I am here to tell you that it came out AH-MAZ-ING! That may also be due to how I cooked down the syrup.
Carefully Cook Down the Maple Syrup
This recipe requires you to cook down the maple syrup to eliminate the water. You need to watch it carefully, as you do not want to burn it. That said, over-cooking it (without burning it) takes it to the caramel stage, which I love, and is what I did with my Grade A Amber Color syrup. The key is to stir it constantly as you cook it. The syrup will go from, well, syrupy, to a thicker, honey-like consistency. Again, be carefully not to cook it too long after it thickens, as it will burn. When you add the cold milk/cream, that caramel will seize and harden. That’s ok. As you heat the mixture back up, the caramel will dissolve into the milk and cream. Just keep stirring. And don’t panic!
Prepare the Pie Dough Like Usual, but Don’t Think About it
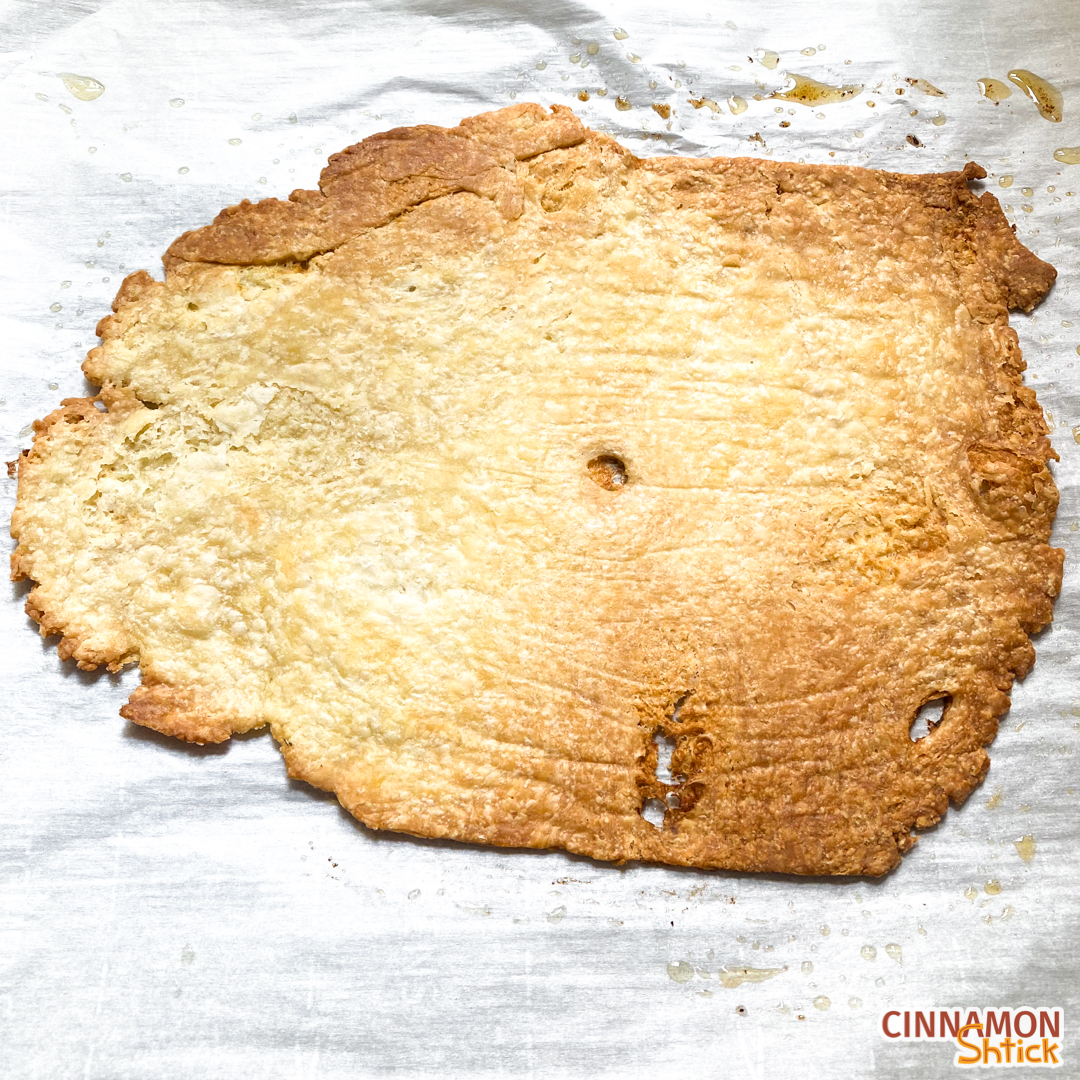
You want a typical, flaky pie dough, so you want to keep the butter and water cold, and the dough cold once formed. But, since the “pie” is getting carved up and tossed into the ice cream, no one cares how the dough looks. Just roll it out so it is approximately 1/8 of an inch thick. Shoot for a rectangle, but if you get some awkward and ugly oval (as I did), that’s quite ok! No one will ever see it. You will be blind-baking this dough.
Say what? Blind baking just means baking the dough by itself without the filling. Since this is not a traditional pie, the actual pie does not go into the oven. So we need to pre-bake the pie dough. If you just toss it on a baking sheet and pop it into the oven, the dough will rise all over the place. (Nerd alert: That’s due to the layers of butter in the dough. As the water from the butter dehydrates, it pushes the dough up.)
You can dock the dough (punch endless holes in it with a fork everywhere), but there’s really no need for that here. Simply put a piece of parchment paper over it, then place another baking sheet or jelly roll pan on top of it, and bake. The weight from the baking sheet or pan on top will prevent the dough for rising. Remove the baking sheet or pan and the parchment for the last 5 minutes or so of baking so that the middle of the dough gets a light golden color.
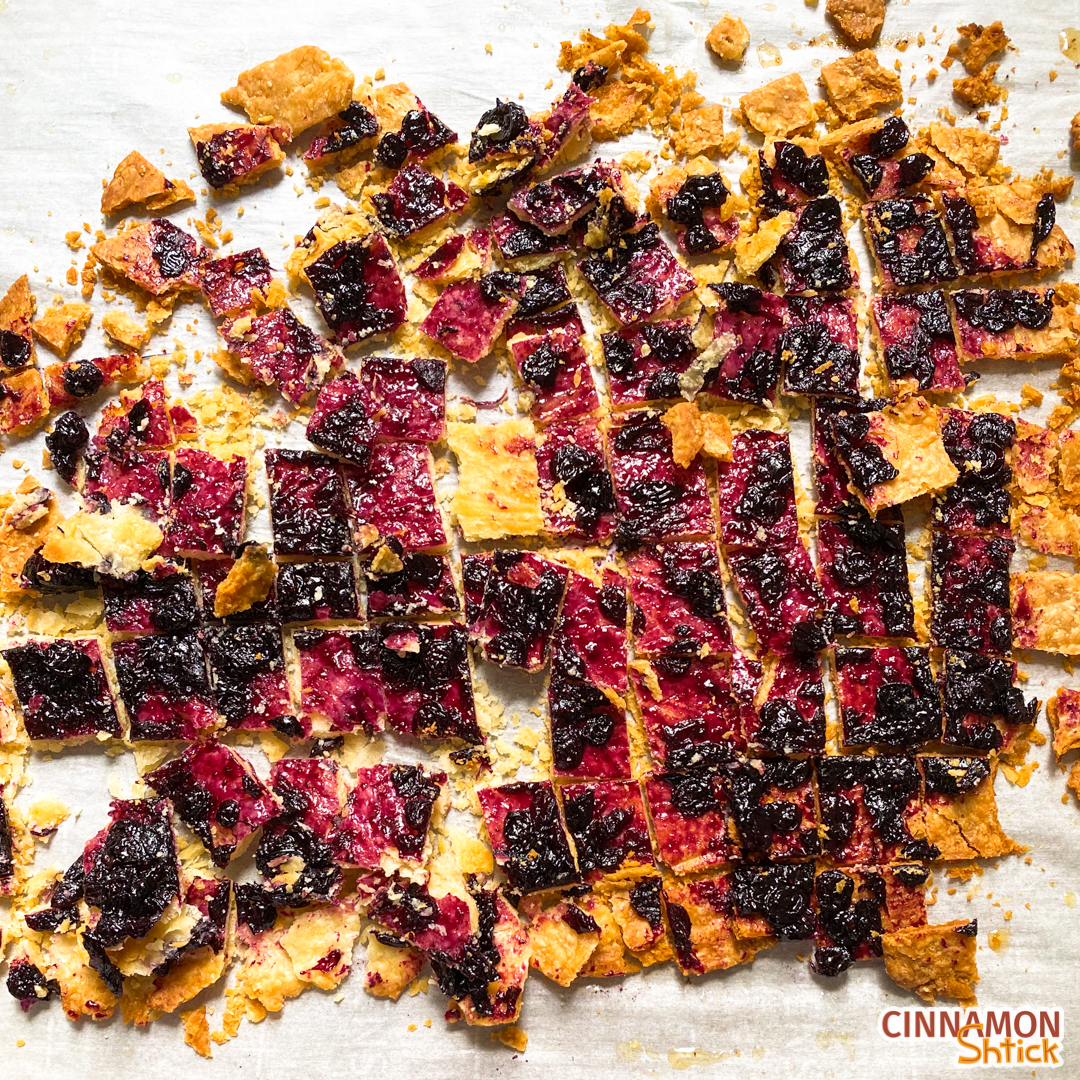
Cook Up the Blueberry Mixture
You will cook the blueberries on the stovetop. The whole process takes no more than 5 minutes, and this can be done well in advance. Just store the blueberry mixture in an airtight container in the refrigerator. Make sure to use as sweet as possible blueberries, if using fresh ones. Frozen ones work well here.
Churn and Toss in the Pie Bits
As you churn the ice cream, spread the blueberry mixture on top of the weird shaped pie crust. Cut into small, bite size pieces. Once the ice cream is done churning, mix in the pieces. Freeze at least several hours so that the mixture fully hardens before you start stuffing your face.
Looking to use up the leftover egg whites? Check out my Chocolate Egg White Cake.
Maple Blueberry Pie Ice Cream
Ingredients
Ice Cream Base
- 322 g. pure maple syrup [See Note, below] (1 cup)
- 550 g. whole milk (2 cups plus 2 tbsp.)
- 255 g. heavy cream (1 cup plus 1 tbsp.)
- ¼ tsp. salt
- 6 egg yolks
Pie Crust
- 105 g. all-purpose flour (¾ cups plus 2 tbsp.)
- 13 g. sugar (1 tbsp.)
- ½ tsp. fine sea salt (or table salt)
- 57 g. refrigerator cold unsalted butter, cut into ¼ inch pieces (4 tbsp.)
- 1½ - 2 tbsp. ice cold water
Blueberry Pie Filling
- 1½ cups blueberries (fresh or frozen)
- 100 g. sugar (½ cup)
- 4 tsp. water (1 tbsp. plus 1 tsp. water)
- ¼ tsp. cinnamon
- Small pinch of ground cloves
Instructions
- Ice Cream Base. Fill a large bowl half-way with ice. Pour cold water over the ice, filling the bowl no more than two-thirds high. Place a clean bowl on top of the water bath. Place a strainer over the empty bowl.
- Combine the milk and heavy cream in a large measuring cup or a bowl. Set aside.
- Boil syrup in a 3 or 4-quart saucepan over moderately high heat until reduced to approximately 3/4 cup (242 g.), 5 to 10 minutes. To keep it from burning, stir it frequently. (For deeper flavor, take it to the caramel stage by cooking until the syrup is thick, stirring constantly.) Carefully whisk in the milk and cream. (It will bubble up initially). Add salt and bring to a boil over medium heat. (If your syrup caramelized, it will likely seize up and harden when you add the milk and cream. Do not panic! Keep heating it up and stirring constantly. The caramel will liquify as the mixture heats up again.) Continue heating until the mixture comes to a simmer.
- When you first turn the heat on for the syrup, vigorously whisk the egg yolks in a medium size bowl to aerate them as much as possible.
- Once the liquid mixture comes to a simmer, turn the heat off and let it sit for a minute or two. With the bowl holding the egg yolks secured on the counter (if no one is around to hold it, place it on a rubber mat or wrap a wet around the base of the bowl), slowly pour half the heated liquid mixture into the yolks, whisking constantly. Once fully incorporated, pour the contents of the bowl back into the saucepan. Over a medium-low heat, stir the mixture constantly with a wooden spoon until it reaches 185°F or a line holds when you drag your finger across the back of the wooden spoon. (It should only take a minute or two to reach the correct temperature.)
- Pour custard through the strainer into the clean metal bowl on top of the ice bath. Stir occasionally. After 10-15 minutes, the mixture should be at room temperature. Place plastic wrap on top of (literally touching) the ice cream base and chill in the refrigerator at least 4 hours and preferably overnight.
- Pie Crust. In a mixing bowl, whisk together the flour, sugar and salt. Add all the butter. Using your hands, coat each piece of butter with the flour mixture. Pinch the pieces of butter to flatten them a bit. Keep working the mixture for a couple of minutes until the mixture resembles coarse sand with most of the clumps of butter the size of peas and some larger pieces the size of walnuts. Make a well in the middle. Add 1 tbsp. of ice cold water. Using your hands, scoop the flour from the sides and the bottoms to hydrate the flour with the water. If the mixture is too dry, create another well in the middle and add an additional 1/2 tbsp. of ice cold water. Repeat if necessary. You know you are done when a clump of dough flattened in your palm is smooth. Pour the entire mixture onto a sheet of plastic wrap. Push down on the plastic wrap to flatten the dough together into a rectangle. Refrigerate at least 30 minutes.
- Roll dough out to a rectangle. You are not looking for perfection here. The important thing is to roll it out to approximately 1/8 of an inch. Place in freezer for 15 minutes or refrigerator for 30 minutes.
- Preheat oven to 400°F. Place a piece of parchment paper over the top of the dough and a baking sheet on top of the parchment paper. Place in oven and bake for 16-17 minutes, until the sides of the dough are browned. (You will have to pull off the top baking sheet and parchment to check on the dough.) Remove the top baking sheet and parchment sheet and continue baking 4-5 minutes. Remove from oven and allow to cool completely.
- Blueberry Pie Filling. Combine all ingredients in a small saucepan and bring to a boil over medium heat, stirring with a wooden spoon and crushing the blueberries as it cooks. Cook approximately 5 minutes until the blueberries are soft and the mixture is thick and deep blue in color. Allow to cool to room temperature. Spread on prepared pie crust.
- Churning and assembly. Freeze custard in ice-cream maker following the manufacturer’s instructions. In the meantime, cut the prepared “blueberry pie” into small pieces, approximately ¼ of an inch squares. Once the ice cream is done churning, add the blueberry pie pieces and churn until fully combined. (Alternatively, fold in blueberry pie pieces with a rubber spatula.) Transfer to an airtight container and cover with a piece of parchment paper or plastic wrap directly on the surface. Cover container and freeze.
Notes
- When selecting a maple syrup, you want pure maple syrup. Do not use syrup with anything added to it, like corn syrup. Pure maple syrup is generally designated with different grades which identify the point in the season the syrup was produced. Lighter maple syrup is generally produced earlier in the season. For some reason, they changed the grading system in recent years, so what was Grade B (which is a bit darker, produced later in the season), is now known as Grade A Dark Color. That is probably the most ideal syrup to use for this ice cream. However, I have used Grade A Amber Color and it came out downright delish, although I did cook it to the caramel stage. For more information on syrup grading, visit this site.
- You can make the blueberry pie filling as much as several days in advance and store it in an airtight container in the refrigerator. I suggest making the pie crust the day that you plan on mixing it into the churned ice cream so that you do not lose the flakiness of the crust, which you still experience even when it is frozen.
2 Comments
Great directions here. What a fun ice cream flavor.
Absolutely delicious!