
This post may contain affiliate links. As an Amazon Associate, I earn from qualifying purchases. For more information, please visit my Privacy Policy.
It should go without saying that I have tried many, many different cinnamon roll recipes. Honestly, most of them are darn good! I mean, you take a bread/brioche/challah type recipe, roll it in cinnamon sugar, and top it with a sensible icing — how can you go wrong?!?
But my go-to cinnamon roll recipe over the past several years is this one from none other than Martha Stewart. Why am I sharing this recipe?
First, I first think you all should try it because it really is delicious.
Second, as I often find with many of her recipes, it is not well written. Yeah, I said it.
Listen, Martha has created quite an empire doing what she does, and for that I could not respect her more. But, I have to say, most of her recipes have problems as written. I believe the list of ingredients is generally correct (although, in my opinion, sometimes the amounts of certain ingredients or components are a bit off, like in this cinnamon roll recipe), but more often than not, the instructions are off. In this cinnamon roll recipe, as written, she (I say “she” knowing that it is unlikely that Martha herself wrote this recipe) says that the rolled up log should be 18 inches long. Then she says to trim the ends of both sides. Then she says to cut 12 rolls, each 1 1/2 inches. Um, I’m no math wiz, but having less than 18 inches does not allow you to cut 12 rolls, each 1 1/2 inches.
OK, I feel better now that I got that rant off my chest.
Even though I usually find issues with Martha’s recipes, she does have some good ones to use as a starting point. For example, this dough recipe is downright delicious and one of the fluffiest, pillowiest doughs I have encountered in a cinnamon roll. (Brava, Martha!) I’m sharing it here so that you have more accurate instructions on how to make it. I also made a slight change to the filling.
As I said, what makes this recipe worthy of repeat baking is the dough. It is special. It is smooth, fluffy, pillowy, and wonderful. Question: Why is that so? Answer: Potato!
Seriously — there is a mashed potato in the dough. What’s a potato doing in there? Potato is what makes this dough so fluffy and pillowy. (Nerd alert: The starch in the potato absorbs more of the liquid in the dough and improves fermentation. The result is a soft and moist dough that tends to stay fresh longer.)
The first few times I made this recipe though, I did not feel like I was getting enough cinnamon sugar in every bite. The only change I made to the original recipe was to increase the cinnamon sugar mixture by 1.5. I feel that is an appropriate amount of deliciousness to accompany such a divine dough.
I also converted the ingredients from measurements into weights which, as you know (see my post on Weighing v. Measuring), is my preferred way to bake.
Among the reasons why this recipe is my go-to is that you can make the dough the day/night before so that you can be munching on these babies for breakie the next morning.

Here are a few tips for making these cinnamon rolls:
- When kneading the dough, really let it knead for about 15 minutes. (If kneading by hand, add at least a few minutes of kneading time.) You want to fully develop the gluten. Your dough will be smooth, shiny and sticky.
- For sticky doughs like this, a great tool to use is a bowl scraper, which is basically a plastic bench scraper that can bend easily as you scrape the side of your bowl. It’s a brilliant tool! I use these bowl scrapers. Oh, and these bowl scrapers are fabulous to use to knead by hand, especially with a stickier dough like this one.
- I recommend rolling out the dough on parchment paper that is lightly floured. You will also want to lightly flour the top of the dough as you roll it out. Use just enough flour so that you can roll it out without it sticking. Be careful not to add too much flour back into the dough.
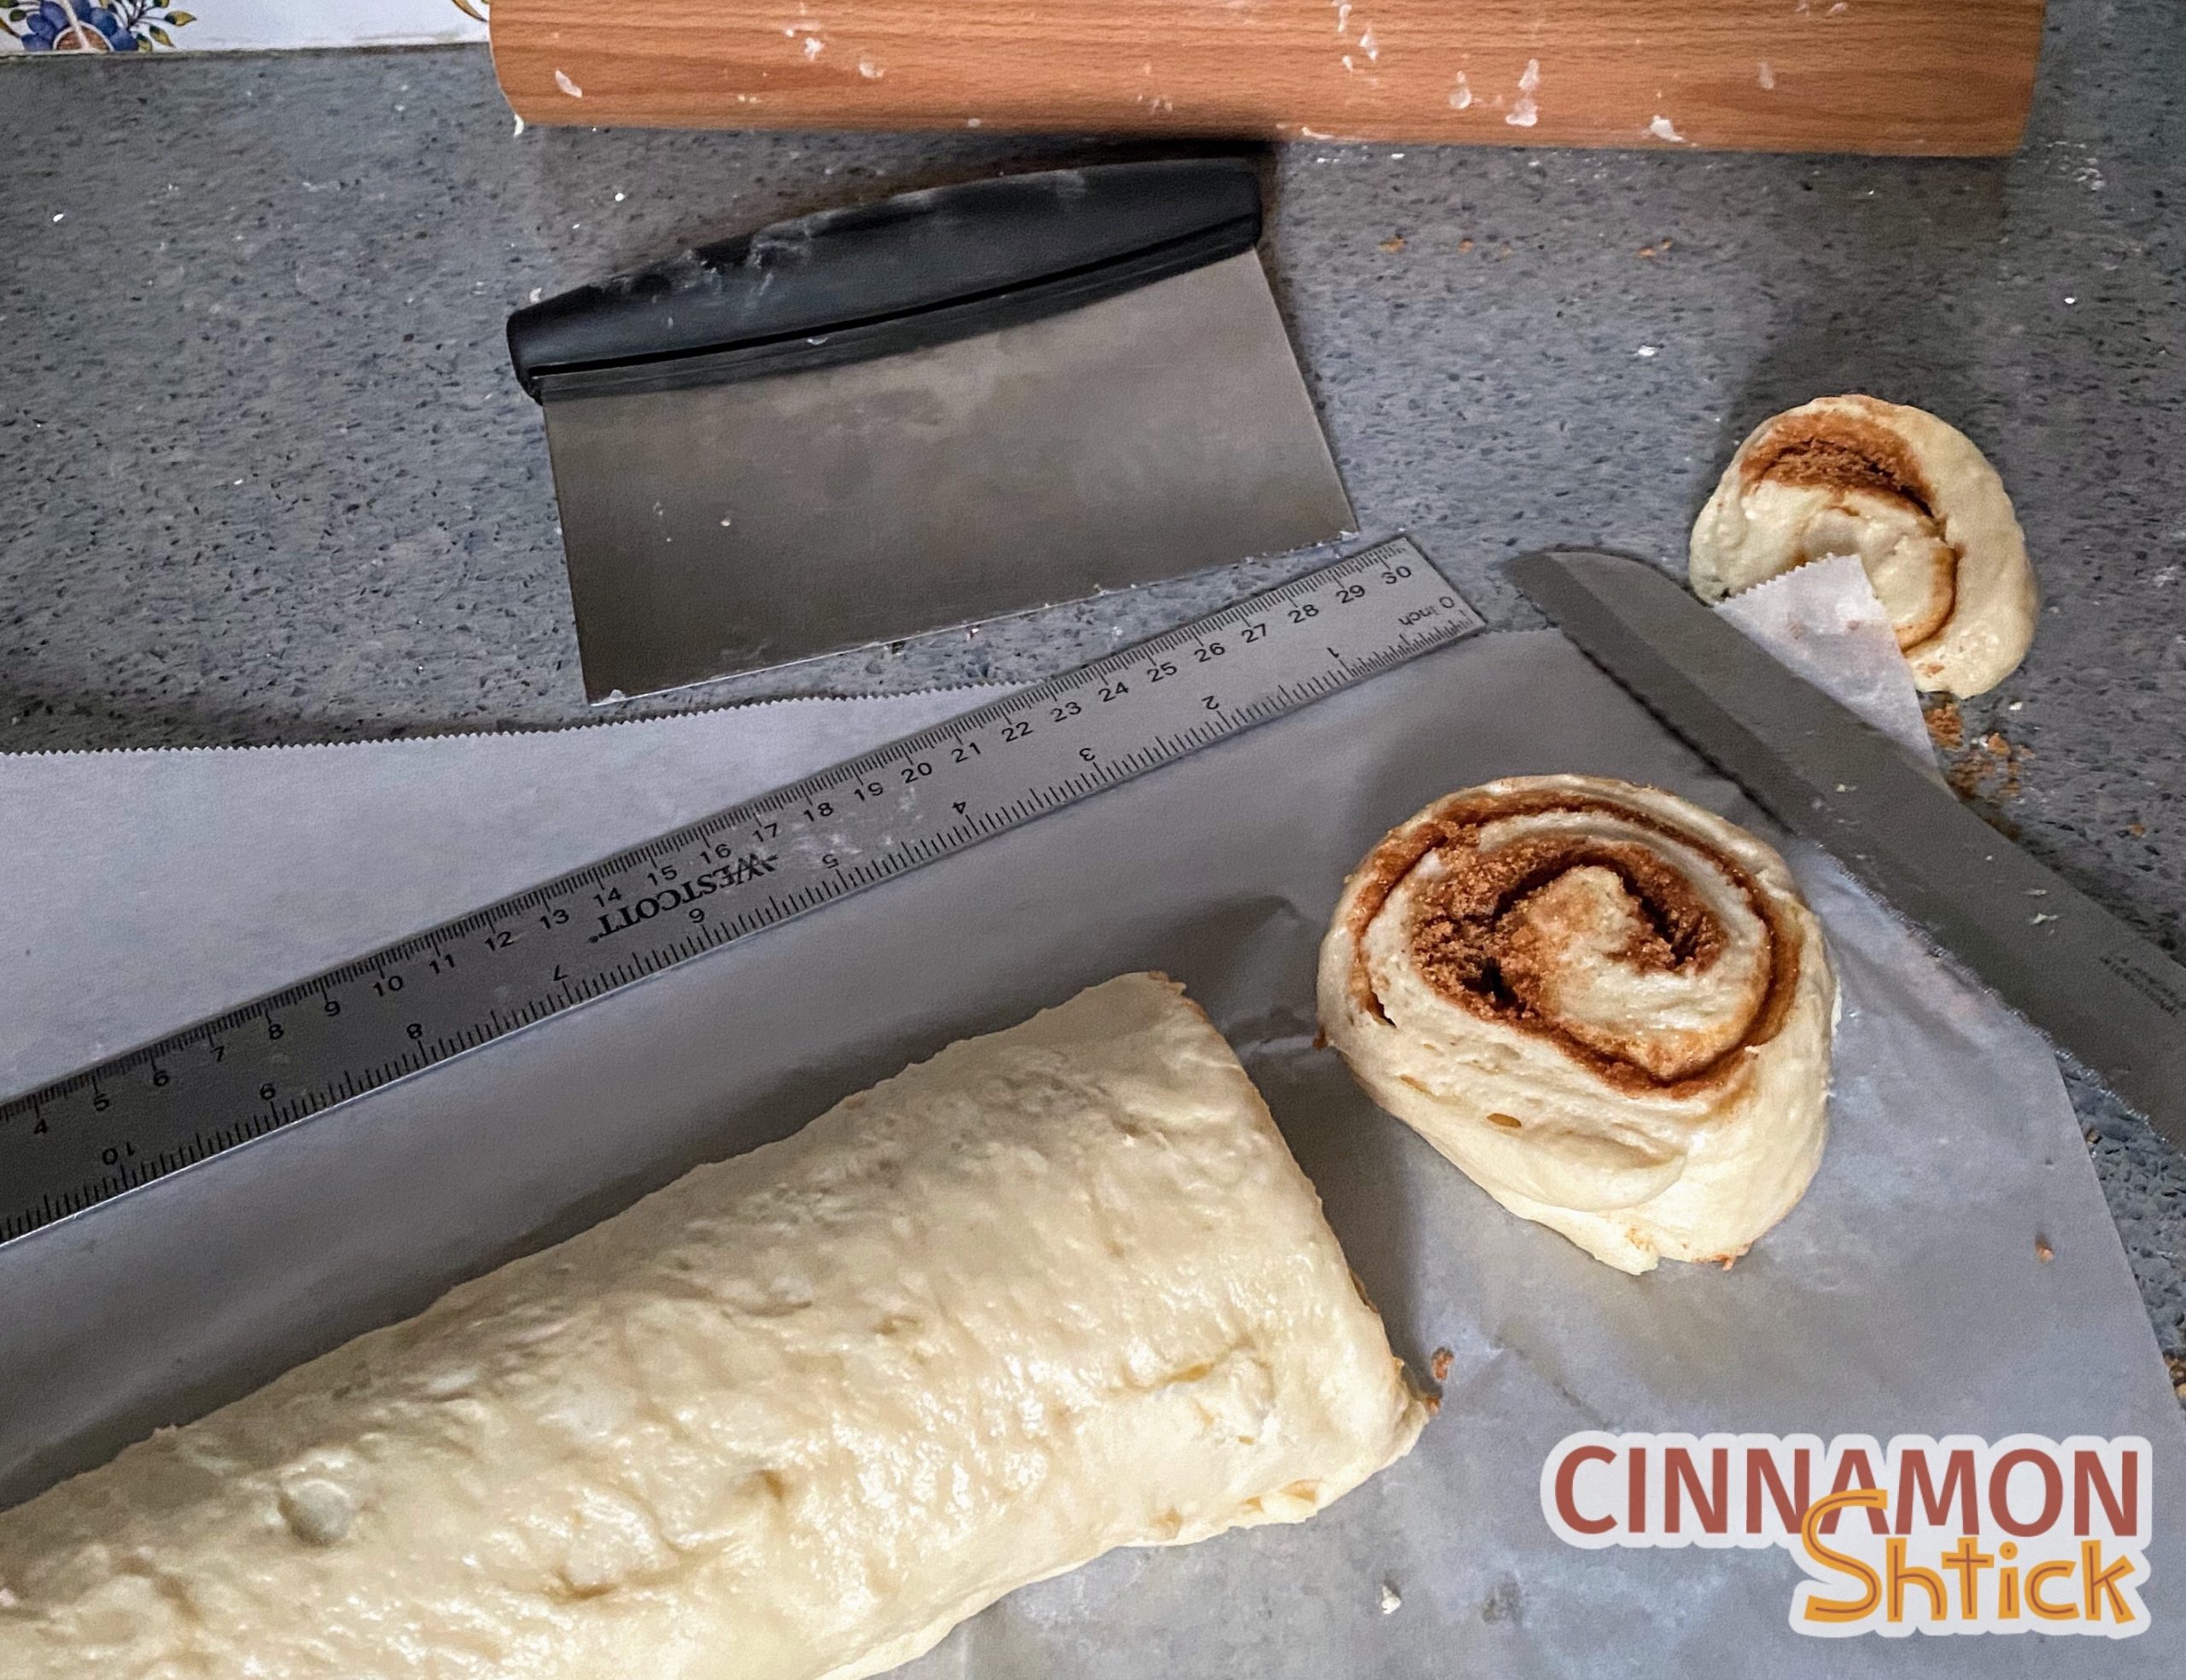
- Refrigerating the rolled up log of dough will make your life soooooo much easier, so do not skip this step! You do not need dental floss to cut your rolls. (I find using floss too cumbersome.) Just use a serrated knife. You will get beautifully cut rolls with the slightly chilled dough.
- Use a ruler! Of course it will look great when all your rolls are about the same height, but cutting them all the same size will help ensure that the rolls bake evenly.

Cinnamon Rolls
Ingredients
Dough:
- 1 medium russet potato peeled and cut into ½ inch pieces (You will not use the entire potato.)
- 85 g. unsalted butter (6 tbsp.)
- 245 g. milk (1 cup)
- 7 g. active dry yeast (2¼ tsp. or one envelope)
- 133 g. sugar (⅔ cup)
- 1 large egg, at room temperature
- 420 g. bread flour (3½ cups)
- 1½ tsp. kosher salt
Filling:
- 220 g. light brown sugar (1 cup)
- 8 g. ground cinnamon (1 tbsp.)
- ¼ tsp. kosher salt
- 85 g. unsalted butter, at room temperature (6 tbsp.)
Glaze:
- 113 g. cream cheese, at room temperature (4 oz.)
- 55 g. confectioners’ sugar (½ cup)
- 1 tsp. vanilla
- Pinch kosher salt
- 30-45 g. milk (2-3 tbsp.)
Instructions
- Dough. Lightly grease a bowl with non-stick spray and set aside. Place cut up potato in a small pot of water and bring to a boil. (Do not salt the water.) Cook for about 10 minutes until a fork inserted into the potato pieces can be inserted easily. Drain the potatoes and mash with a fork. Measure out 146 g. (2/3 cup) and allow to cool slightly.
- While the potatoes are cooking, in a small pot or saucepan, melt the butter over low heat and allow to cool.
- Heat milk to slightly above body temperature (generally between 105°F and 110°F) in a small pot or in the microwave at 20 second intervals, stirring after each interval. Transfer warmed milk to the bowl of your mixer. Sprinkle the yeast over the milk. Add a pinch of the sugar. Using a fork, stir the mixture to distribute the sugar and to ensure all the yeast granules are hydrated. Allow to sit for approximately 3-5 minutes until the mixture gets foamy.
- Add the melted butter, mashed potato, sugar, egg, and bread flour. With the dough hook attachment, knead on a medium speed for about 7 minutes, stopping the mixer every couple of minutes to scrape down the sides of the bowl. With the mixer on a lower speed, slowly add the salt. Increase mixer speed to medium and continue kneading for an addition 7-8 minutes, again stopping the mixer every couple of minutes to scrape down the side of the bowl. If the dough seems too wet and sticky, add 1 tbsp. of flour. However, the dough should not entirely clean the sides of the bowl as it is kneaded and should be slightly sticky.
- Place dough into the lightly greased bowl, turn it over once. Cover with plastic wrap and allow to double in size, approximately 1½ hours. (Alternatively, the dough can be refrigerated, covered with plastic wrap, for up to 2 days.).
- Prepare a 9 inch by 13 inch pan by either lining it with parchment paper, spraying it with non-stick spray, or buttering it.
- Filling. In a bowl, stir the brown sugar with the cinnamon and salt. Set aside.
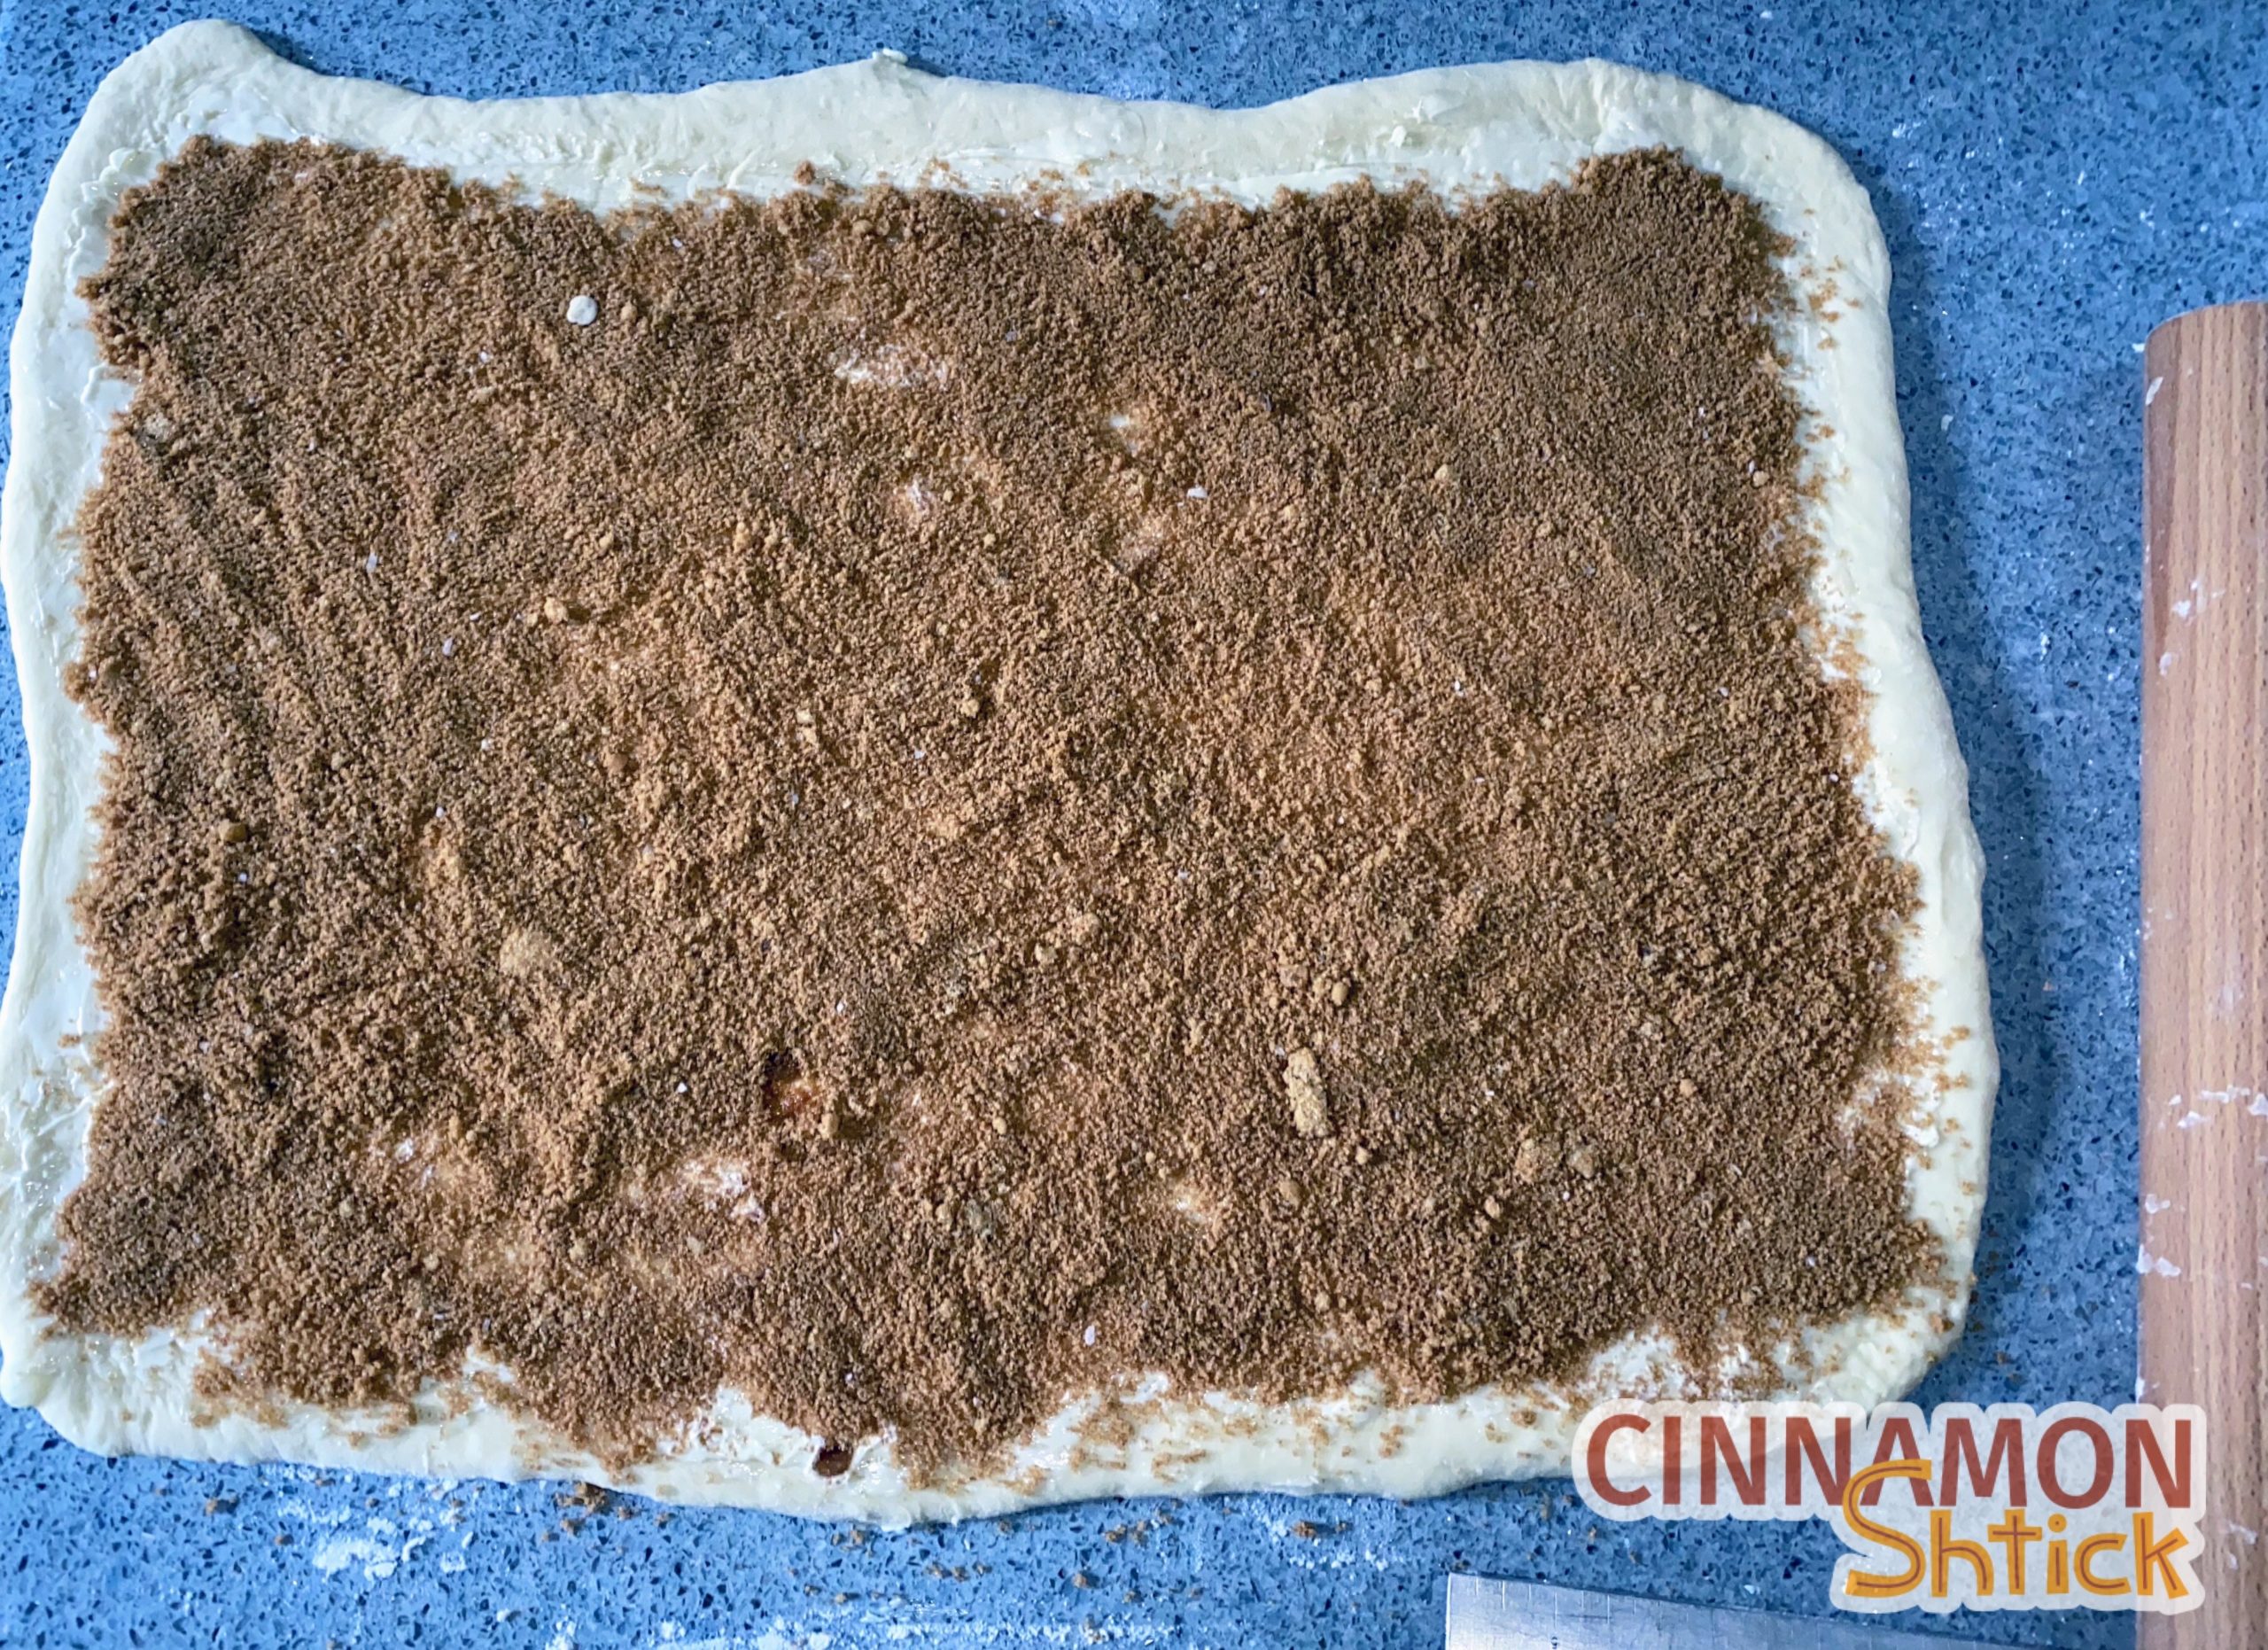
- Punch down the dough, giving it two or three kneads. Roll it out to a rectangle, at least 19 inches long and about 14 inches wide. Have the dough facing you so that the width is 19 inches and the 14 inches runs vertically.
- Spread the room temperature butter all over the dough, leaving ¼ inch border across the top unbuttered.
- Sprinkle the filling all over the butter and spread it evenly.
- Roll the dough up, away from you, in a tight roll. If the dough is sticking, flour a bench scraper to slide under the dough as you roll, or, if you are rolling on parchment paper, use the parchment to lift the dough up and roll it onto itself. Pinch the seam closed. Place log, seam side down, on a piece of parchment paper and cover loosely with plastic wrap. Place in refrigerator for 30 to 60 minutes, just until the dough is somewhat firm.
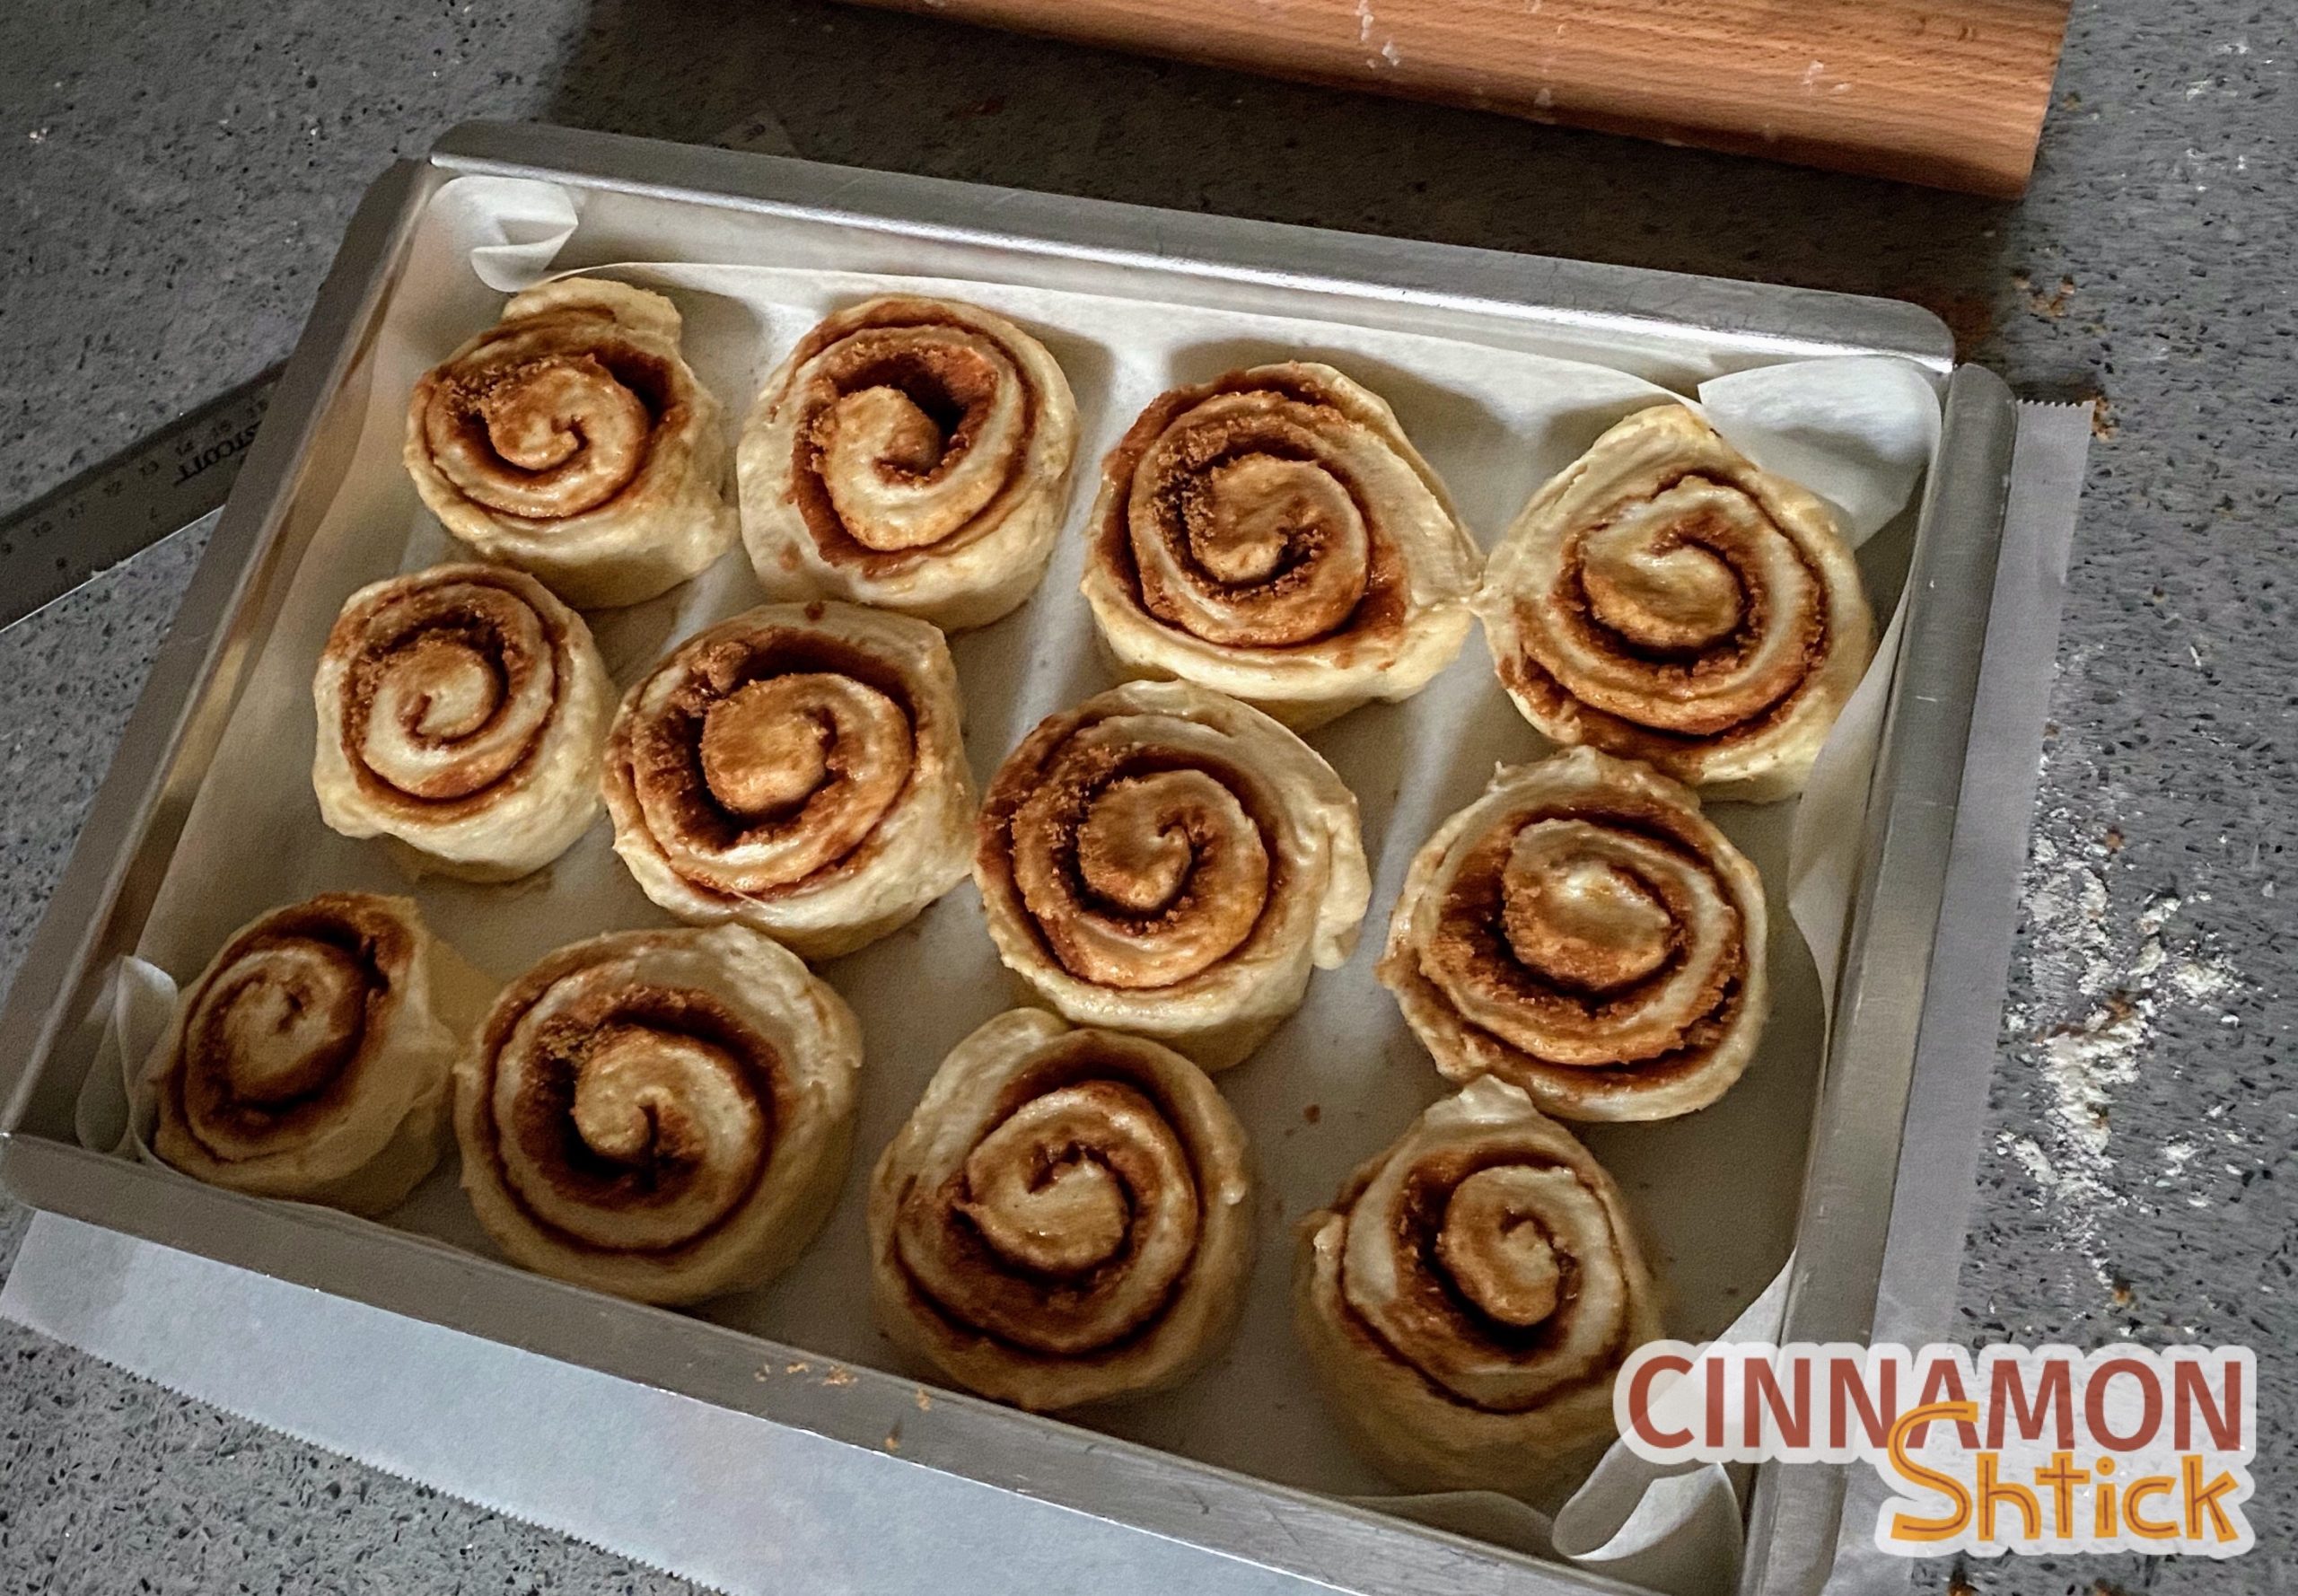
- Trim about ½ inch from one end. Using a ruler, cut 12 rolls, each 1½ inches wide. Place them in the prepared pan, 4 across the 13 inch side, and 3 along the 9½ inch side. There should be space between the rolls. Cover the pan with plastic wrap completely so no air can get in. Refrigerate overnight. (You should have scraps left over from the two ends. Grease a small ramekin, knead the scraps together, and place the ball of scraps in the prepared ramekin. Cover with plastic wrap and refrigerate overnight with main batch of rolls.)
- The next morning, remove the pan (and the ramekin) from the refrigerator. Rest them on the counter at room temperature for approximately 1½ hours. They should almost double in size.
- Approximately 30 minutes before you plan to bake, preheat the oven to 350°F.
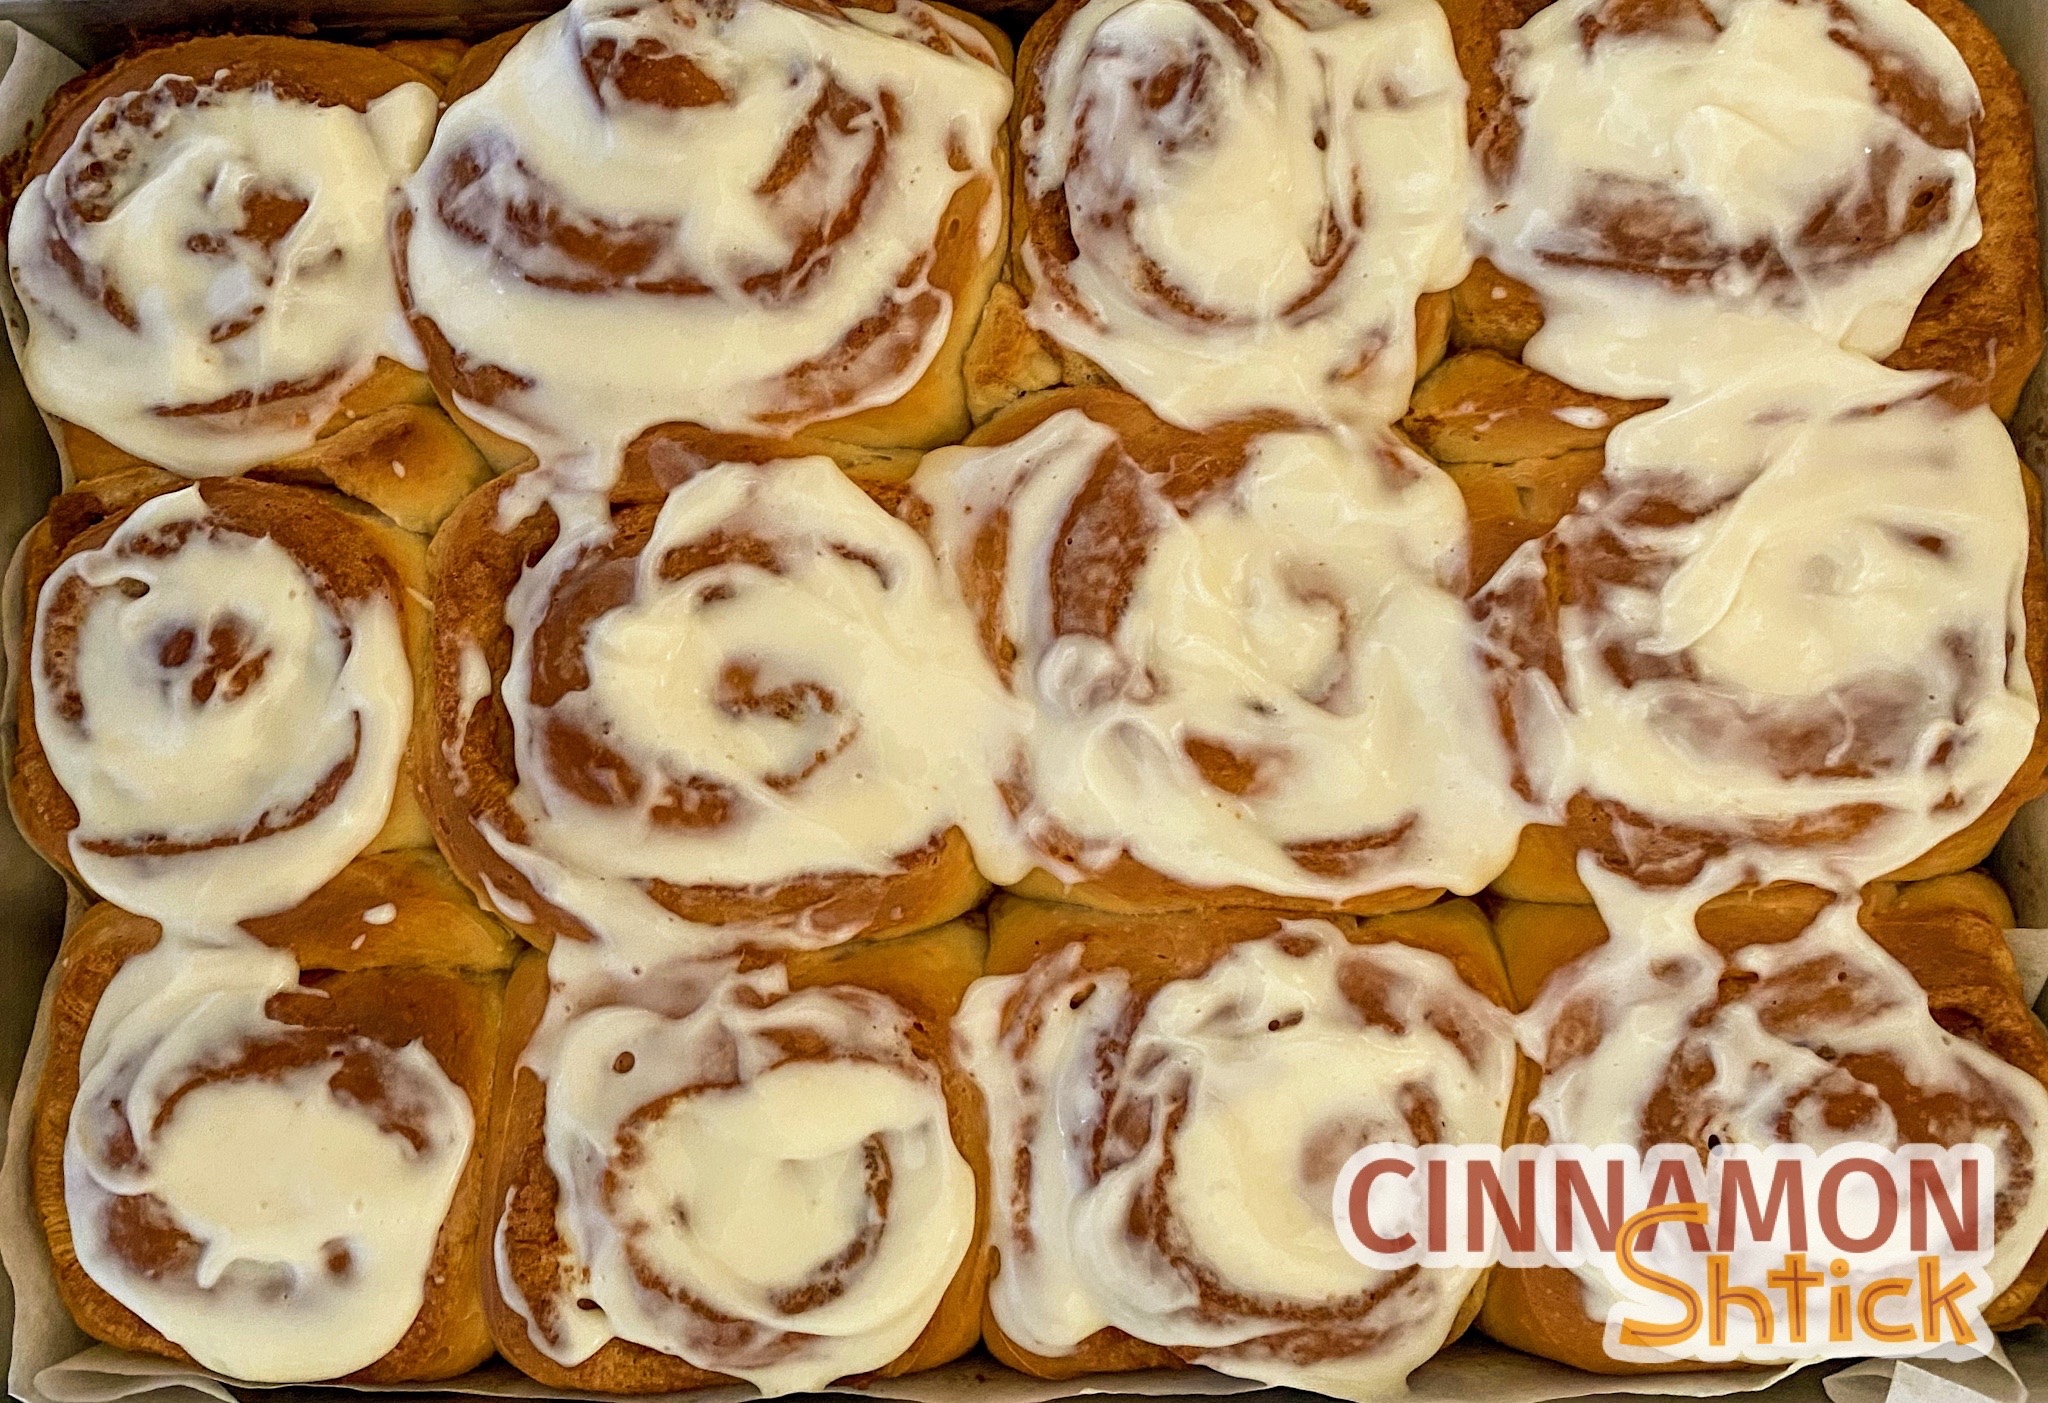
- Bake the rolls for 35-40 minutes. The tops should be golden brown, and they should not jiggle when you move the pan. If you are using a thermometer, the inside temperature should be about 210°F. (The lone roll in the ramekin will likely be done approximately 5 minutes before the rest of the rolls.) To take the temperature of the rolls, I highly recommend a Thermapen thermometer from Thermoworks. (I literally use it to take the temperature of anything I make, from ice cream to breads to tempering chocolate.)
- Glaze. After the rolls have been in the oven for 30 minutes, whisk together all the ingredients for the glaze, starting with just 2 tbsp. of the milk. If the glaze is too thick, add a little more milk until you reach a smooth, spreadable consistency. When the rolls come out of the oven, dollop a spoonful of the glaze on each roll. Spread the glaze all over. Allow to cool at least 20 minutes before serving.
Notes
Nutrition
2 Comments
Hi!
I tried the recipe and they were super fluffy and yummy but the dough was a bit liquid and therefore very difficult to work with. I let the dough in the red for 10h but even after that the dough was quite sticky and they didn’t turn out super pretty (yummy tough!)
Is that normal? Any idea what I might have done wrong? Thank you!!!
That is very strange. It sounds like you did not have enough flour in the dough. Is it possible you did not measure/weigh the stated amount? If you had the correct amount of dough, it could be a function of under-kneading. The dough should form a windowpane before adding in the butter. The dough will be tacky, but not crazy sticky as you described. I’m glad you were able to enjoy them anyway!