This post may contain affiliate links. As an Amazon Associate, I earn from qualifying purchases. For more information, please visit my Privacy Policy.
If you have ever visited Cinnamon Shtick, you know by now that I am a bit babka obsessed. OK, “a bit” is obviously an understatement. So, I’ll be honest: I am completely babka obsessed. Over the years, I have broken from the traditional cinnamon babka and chocolate babka to develop new babka flavors. So far on my list are
- Cinnamon Toasted Pecan Babka
- Blueberry Lemon Crumb Babka
- Apple Honey Babka
- Cinnamon Oatmeal Babka.
- Blueberry Babkallah
Today, to that esteemed list, we add Brownie Babka! Hooray!!!
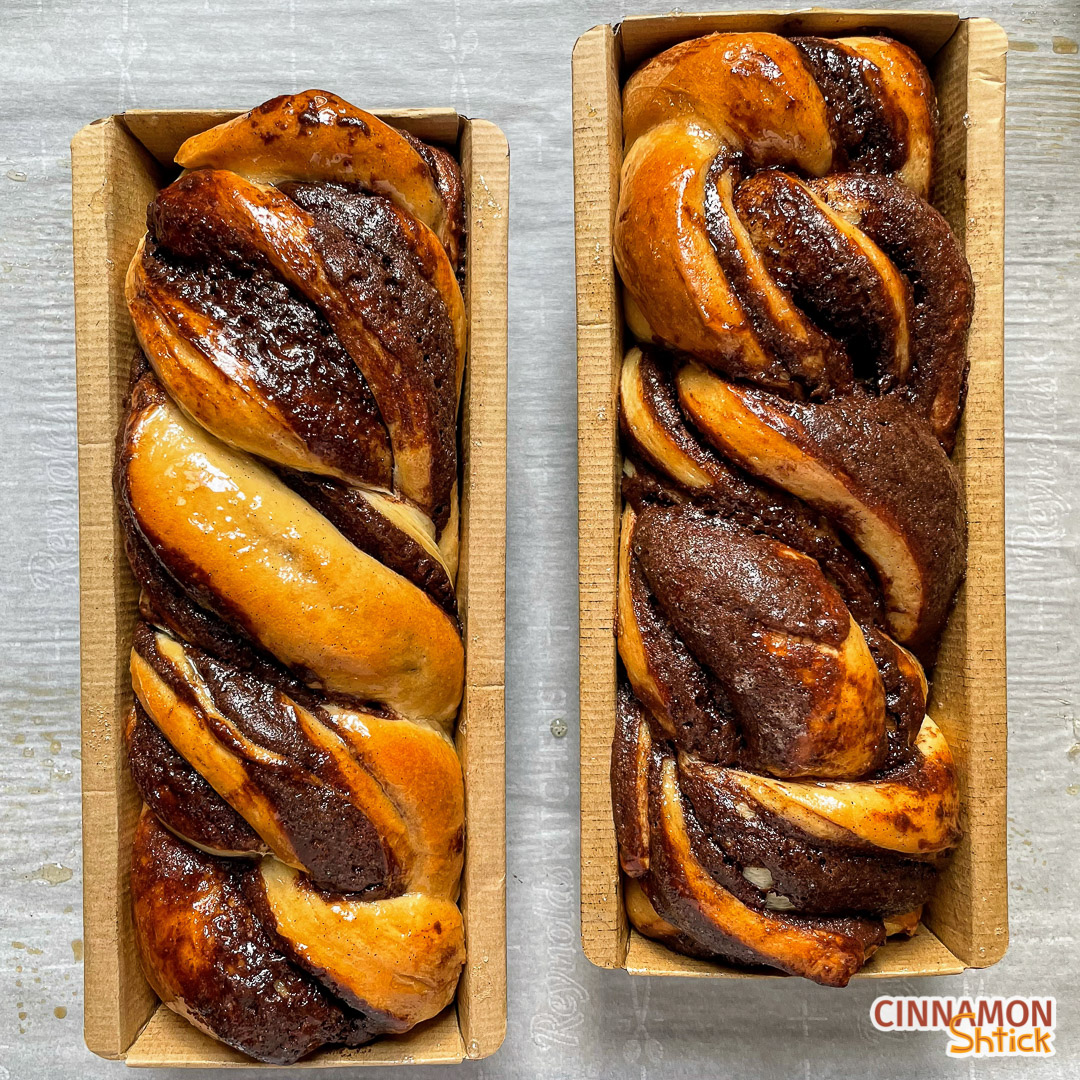
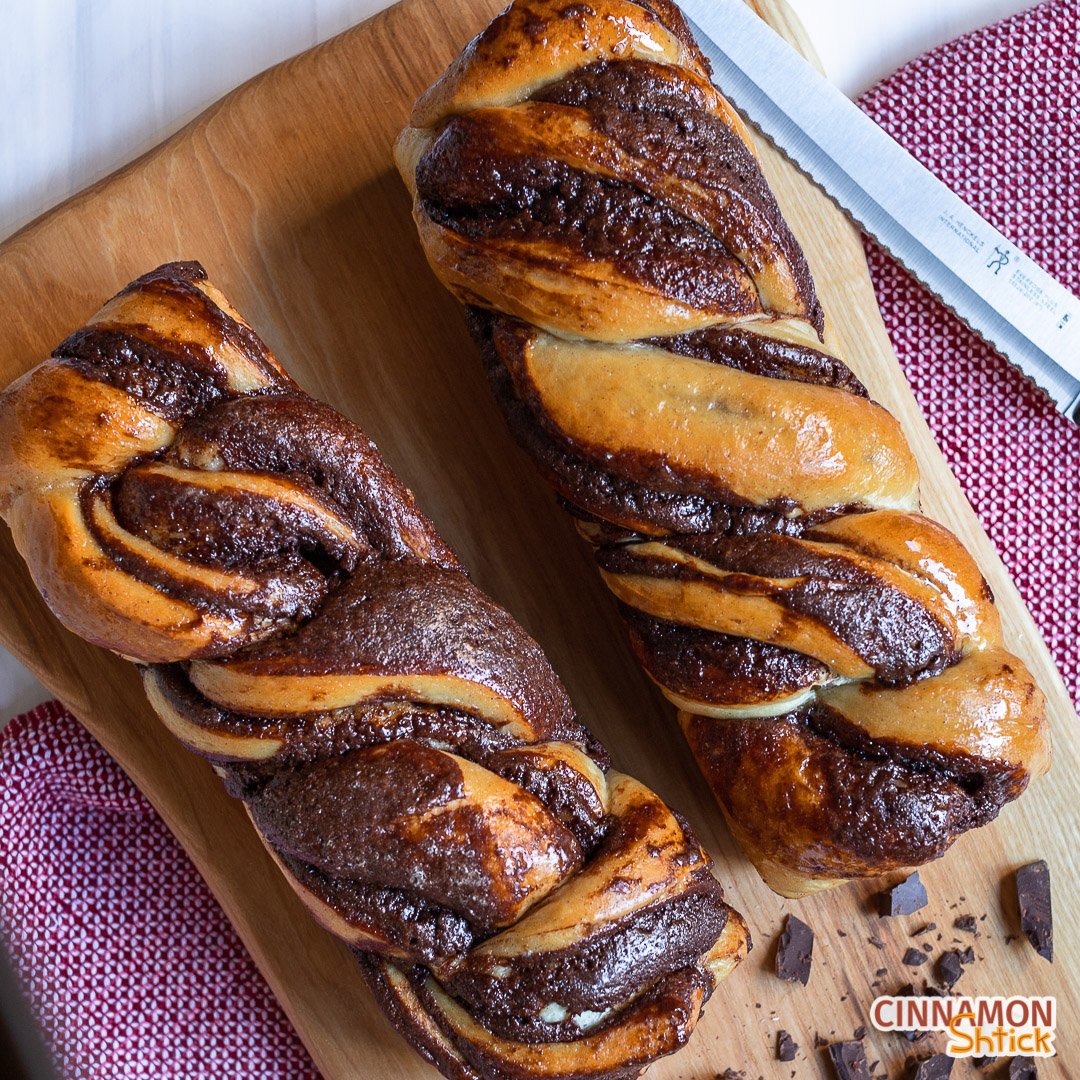
To be perfectly frank with you, I am not a huge chocolate babka fan. I love me some chocolate, and I love me some babka, but chocolate babka has just not really been my jam. That could be a consequence of growing up in a cinnamon obsessed household where the only babka to be found was cinnamon. That confession out of the way, I LOVE this Brownie Babka.
What is Babka?
Traditionally, babka dough was simply Challah dough with a filling in it, such as chocolate or cinnamon/raisin. These days, babka has become more complex, with many bakeries using a brioche dough which has butter in it, making it dairy, unlike challah dough. Modern babkas are exceptional. I give a little more background on babka evolution in my Cinnamon Toasted Pecan Babka post.
Why Brownie Babka?
Um, why not?
I think one of the first people to put brownies and babka together on the Internet was Sam from Buttermilk by Sam. I imagine that combination coming about sort of like the old Reese’s Peanut Butter Cup commercials with the exchange of: “You put your chocolate in my peanut butter. You put your peanut butter in my chocolate.” However, I suspect Sam’s combination was no accident and was the result of a carefully planned babka recipe, especially seeing all the interesting flavor combinations in her recipes.
This concept intrigued me. For me, traditional chocolate babka is just too rich and too much chocolate. Using brownie batter tones that down a bit. It also transforms the babka from a traditional breakfast/brunch treat to an afternoon or evening snack/dessert. Want to really dazzle? Make a Brownie Babka ice cream sandwich!
Seven Easy Steps to Make Brownie Babka:
1. Make the dough
Using a KitchenAid mixer makes this step seamless. Especially if you are using dry active yeast, the important thing here is to make sure that your eggs and butter are at room temperature. Forgot to take them out of the refrigerator and feeling so excited to get started that you do not want to wait 30-60 minutes for the eggs and butter to get to room temperature? No sweat. Check out my Getting to Room Temperature post. If you are using instant yeast, the eggs can go in directly from the refrigerator.
2. Allow the dough to rest
A great alternative to making your Brownie Babkas in one day is to place the dough in the refrigerator overnight. In the morning, make the brownie filling. Then remove the dough from the refrigerator. You will find that the dough is much easier to roll out when it is cold.
3. Make the brownie batter filling
The brownie batter filling is very simple to make. I use a similar filling in my S’Mores Brownie Hamantaschen. Although there is not much flour in the brownie batter, I recommend using rye flour, as it brings out slightly more of the chocolate flavor. All purpose works just as well though.
The key to success here is to make the brownie batter while the dough is rising so that it has time (30 minutes is ideal) to chill in the refrigerator. Trust me, you do not want to skip the refrigeration step. Cooling the batter will thicken it slightly, making it tremendously easier to spread on the babkas and, more importantly, much less messy when shaping the babkas.
4. Shape the dough
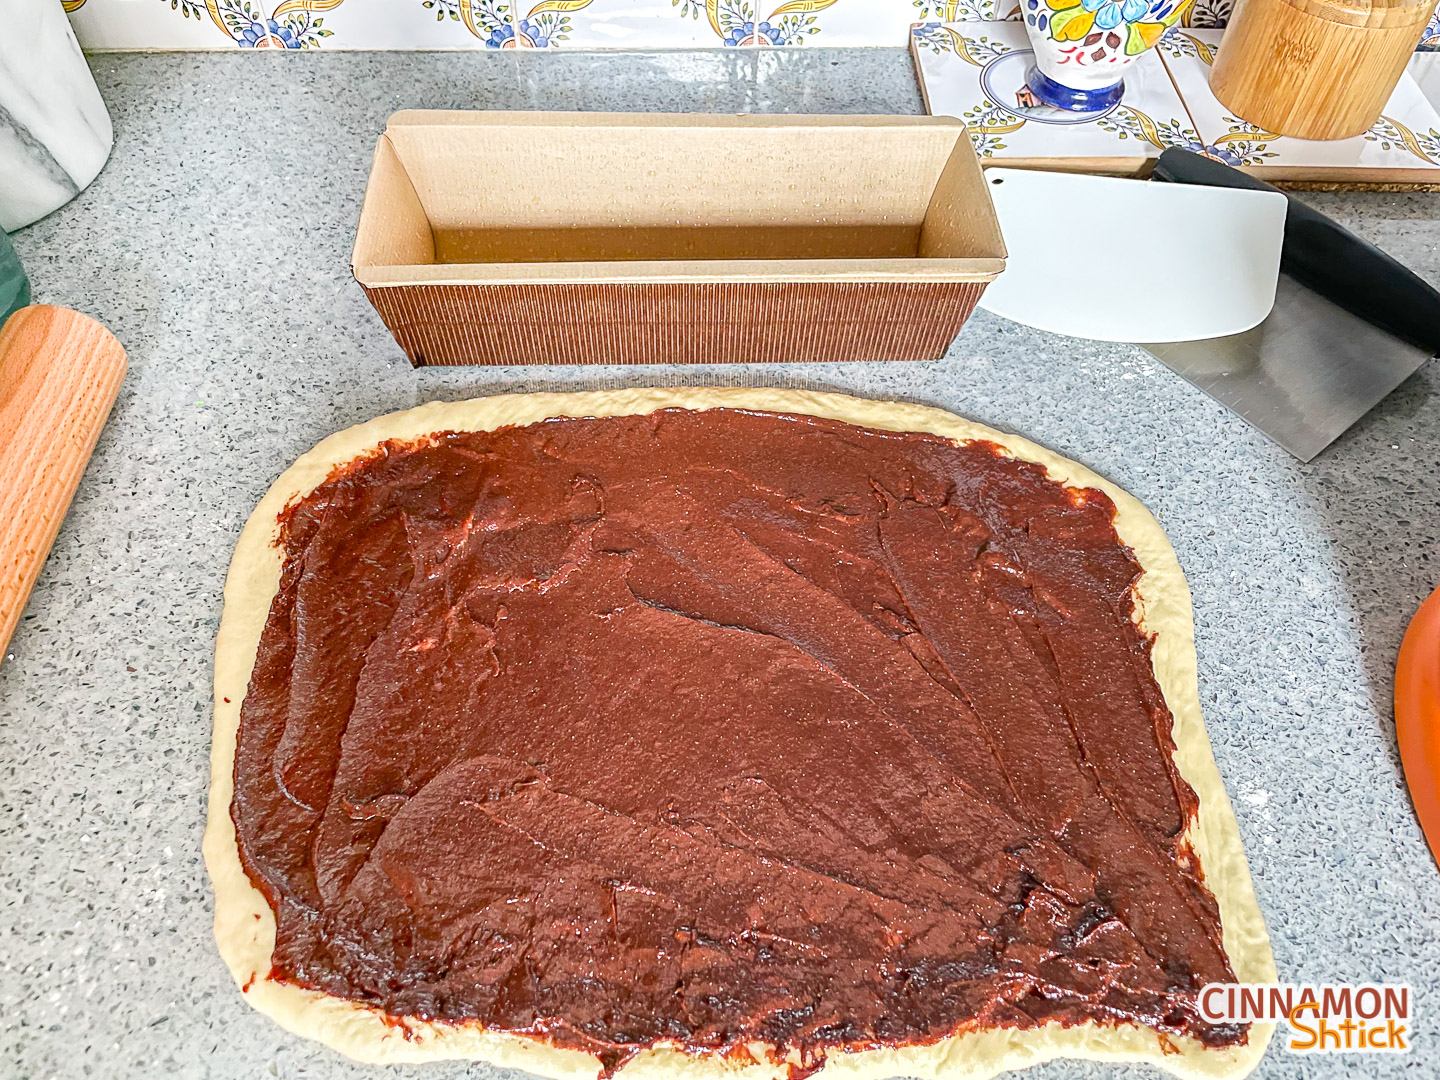
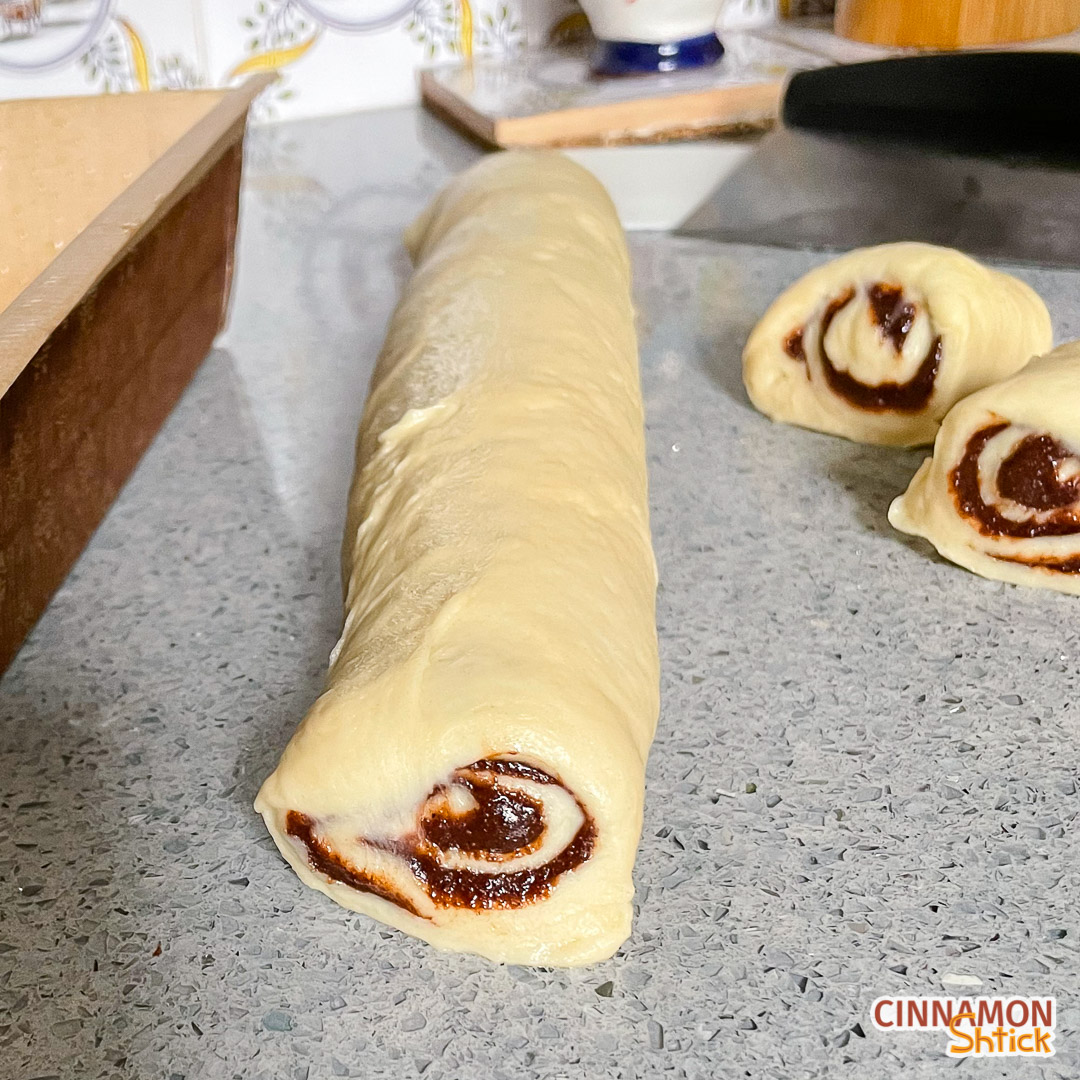
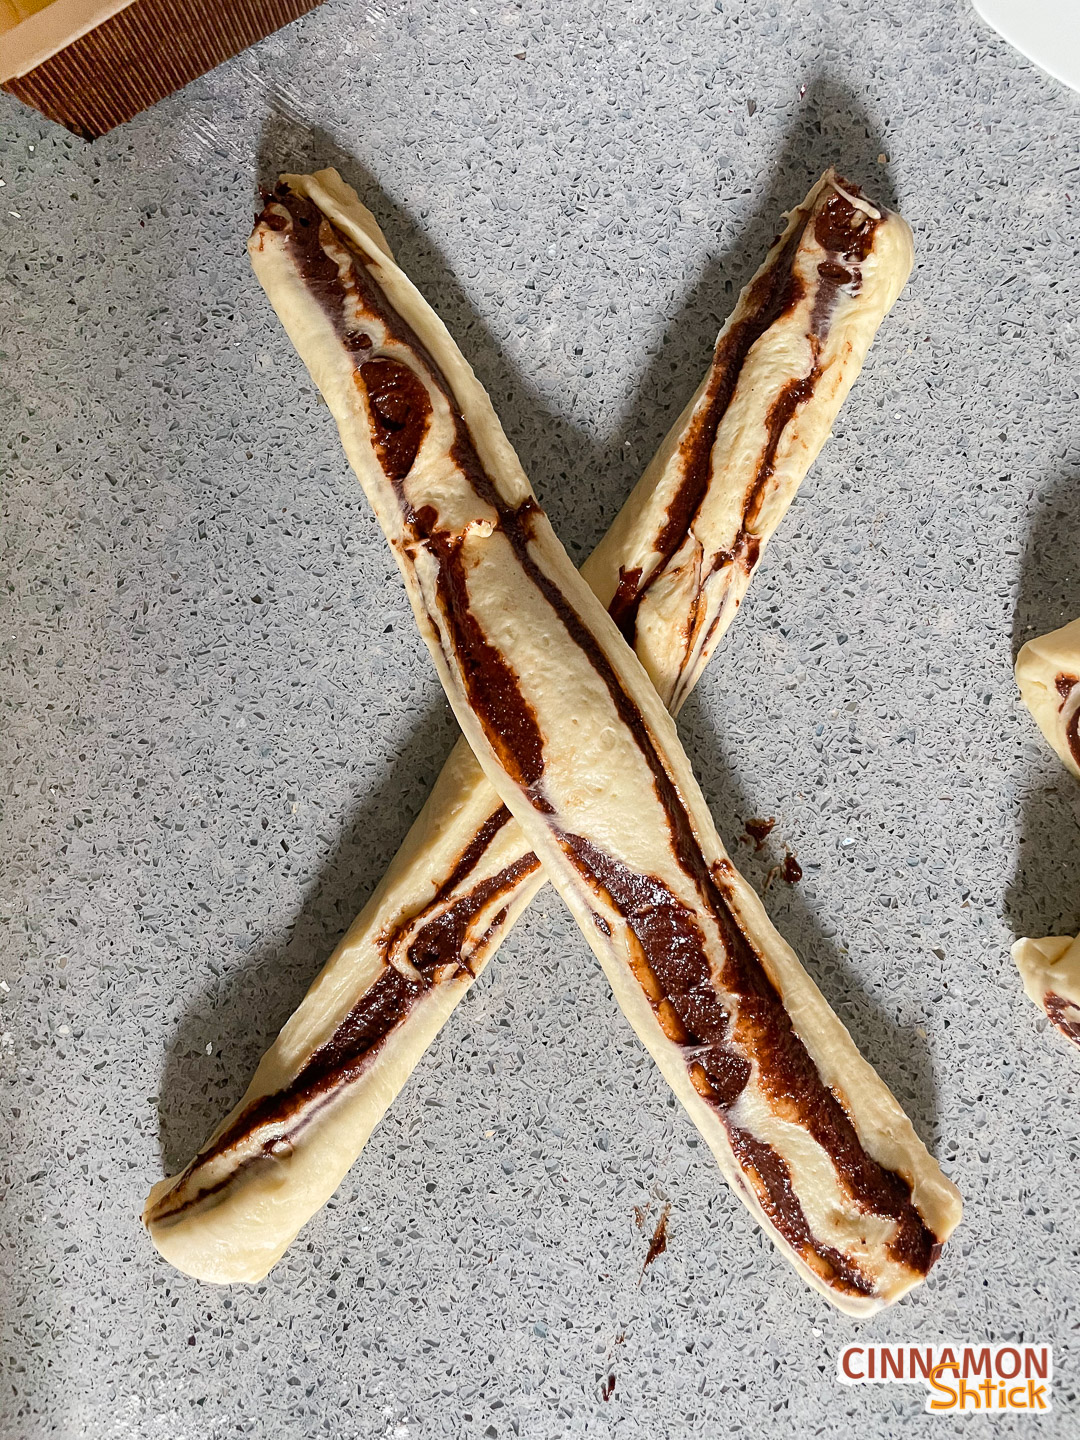
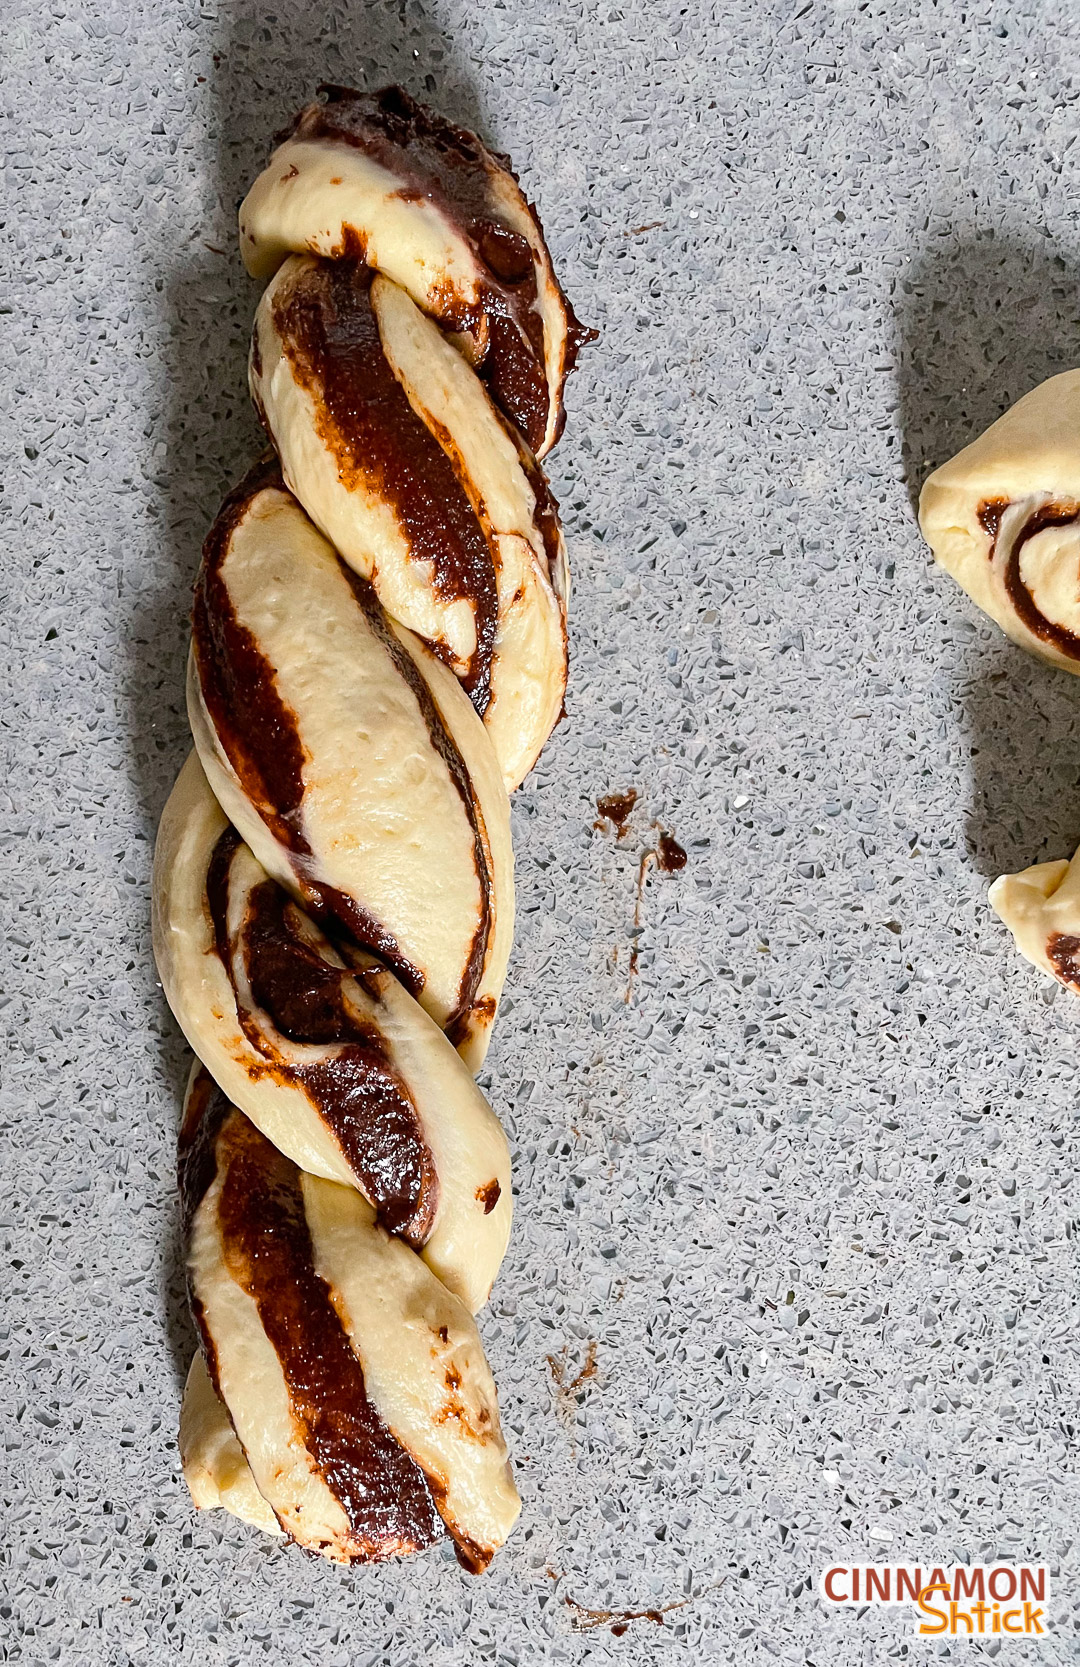
This is the part that looks complicated, but it is really just messy, which is perfectly ok! Roll the dough out into a rectangle, spread the chilled brownie batter on it, roll it up like a jelly roll or cinnamon rolls, then slice the log down the middle. Use both portions to form an X. Starting from the middle, twist the ends downward towards you, then go back to the middle and twist the ends moving towards the top. Plop it in the prepared pan.
5. Let it rise
Once the dough is rolled out and shaped, let it rise. If you refrigerated the dough overnight, I recommend letting the shaped dough rise for a full 1½ hours.
6. Bake
I have followed recipes that told me to take the internal temperature of the babka and that it was done at 185°F. Every time I would remove it from the oven after it reached 185°F, the middle would sink in because it was under baked. I find that 30-35 minutes is perfect for Brownie Babka, and the internal temperature at that time is usually over 205°F. To take the temperature of the babka, I highly recommend a Thermapen thermometer from ThermoWorks. I literally use it to take the temperature of anything I make, from ice cream to breads to tempering chocolate.
7. Make the vanilla glaze
The glaze is super easy to make and can be done in one small pot. I suggest making it approximately 5 minutes before the babkas are expected to be done so that it is still very hot. When the babkas are done, pull them out of the oven and brush the tops with the glaze using a pastry brush. Be generous and paint over the tops a couple of times. Then pop it back into the oven for two minutes so the glaze will harden a bit on top and maintain a beautiful shine.
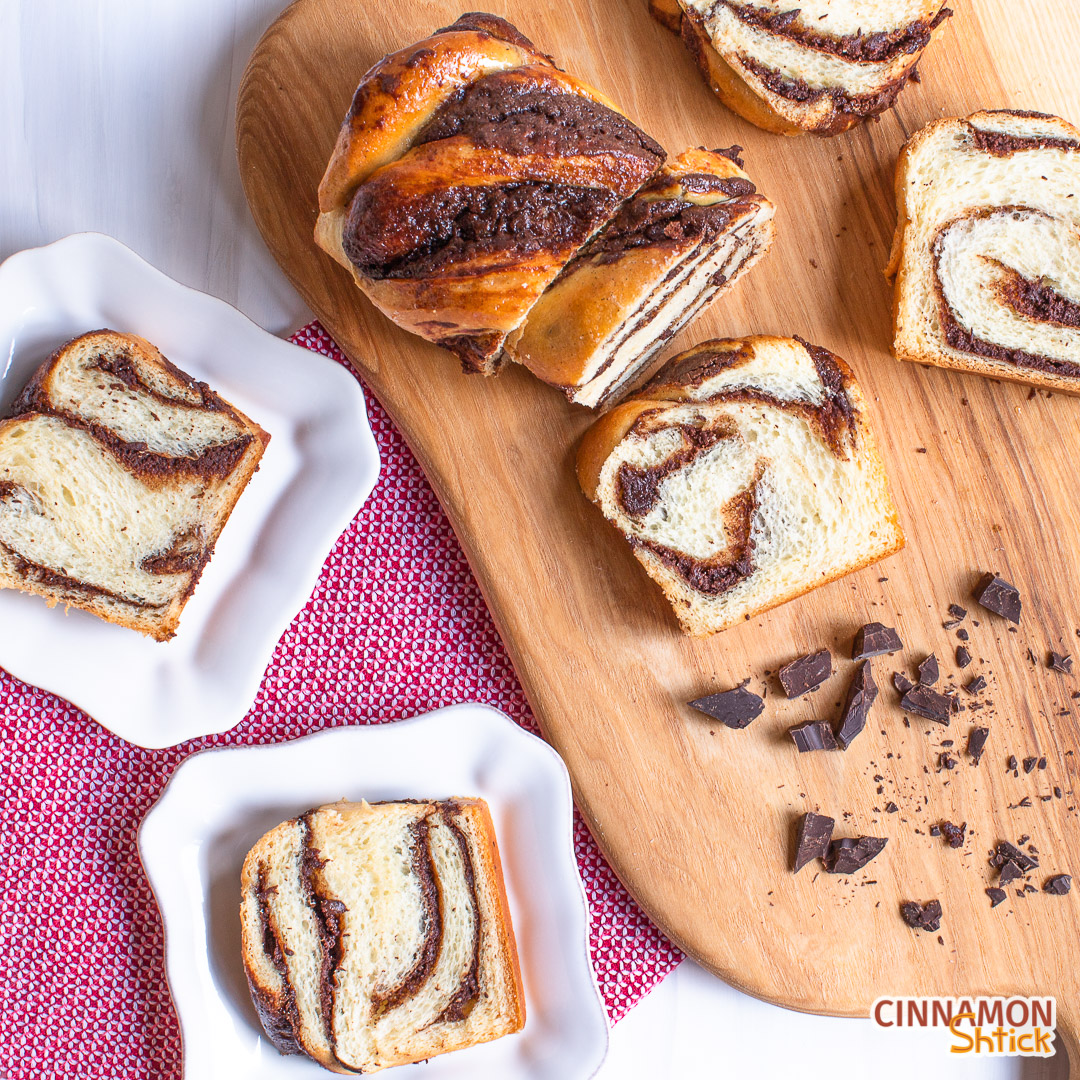

Brownie Babka
Ingredients
Dough:
- 7 g. active dry or instant yeast (2¼ tsp. or 1 envelope)
- 245 g. milk* (1 cup )
- 75 g. granulated sugar, divided if using active dry yeast (⅓ cup plus 2 tsp.)
- 1 large egg, at room temperature
- 1 large egg yolk, at room temperature
- 2 tsp. vanilla extract
- 480 g. all purpose flour (4 cups)
- 1 tsp. salt
- 113 g. unsalted butter, at cool room temperature, cut into 8 pieces (8 tbsp. or ½ cup)
Brownie Filling:
- 57 g. unsalted butter (4 tbsp.)
- 57 g. unsweetened chocolate (2 oz.)
- 50 g. sugar (¼ cup)
- 55 g. light brown sugar (¼ cup)
- 1 large egg (beaten)
- ½ tsp. vanilla
- 30 g. rye or all purpose flour (2 tbsp.)
- ⅛ tsp. salt
Glaze:
- 45 g. water (3 tbsp.)
- 50 g. sugar (¼ cup)
- ½ tsp. vanilla
Instructions
- Prepare Dough. [If using instant yeast, skip to Step 3 and add the yeast and the milk (can be cold) with the rest of the ingredients.] In microwave at 20 second intervals, stirring after each interval, warm milk to body temperature, generally between 105°F and 110°F. Alternatively, you can heat the milk in a saucepan on a low flame, stirring constantly. Either way, do not let the milk get above 115°F. (If you do, just let it sit out at room temperature for a couple of minutes constantly checking it until it cools to body temperature.)
- Place warmed milk into bowl of electric mixer. Sprinkle yeast and approximately 1 tsp. of the sugar over the milk. Using a fork, stir the mixture to distribute the sugar and hydrate the yeast granules. Allow to sit for approximately 3-5 minutes until the mixture gets foamy.
- Add the room temperature egg, the room temperature egg yolk, and the vanilla to the mixture. Using the dough hook, turn the mixer on at a low speed and add the rest of the sugar. With the mixer running at the lowest speed, add the flour. As the flour starts to get absorbed by the liquid mixture, raise the mixer to a medium speed. You may need to turn the mixer off once or twice to wipe down the sides of the bowl with a rubber spatula. Allow to knead for approximately 3 minutes. The dough should clean the sides of the bowl and be tacky, even a bit sticky. If it is too wet (sticking to the sides and bottom of the bowl), add some flour, no more than 1 tbsp. at a time. If the mixture is too dry, add a little milk, 1 tsp. at a time.
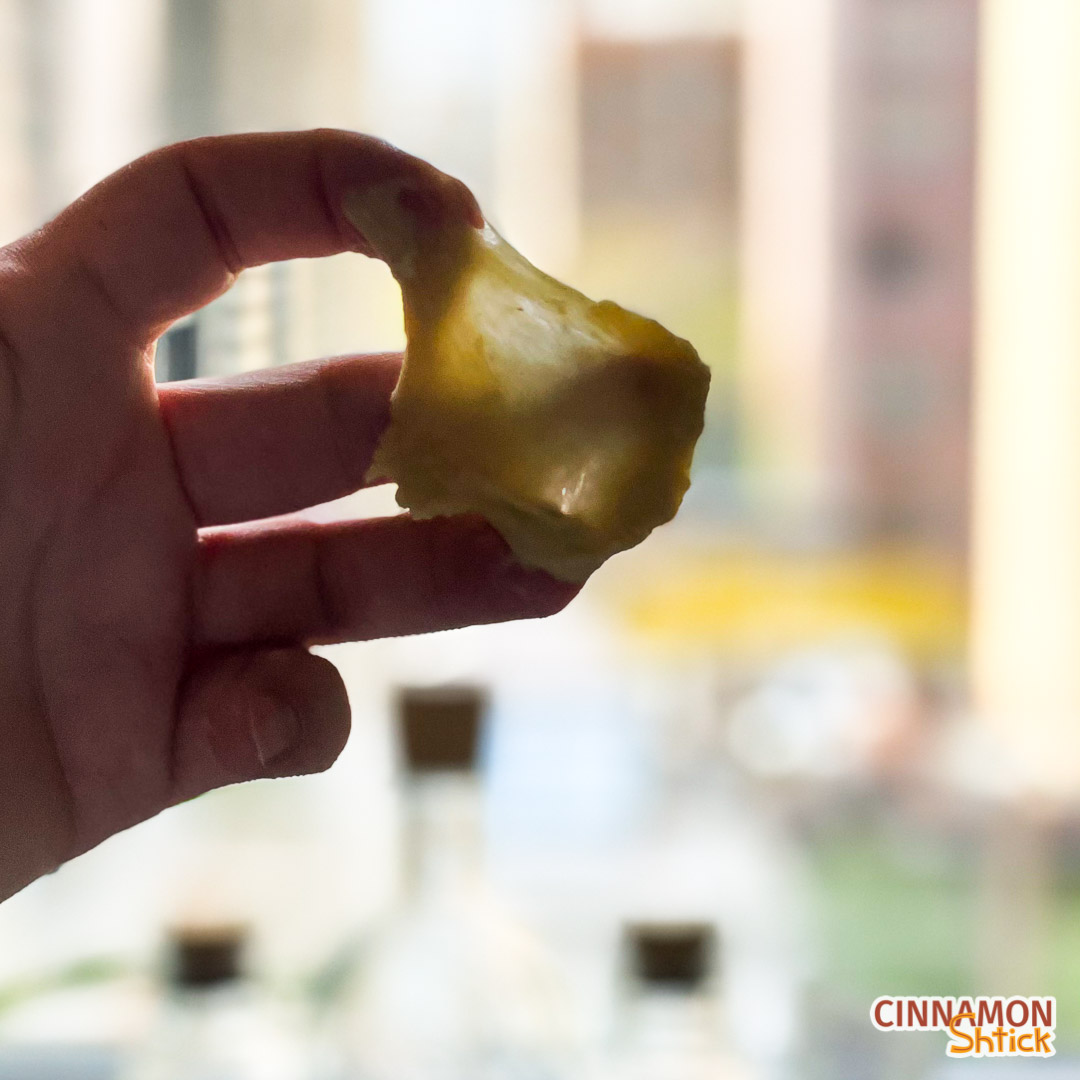
- Lower the mixer speed to low (1 or 2 on the KitchenAid) and slowly add the salt, allowing it to knead into the dough, an additional 3 minutes. Stop the mixer and take a small piece (approximately 1 tsp.) of dough and stretch it between your fingers. It should form a “window pane”, meaning it should get thin enough that it is translucent without it ripping. If it is not at that point yet, continue kneading in the machine at 1 minute intervals. (It may just need an additional minute or two to reach the window pane stage. If it still isn’t there yet, check to see if the dough is too dry. If it is, add ½ tsp. water and knead another minute.)
- With the mixer running at medium speed, add the butter. It is best to add it one piece at a time, waiting until it is fully integrated into the dough before adding the next piece. You may need to turn off the mixer from time to time to push the slab of butter back into the range of the dough and the hook. This process will take approximately 5 minutes. Once all the butter is incorporated, the dough will look shiny and be slightly sticky. (If, after approximately ten minutes, the butter is still not fully incorporated, do not panic. Just move to the next step – having some unincorporated butter is not problematic in this recipe. That said, the key to incorporating the butter is nothing more than patience.)
- Lightly grease a bowl with a little butter or nonstick cooking spray. Form dough into a ball and place it in the bowl. Turn the dough over to coat it in the butter or nonstick cooking spray and cover tightly with plastic wrap.** Let the dough sit in a warm area on the counter until doubled in size, approximately one hour.
- Brownie Filling. In a 2 quart saucepan over the lowest heat, melt the butter and chocolate. Stir occasionally until fully melted. Remove from heat. Stir in the sugar and brown sugar. Set aside for a couple of minutes to make sure the mixture cools completely. Add the beaten egg and vanilla. Mix in the flour and salt just until all the flour is fully absorbed. Cover pot (plastic wrap will do) and refrigerate.
- Prepare two loaf pans, 8 or 9 inches long, and 3 to 5 inches wide, by coating with nonstick cooking spray or butter. (Using butter imparts more flavor on the edges of your babkas.) For an even easier pan removal, use parchment paper on the bottom and/or sides of the pan, but be sure to coat the parchment with nonstick cooking spray or butter.
- Once dough has doubled in size, remove the plastic wrap and de-gas it by folding it over onto itself and knead it a few times by hand. Divide it in half, preferably by weight. Cover one half with plastic wrap until you are ready to work with it.
- Roll dough out to three inches longer than the length of your pan. (If you are using a 9 inch long pan, roll it out to 12 inches, to form a rectangle of 12 inches by approximately 16-18 inches. The dough should be approximately ⅛ inch thick.
- Remove brownie filling from the refrigerator. Leaving a border of ½ an inch on every side, spread ½ of the brownie filling on the dough. (There should be approximately 300 g. of brownie batter, so use approximately 150 g. for each babka.)
- Have the dough facing you the long way so that the side of the dough that is three inches longer than the length of your pan is facing you. For example, if your pan is 9 inches long, the side of the dough that is 12 inches long should be in front of you. Roll the dough upward so that you have a 12 inch long log. Trim ½ inch to an inch from both sides of the log. (Tip: Save these trimmings and bake in a separate greased pan with trimmings from second log. This is the “mini babka” you get to taste so you can present the two babkas to your guests and already know how good it tastes!)
- Slice the log down the middle in half, exposing the layers of filling. Form an X with the two pieces, and cross the two over each other starting from the middle going down towards you. Repeat from the middle going up. Place dough in prepared pan. Cover loosely with plastic wrap and allow to sit until doubled in size, approximately one hour.
- Repeat steps 10-13 with second portion of dough from step 9.
- Approximately 30 minutes into the second rise, preheat oven to 350°F.
- Once the babkas have doubled in size, bake for 30-35 minutes.
- Towards the end of the baking time, in a small pot bring the water and sugar to a boil, stirring to ensure the sugar is fully melted. Stir in the vanilla.
- The babka is done once the top is golden brown. (Best to take the babka’s temperature. It is done when the internal temperature reaches 205°F).
- Immediately after removing the babkas from the oven, brush the tops with the hot syrup glaze. Return to the oven for 2 additional minutes.
- Cool babkas in pans for 10-15 minutes and then remove them from their pans onto a wire rack. (Use a metal spatula or flat knife against the sides of the pans before turning the pans over.)
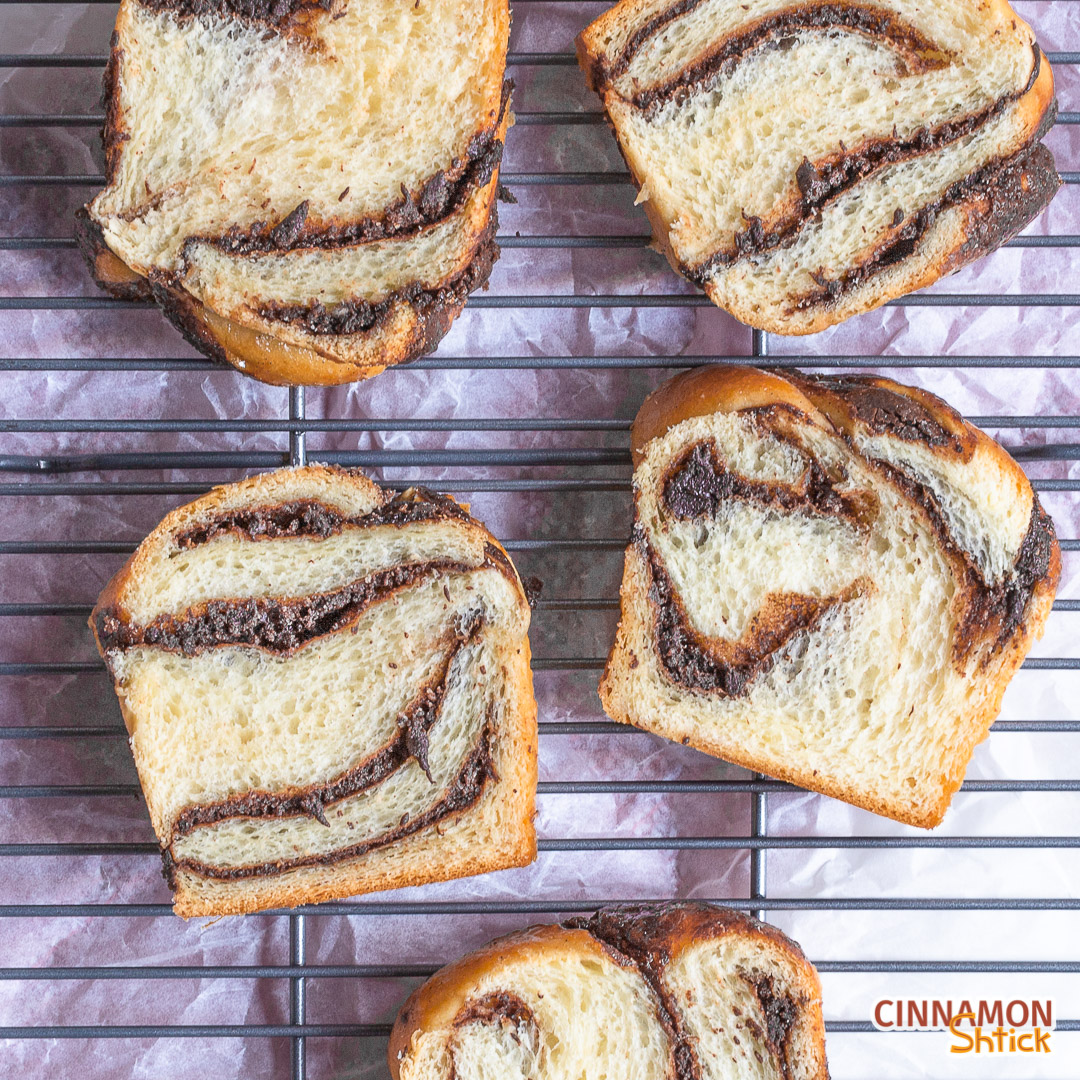
- Once at room temperature, if not eating immediately, cover in plastic wrap. If they actually last so long, they stay fresh for several days wrapped in plastic and stored at room temperature. They also freeze beautifully, wrapped in plastic wrap, for up to 3 months.

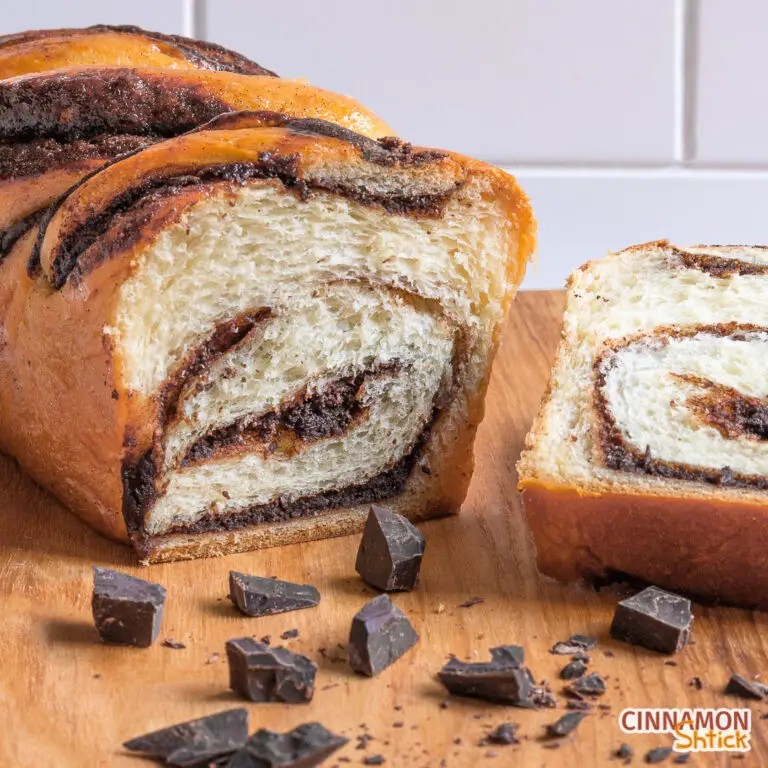
3 Comments
One of my favorite treats lovely recipe
How come I did not know about this recipe? It looks so yummy and perfect for a sweet breakfast!
This was SO good and we can’t wait to make it again. Fabulous recipe!